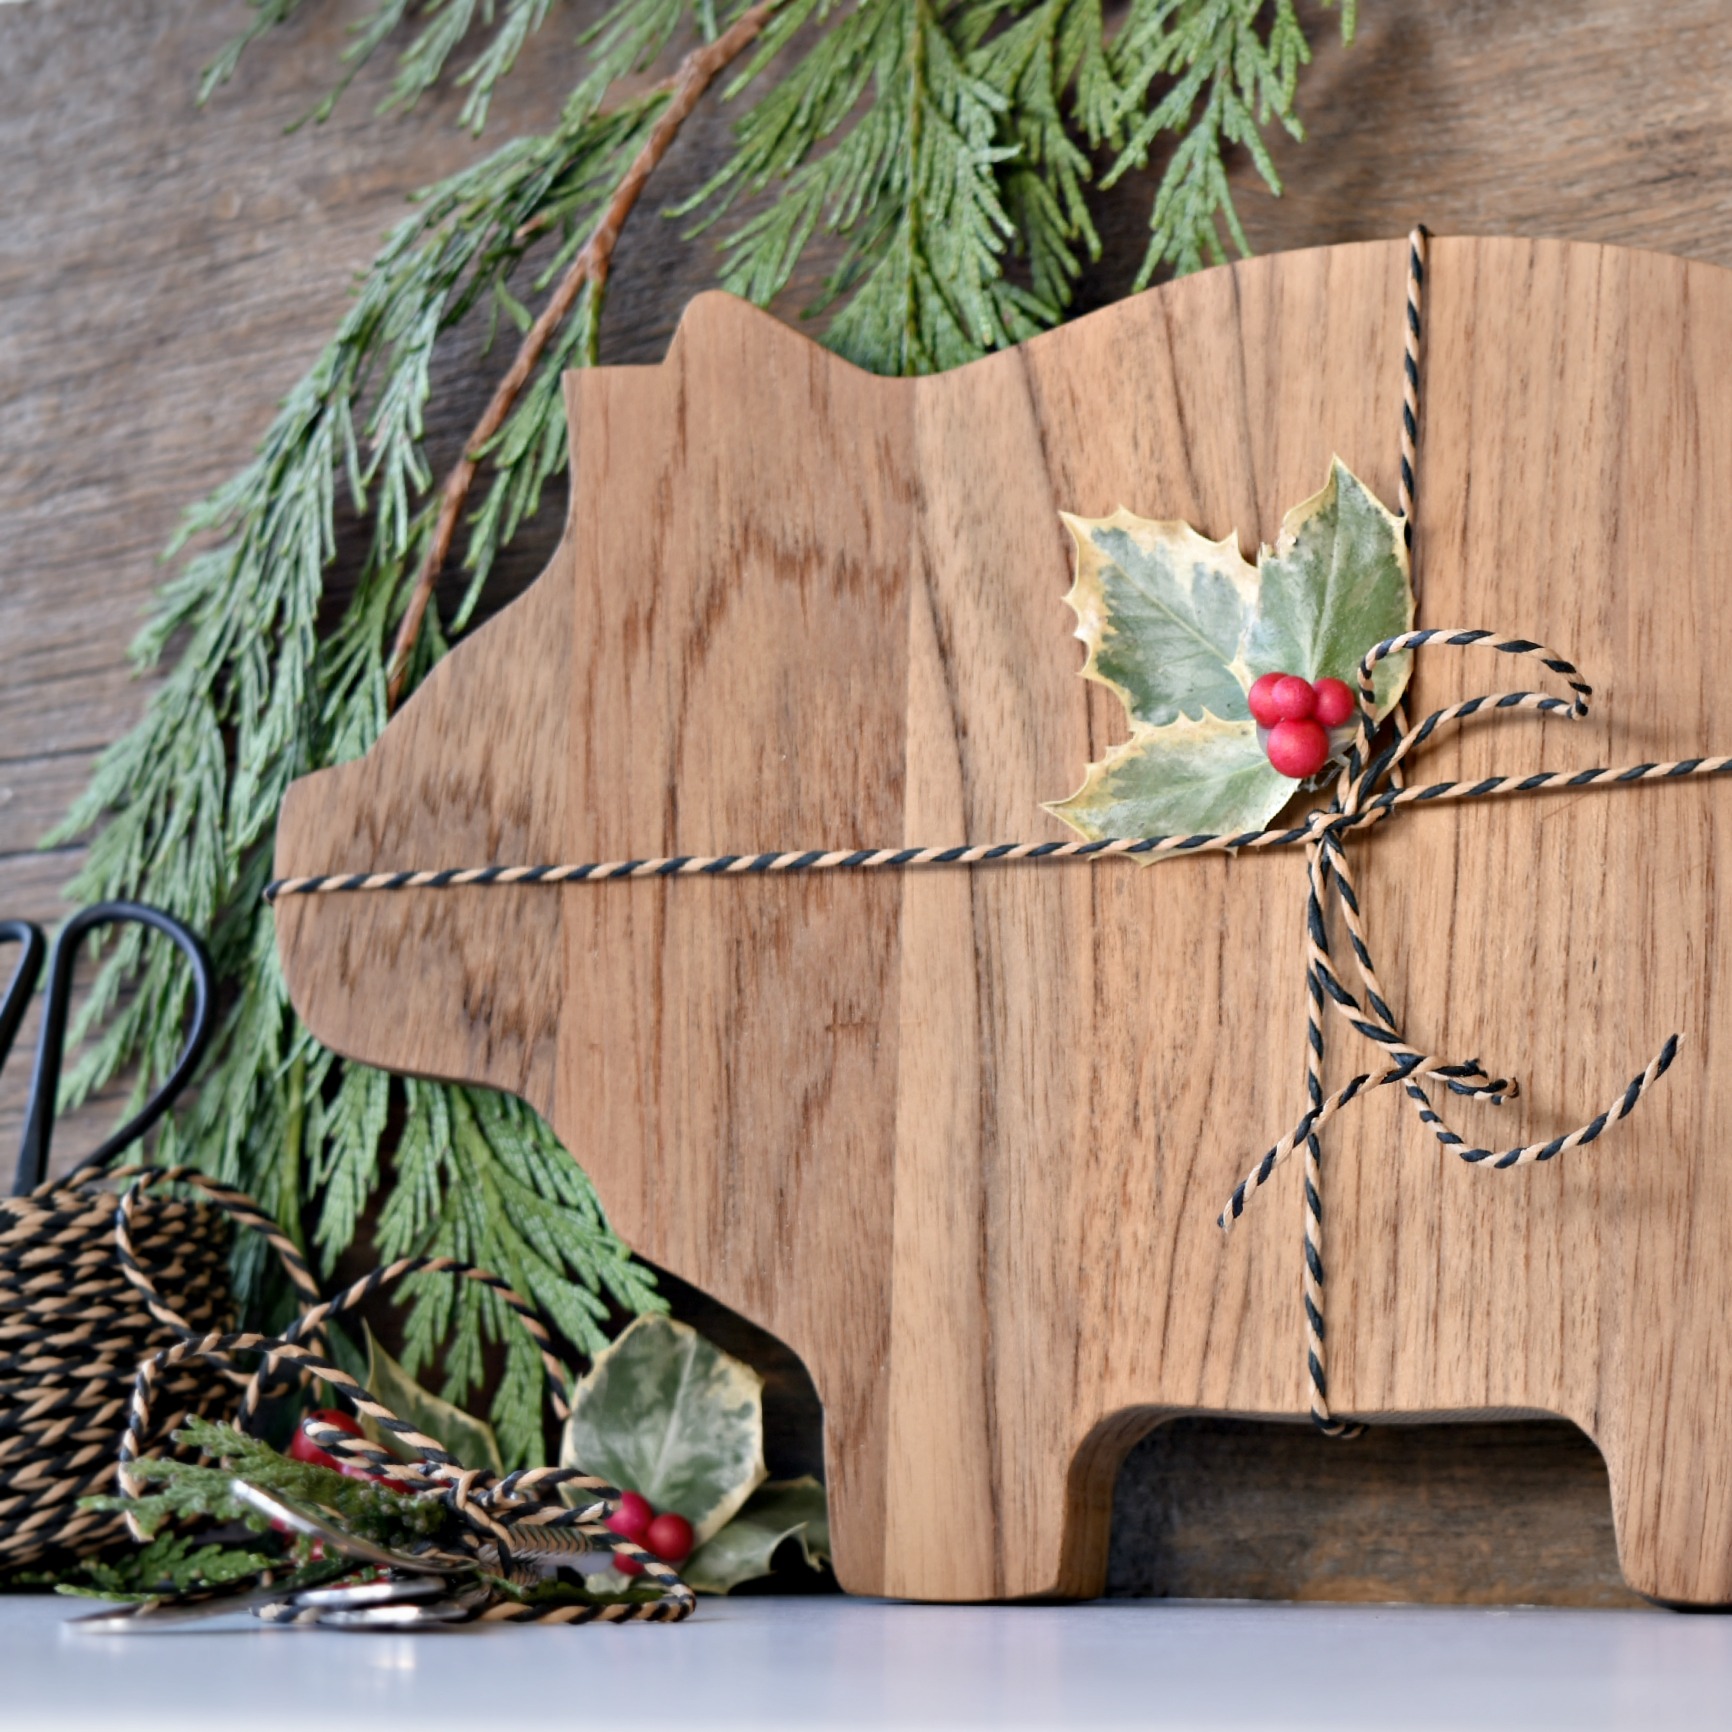
Christmas prep is in full swing around here and I must admit getting ready this early is one of the happy accidents of being a blogger! I’ve made my first Christmas gift this year, a DIY cheese board!
Yes, this gift is for myself but that doesn’t matter really, this simple little gift in any shape or any size I think would be a huge hit this holiday season! I know that I would LOVE to get something so thoughtful and personally made.
 I have to start at the beginning of how this little piggy came to be… when I was growing up, my Mom had a cutting board that was in the shape of a pig. It was a laminated cutting board and was very well used… This little pig has so many memories attached to him, all of the treasured times in the kitchen cooking with Mom, the fact that my Mother is no longer with us makes those memories that much sweeter. My Brother now lives in Mom and Dad’s home and when we were cleaning up, it didn’t seem right to take that little piggy out of “Mom’s kitchen”. Fast forward to this year… I asked my Brother to snap a photo for me, I wanted my very own piggy for my kitchen and thought what a wonderful gift this would make.
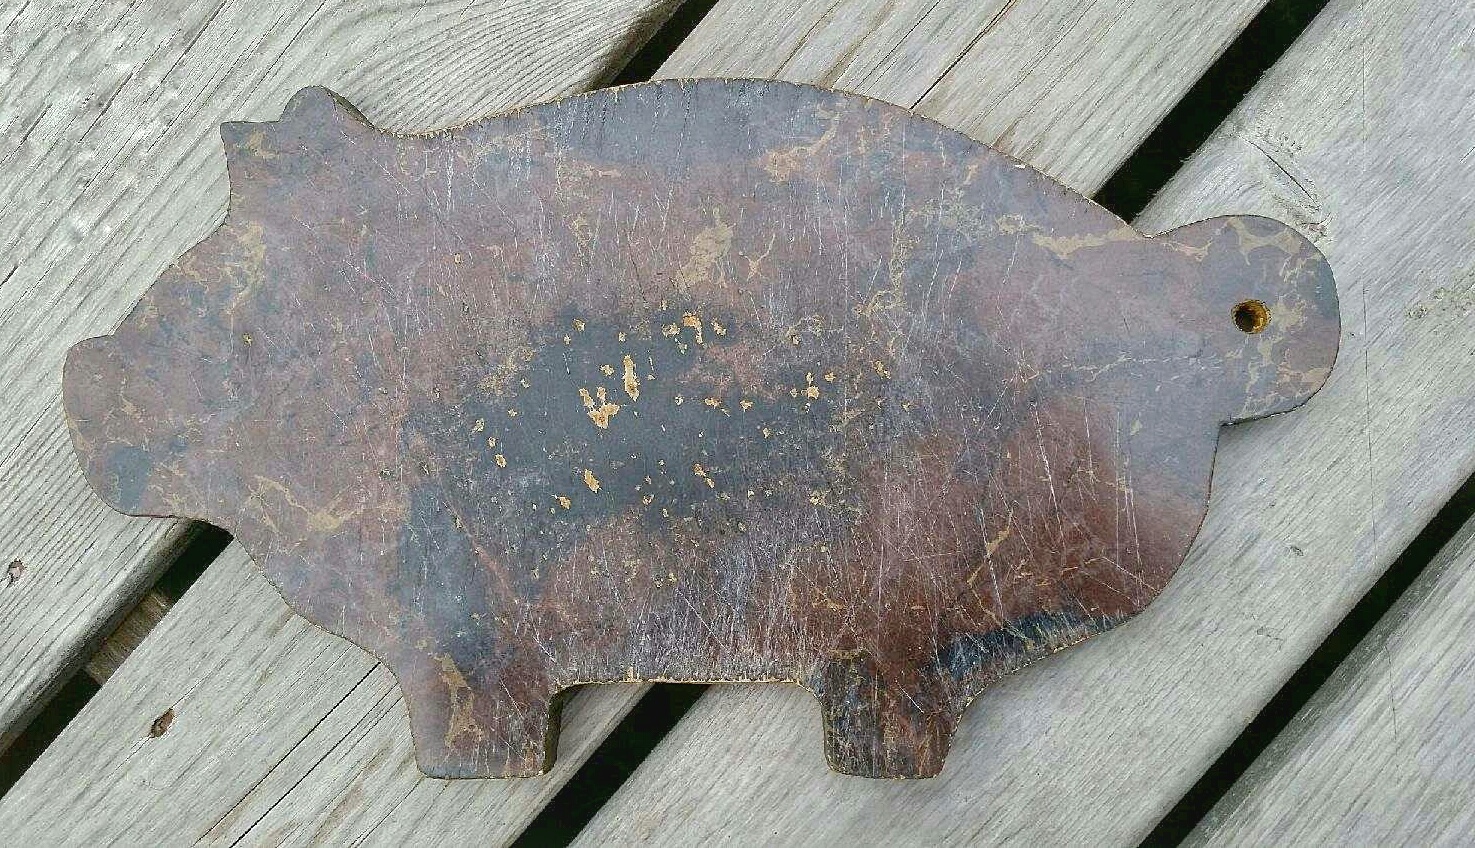 Photo via : my brother, Johnny <3
The things you will need to make your own cutting board/cheese board.
- An old cutting board (I got mine at a yard sale for $2)
- Tracing – tissue pager
- Soft tipped felt maker
- Wax free chalk tracing paper (or chalk)
- Jig saw/scroll saw/band saw (what ever one you happen to have in your tool chest)
- Sander and sandpaper (150 grit and 220 grit)
- Butcher block sealing oil
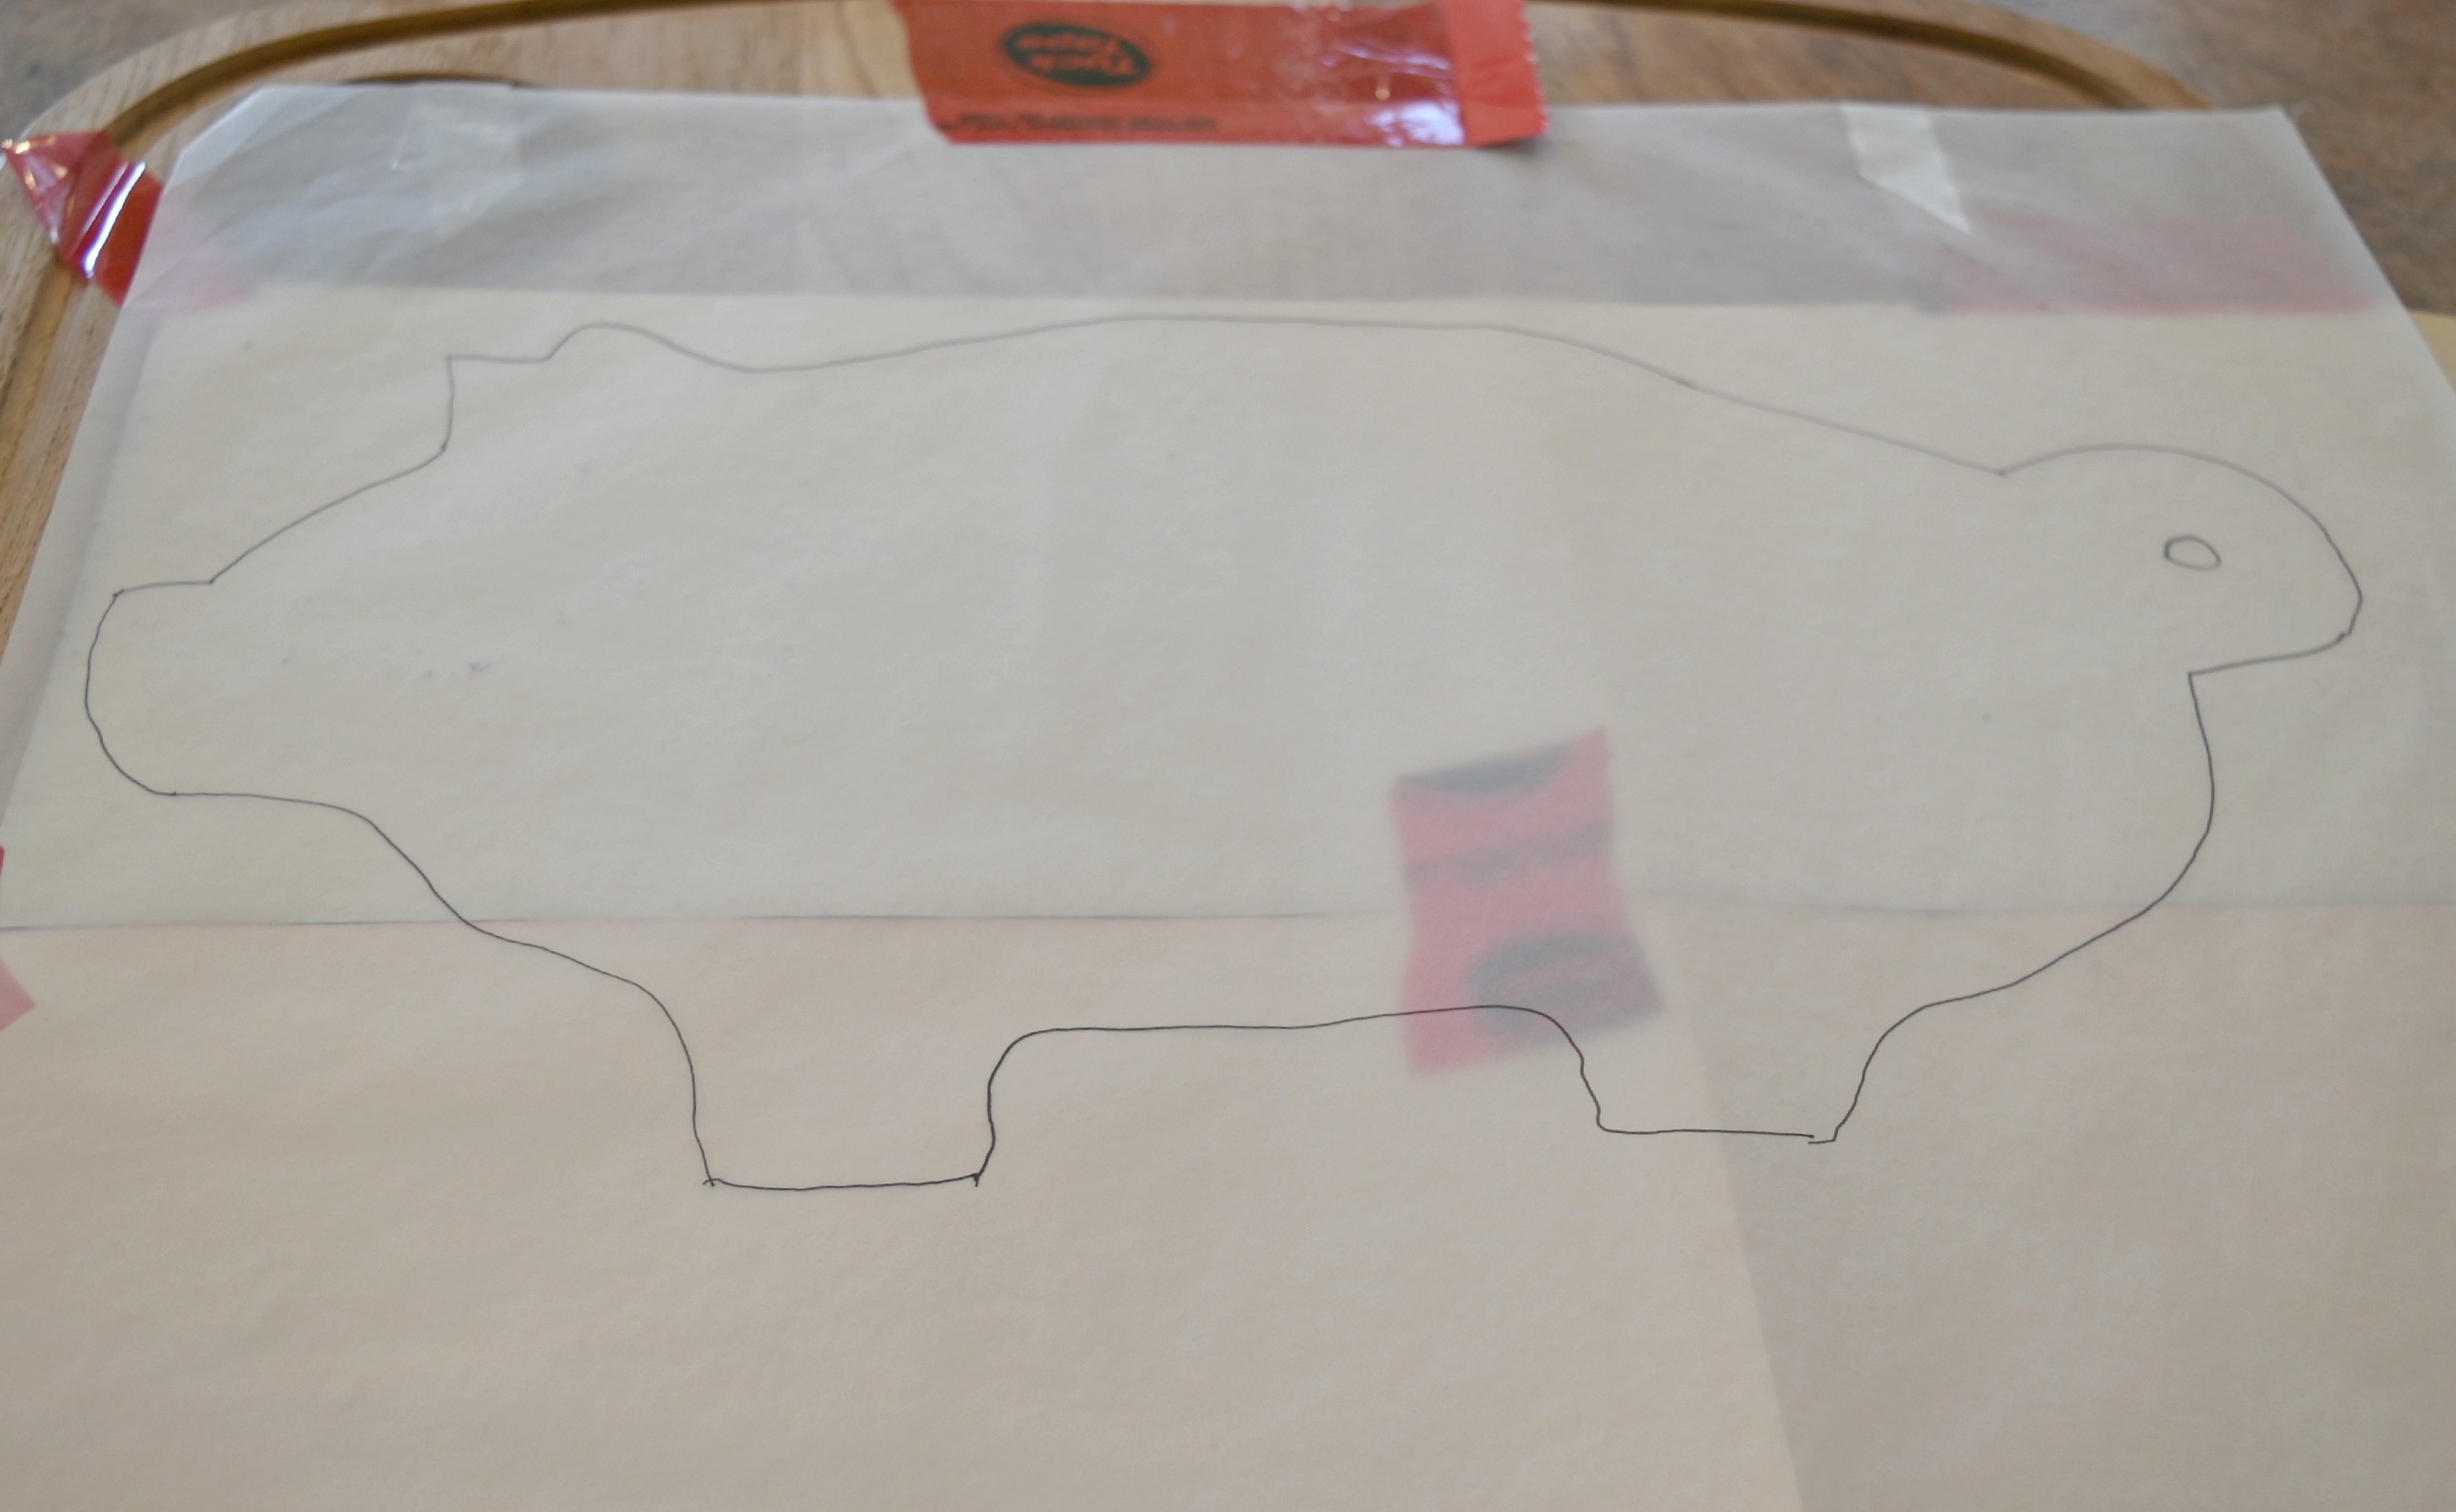
Once I had the photo, Johnny sent me, I very simply traced the pig out…
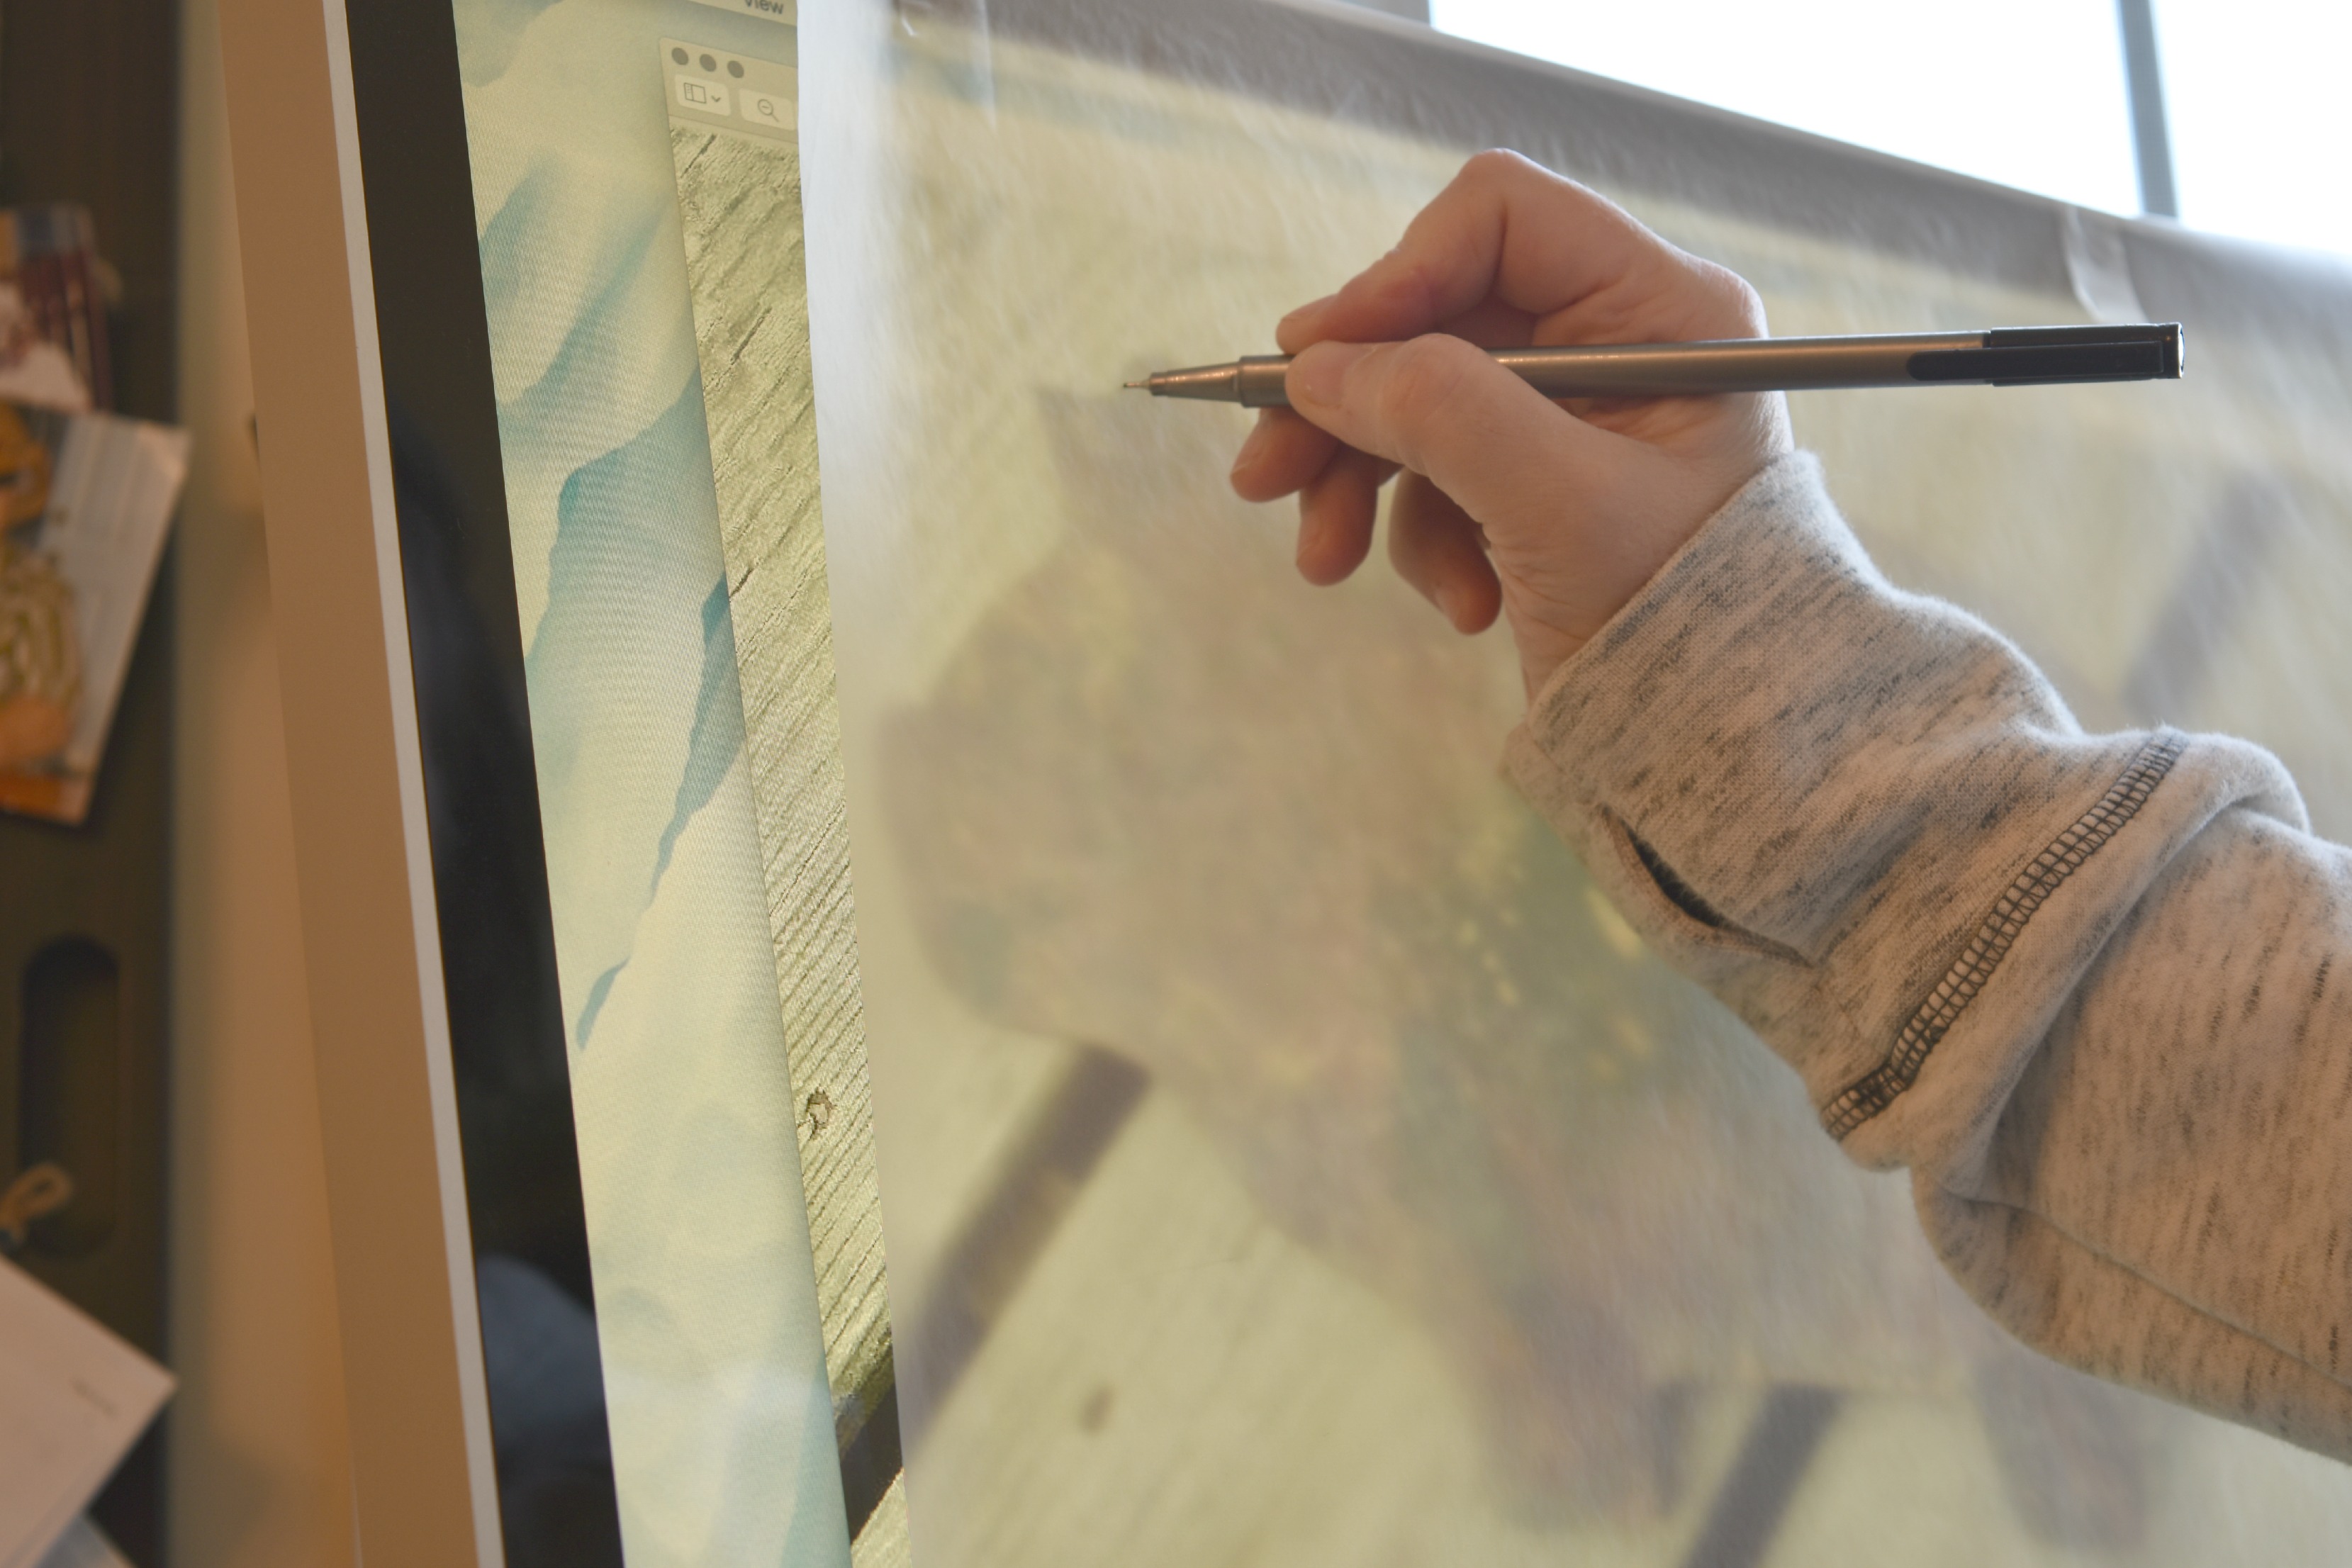
I wanted the exact shape of Mr. Pig and fiddling with printing it out and tracing, well that might include some math business and that just isn’t my thing. I wanted easy and fast so I just enlarged the photo on our computer (by dragging the corner of the photo until I had the desired size on my screen) taped some tracing paper over the screen and used a very soft tipped felt maker ( I didn’t want to leave an impression of the pig – even though I love him, on my computer forever).
Once your image is traced onto a piece of tracing paper it’s time to prep your surface… in this case I used an old cutting board I bought for $2 at a yard sale. I made sure the cutting board was disinfected and very clean by following some of these instructions.
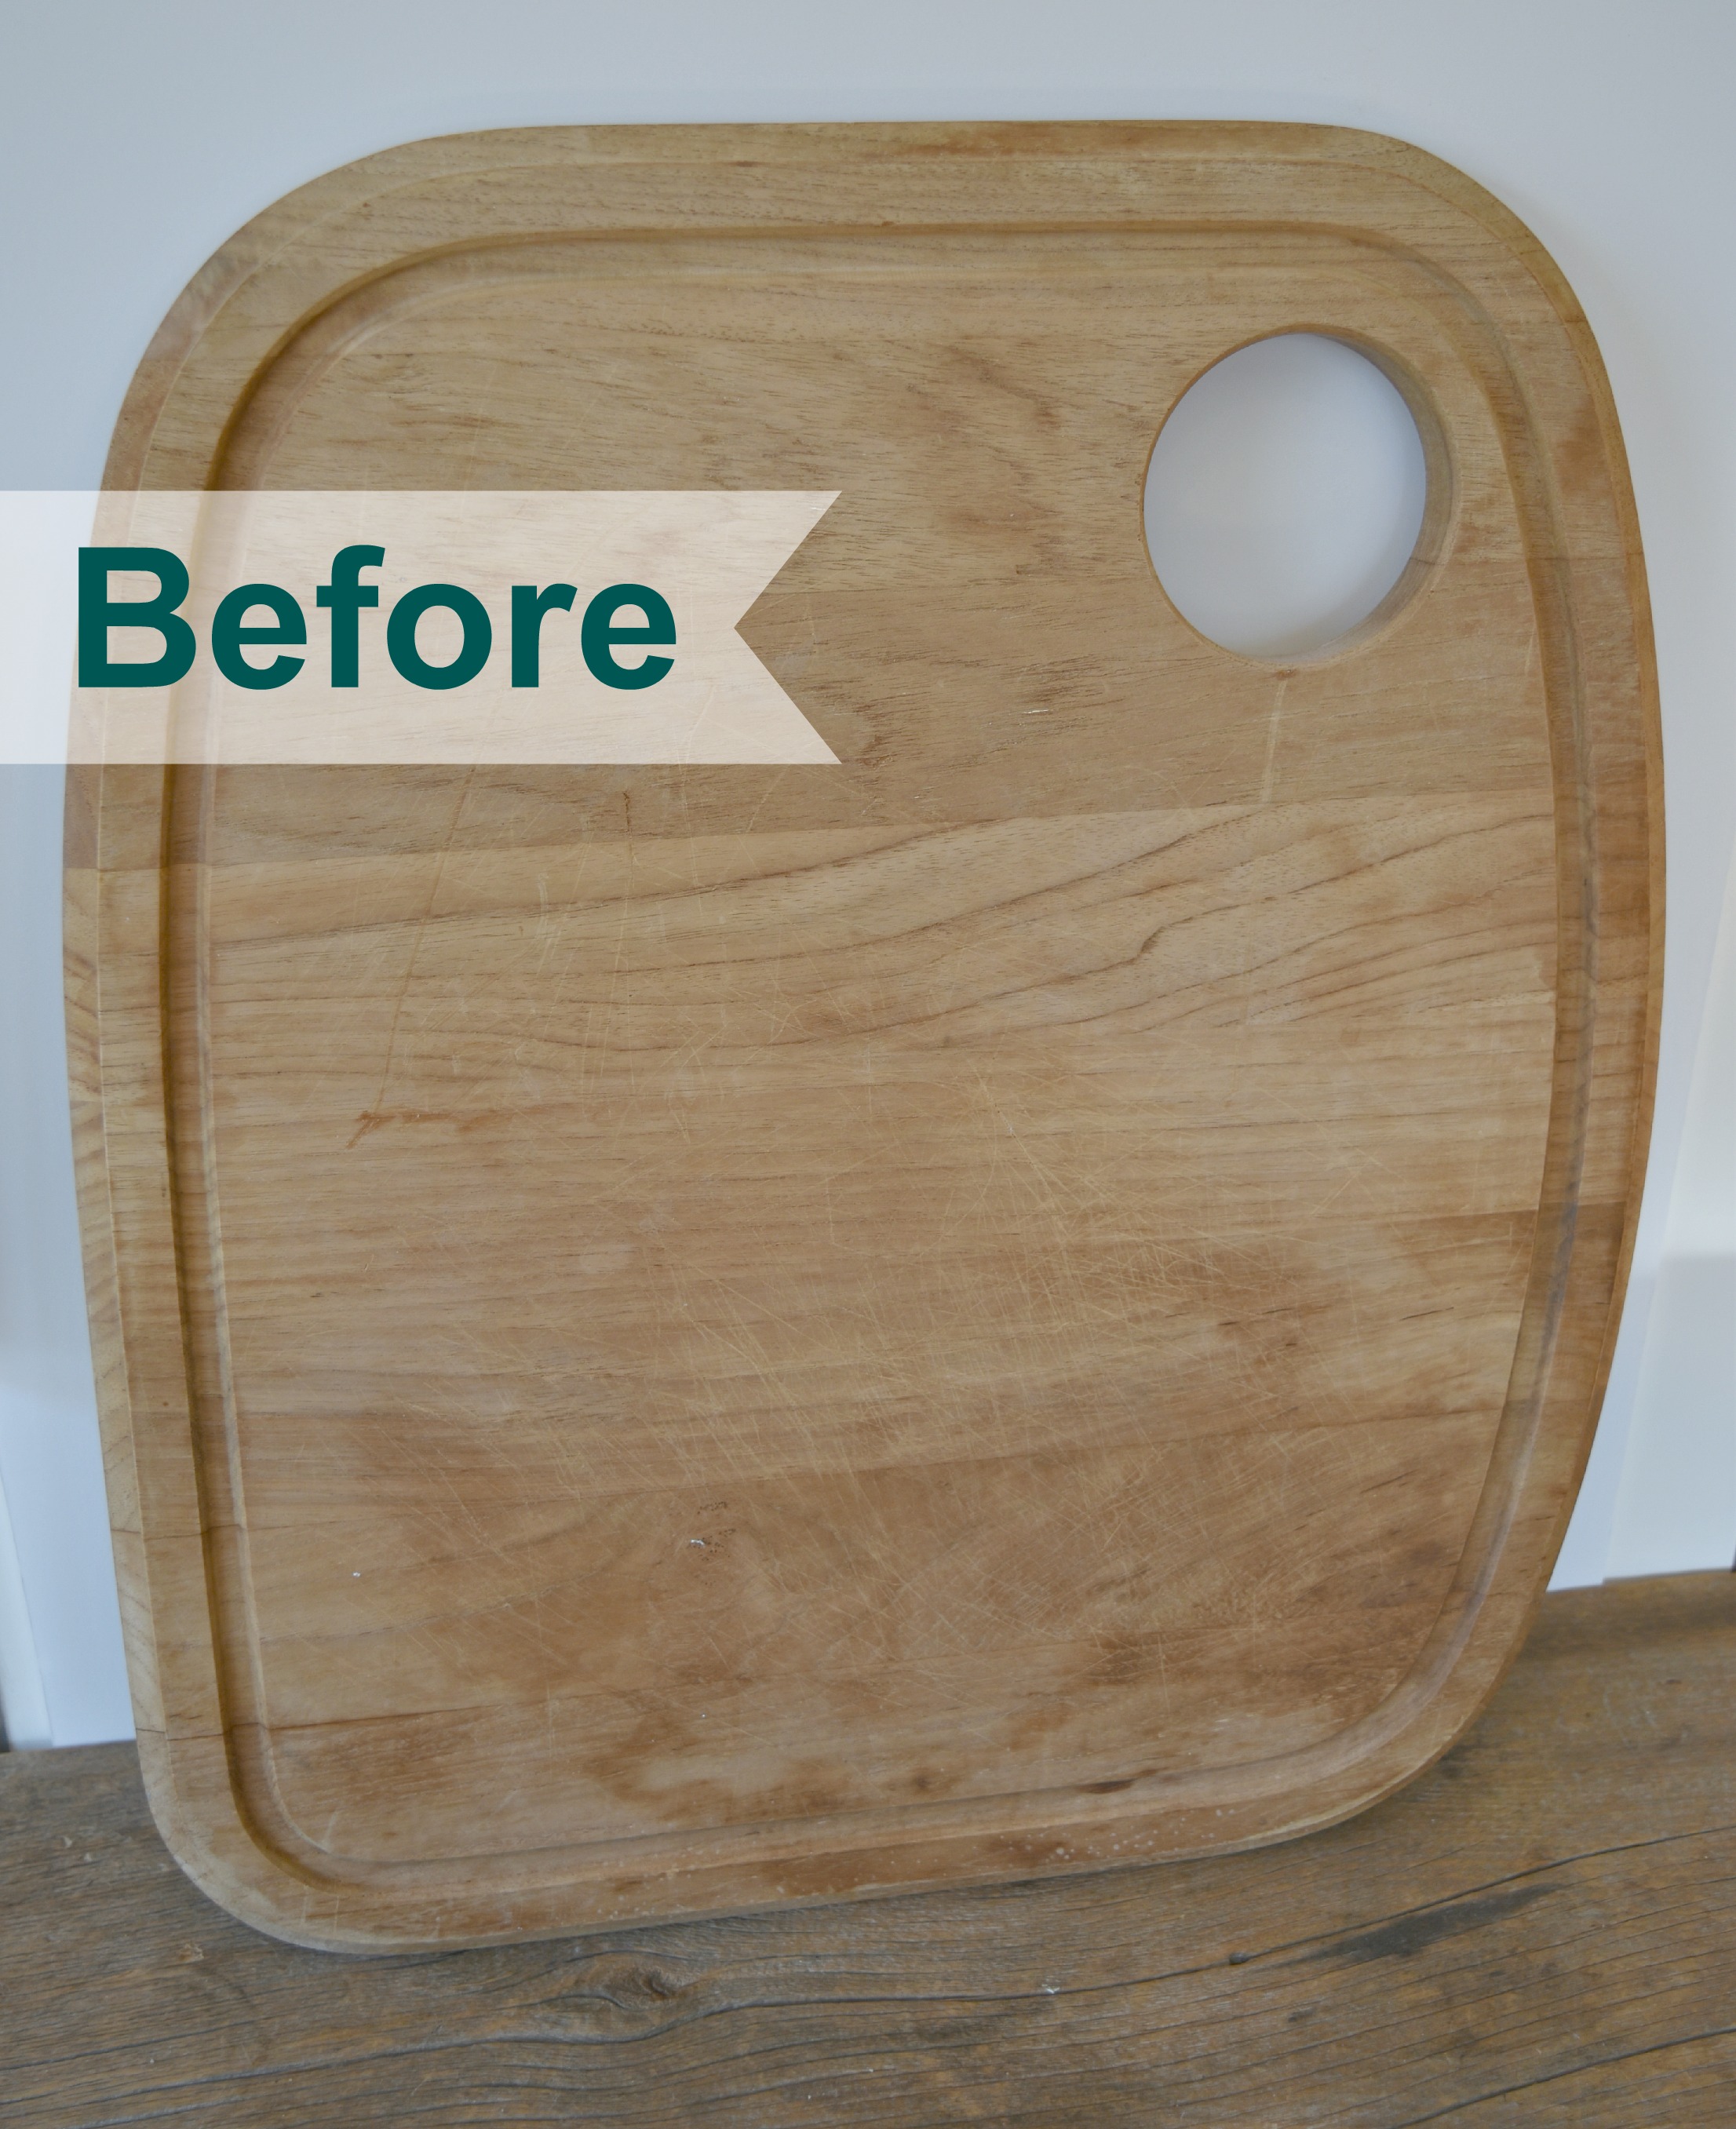 Cleaned and ready for tracing.
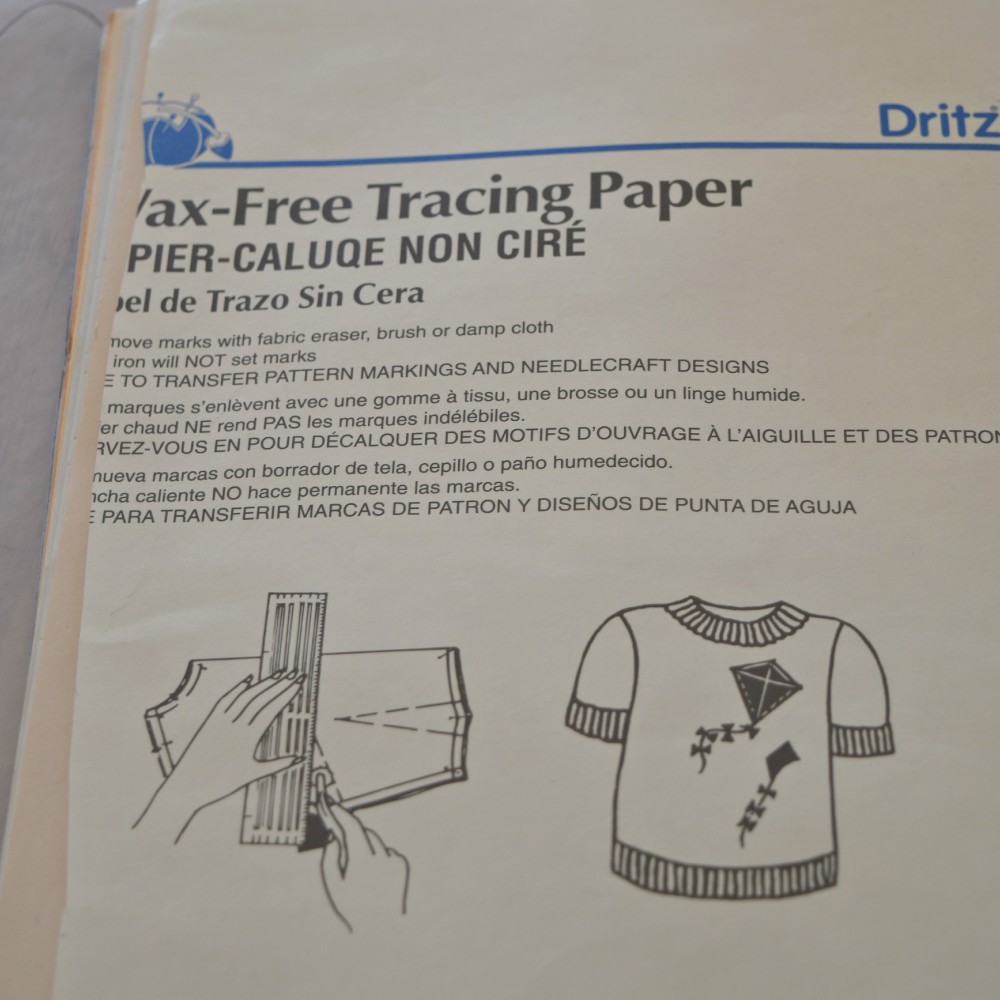 I happened to have some of this vintage tracing paper kicking around from my sewing basket… it worked perfectly for tracing Mr. Pig onto the cutting board.
 I taped the pig’s tracing onto the top of the board and used some non-waxed chalk tracing paper sandwiched between the cutting board and the tracing paper, chalk side down. Then I re-traced the pig with a harder pencil and a firm hand, just to make sure the image was transferred onto the board.

And it’s ready to cut out… just make sure before you start cutting you can clearly see your image and of course always wear your safety goggles.
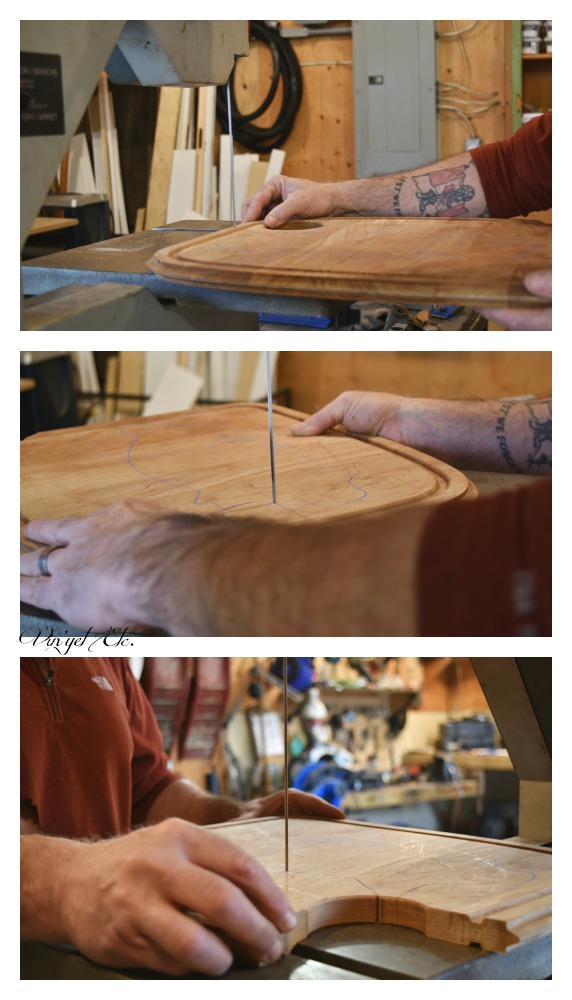 Mr. Mans ended up cutting Mr. Pig out of the board… he has so much more practice with precise cutting than I do and I was way too nervous to ruin the board. I was not nervous of the tool, she goes pretty slowly, but I didn’t want to miss-cut and ruin the board. Yikes! He did an amazing job and I’m so glad he did that for me, yah TEAM! 😉
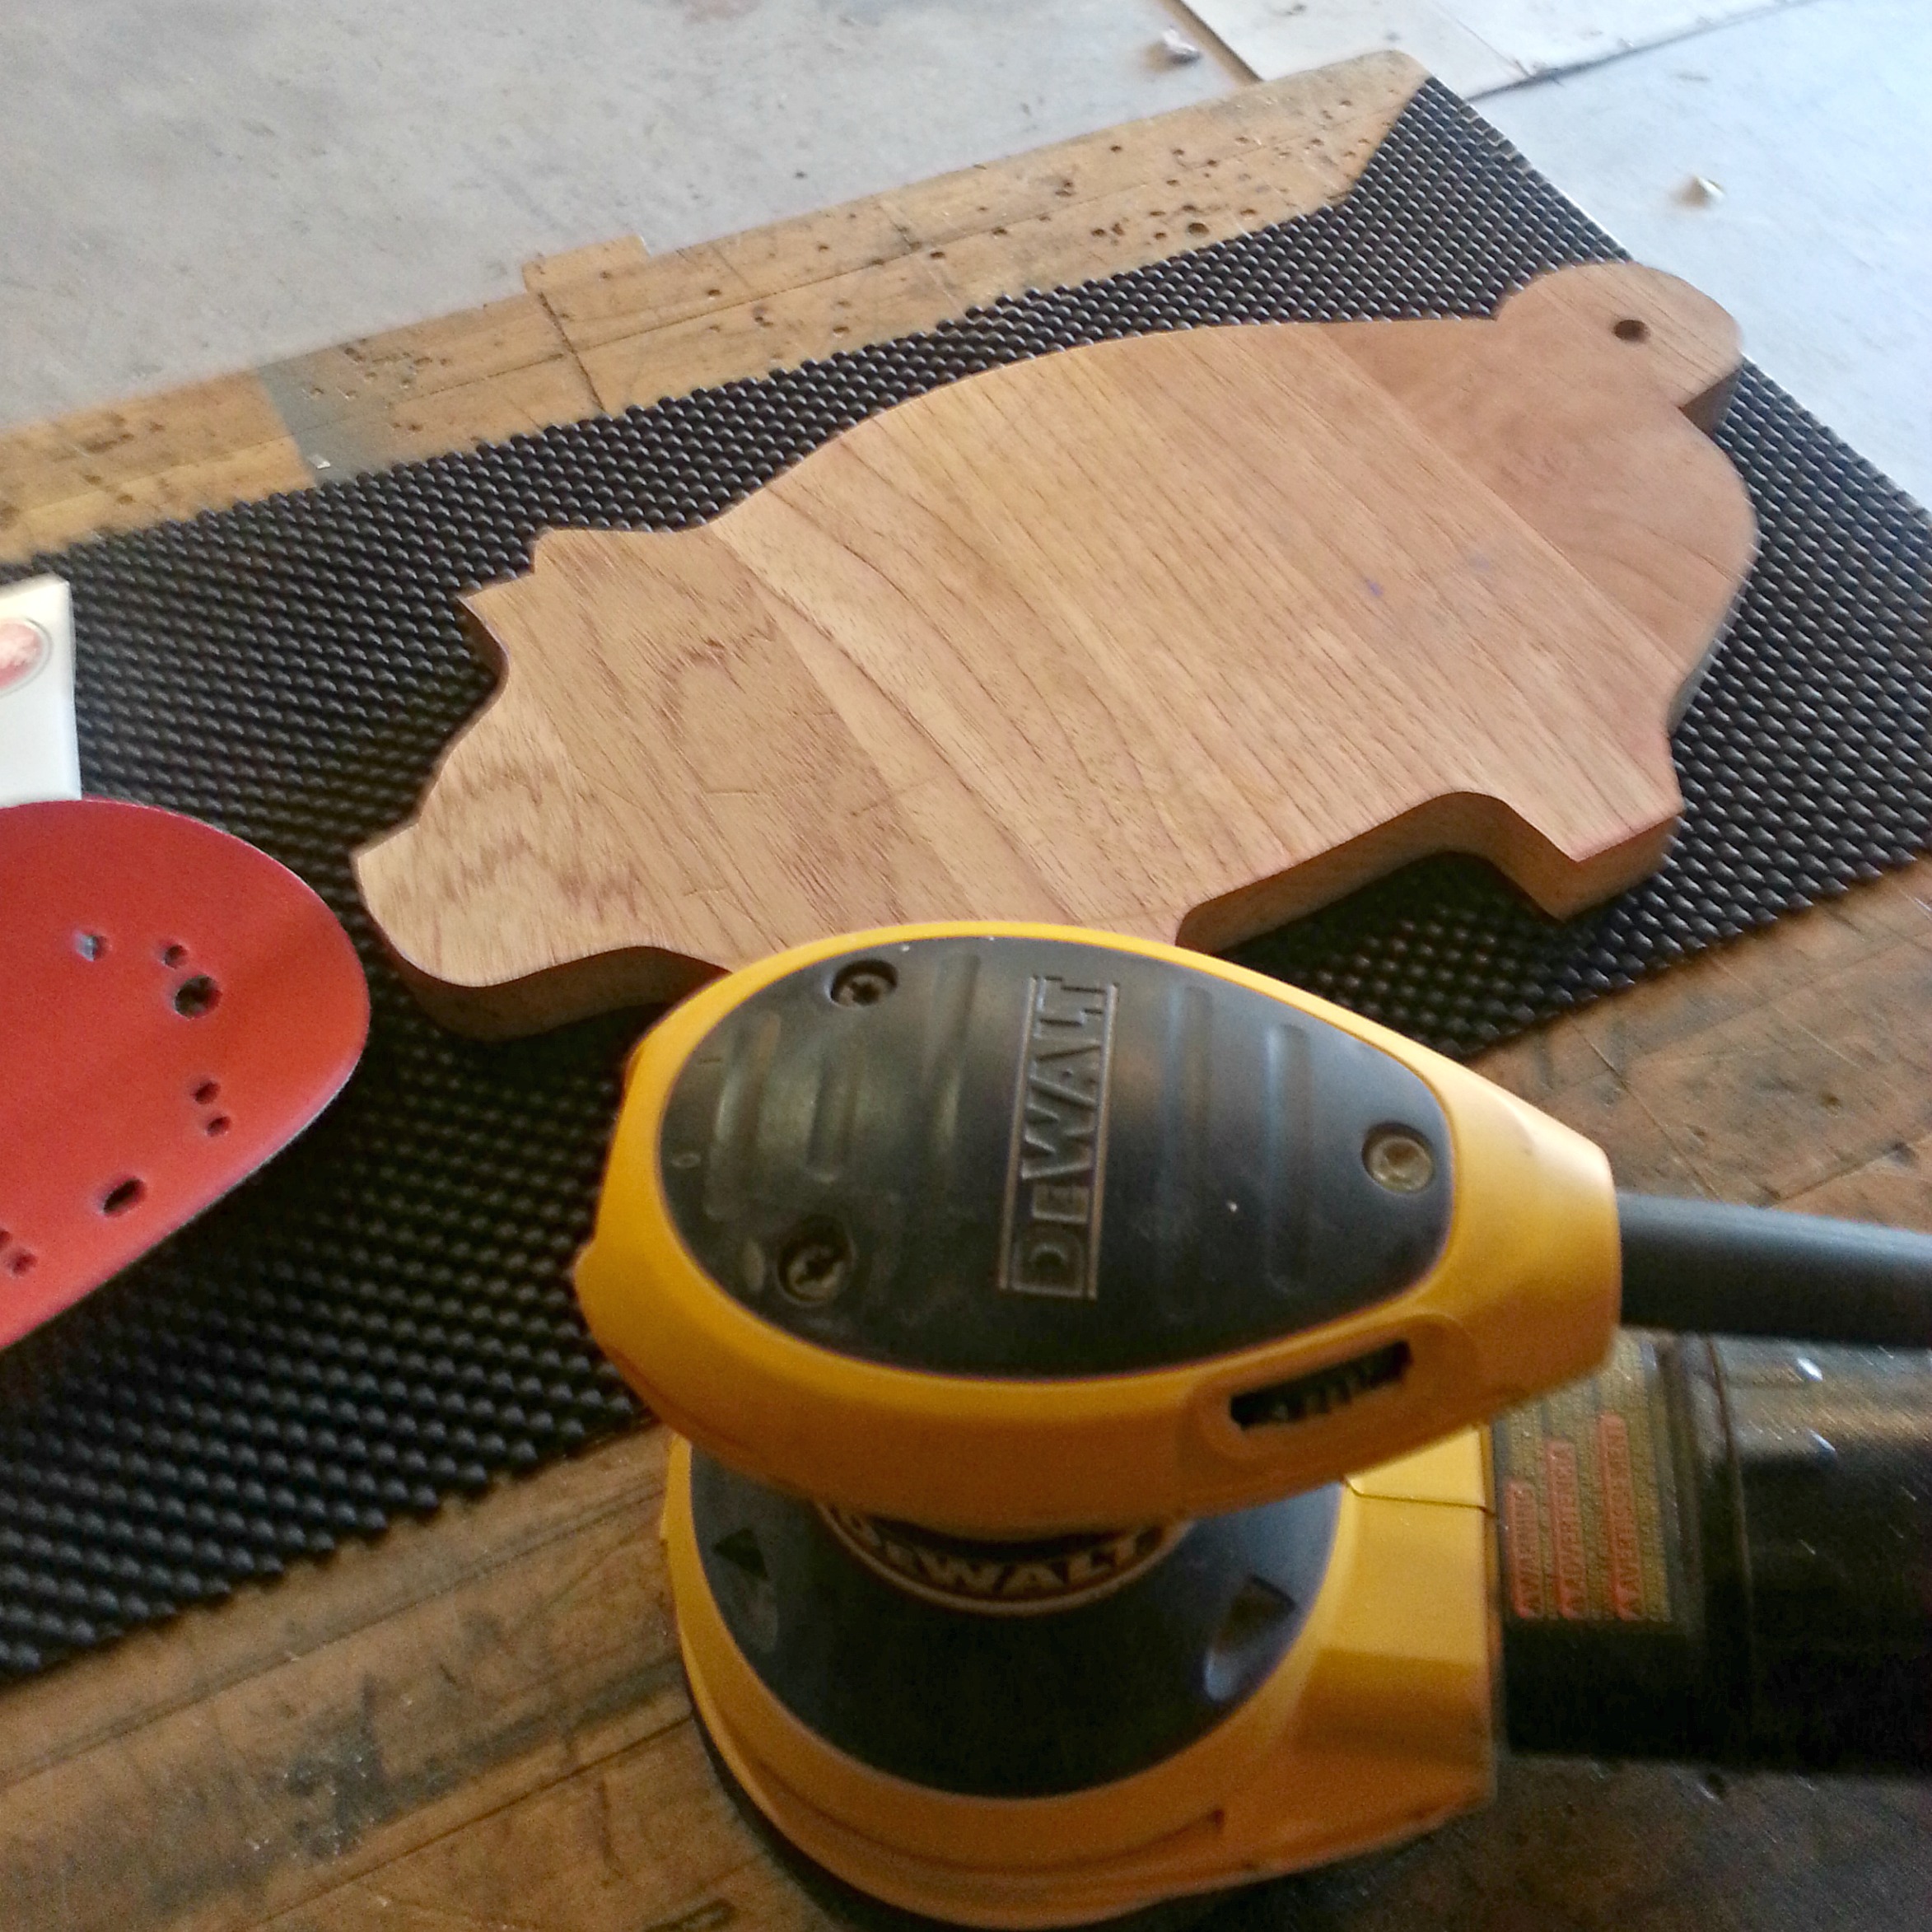
Once he was all cut out I sanded him with 150 grit paper to start, this removed all of the old knife marks in the old board, then I finished it off with a 220 grit paper. I used a grippy pad under Mr. Pig, that just helps keep him still while sanding. Once he was all sanded and wiped down (to remove all of the sanding dust) I sealed the board with Watco butcher block oil, it’s a food safe oil that won’t change the colour of the wood but will deepen the tone and really bring out the grain, exactly what I wanted.
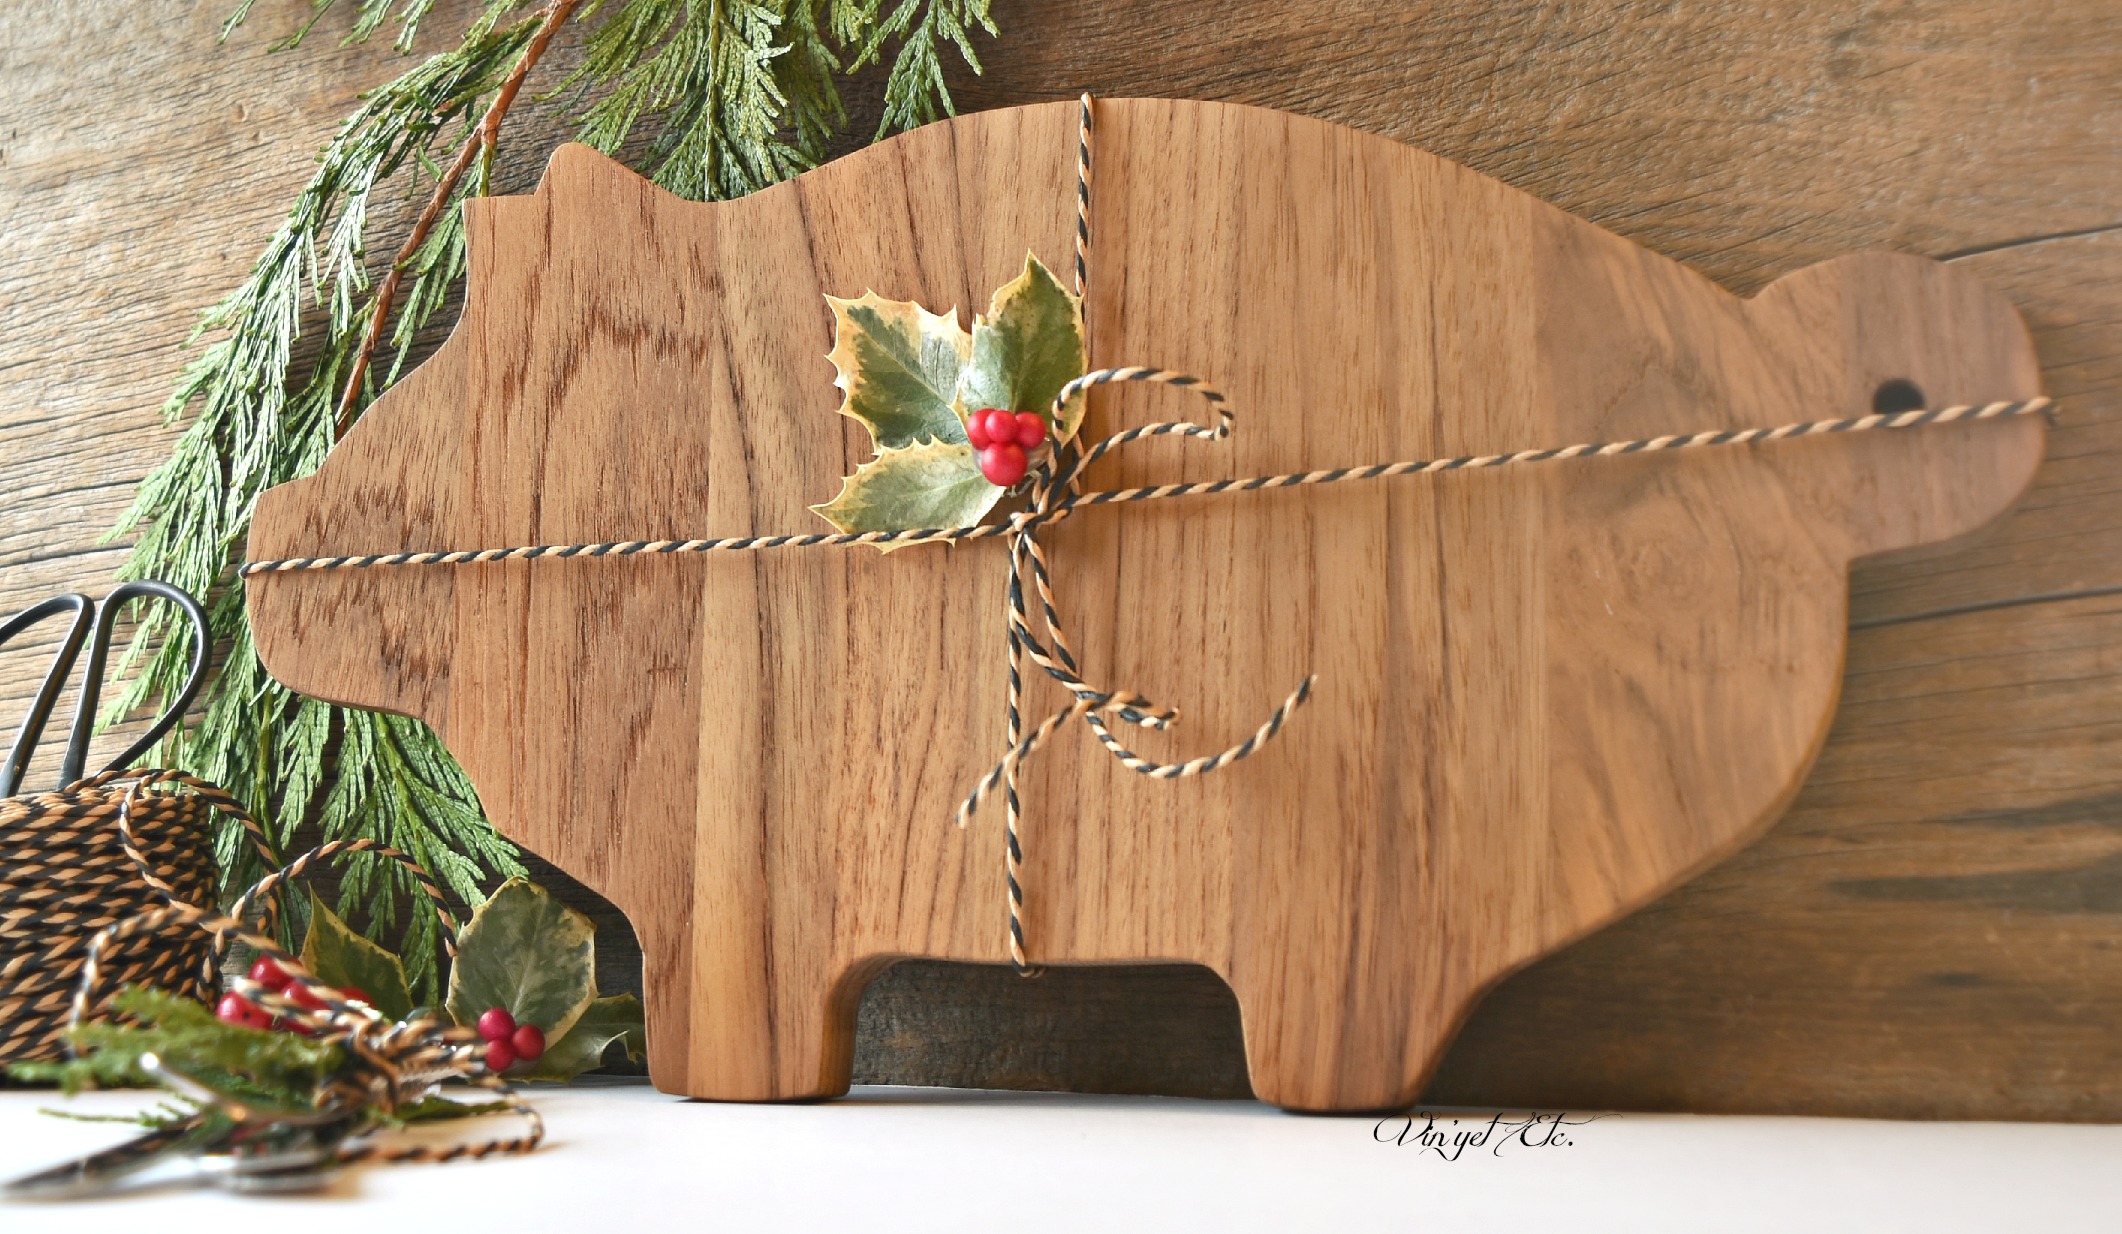
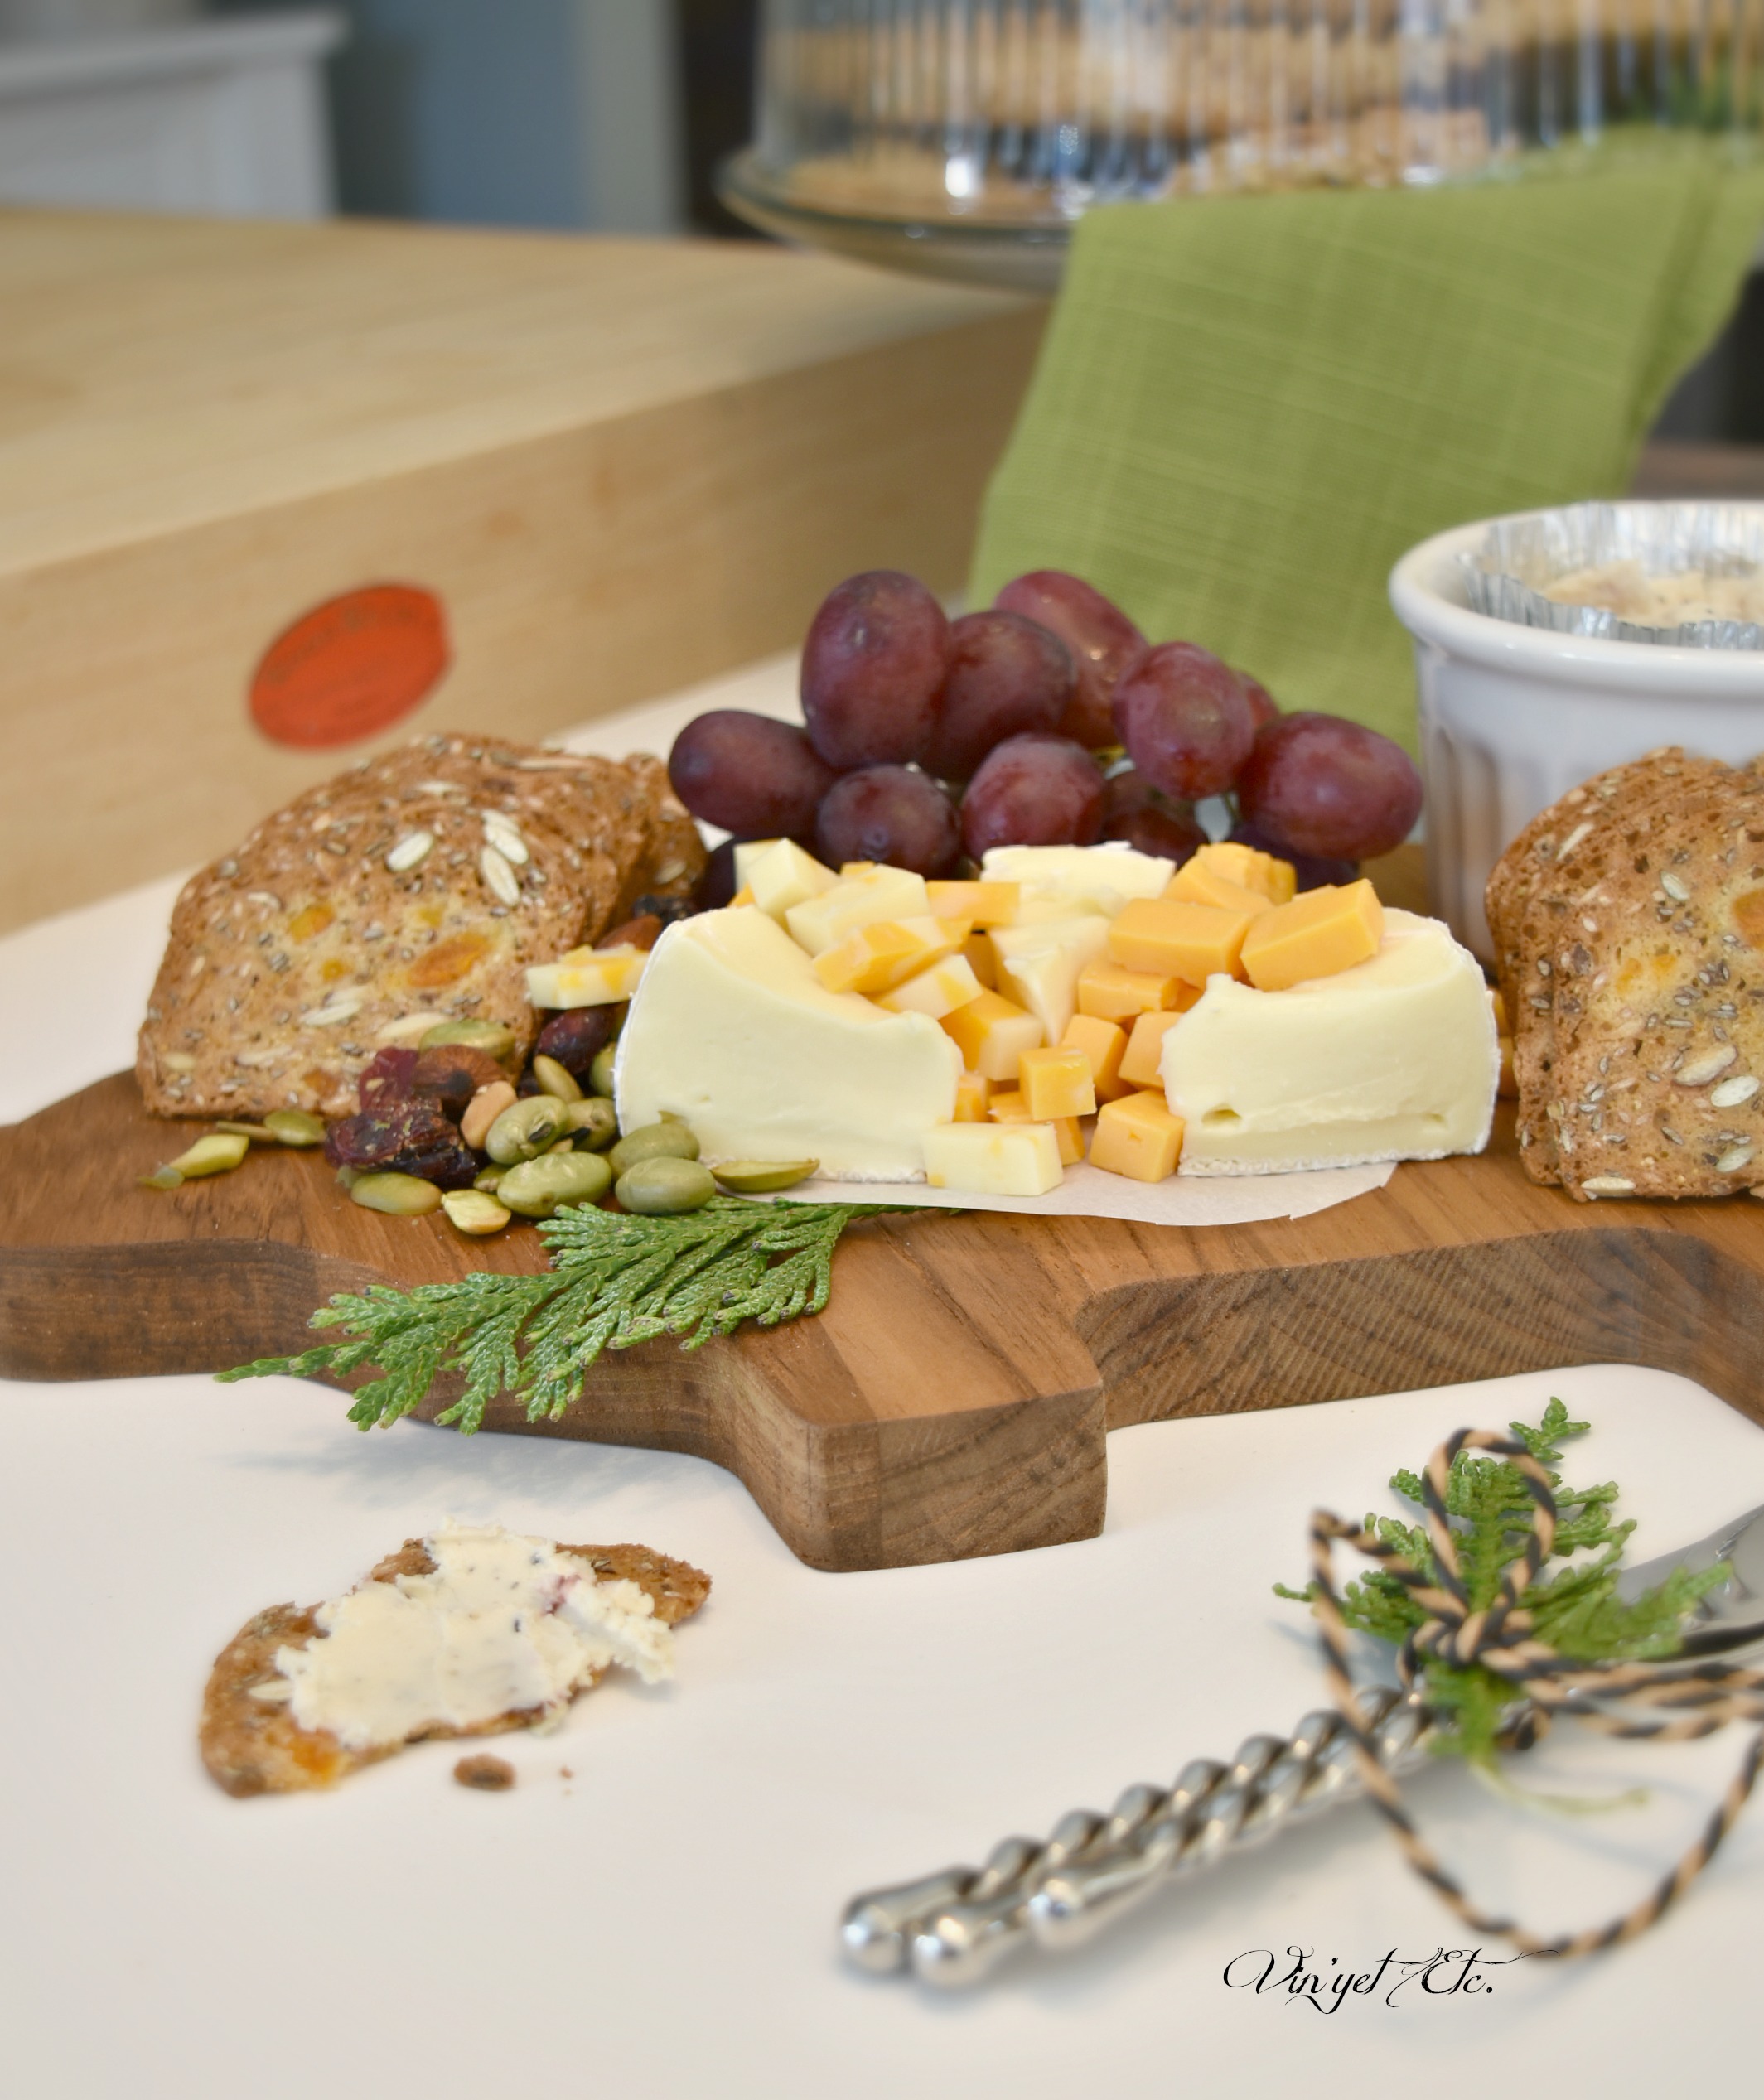
This gift can be given exactly as shown or it can be included in a gift basket filled with all of your favourite cheeses, crackers and yummy homemade goodies…
I’m pretty proud of this little pig… for the way he turned out and now, I have one just like Mom’s. I know she’d get a huge kick out of that. I hope I’ve inspired a little nugget of an idea for someone special on your Christmas list, even if it’s just for yourself.
Thank-you so much for stopping in for a visit, until next time.

I’m pretty thrilled to be joining these talented Canadian bloggers, we are sharing 10 awesome handmade Christmas gift ideas with you… please be sure to stop by and check out all of them, the unique ideas will surely inspire. I know they are inspiring me to make some more handmade Christmas presents for under the Christmas tree.
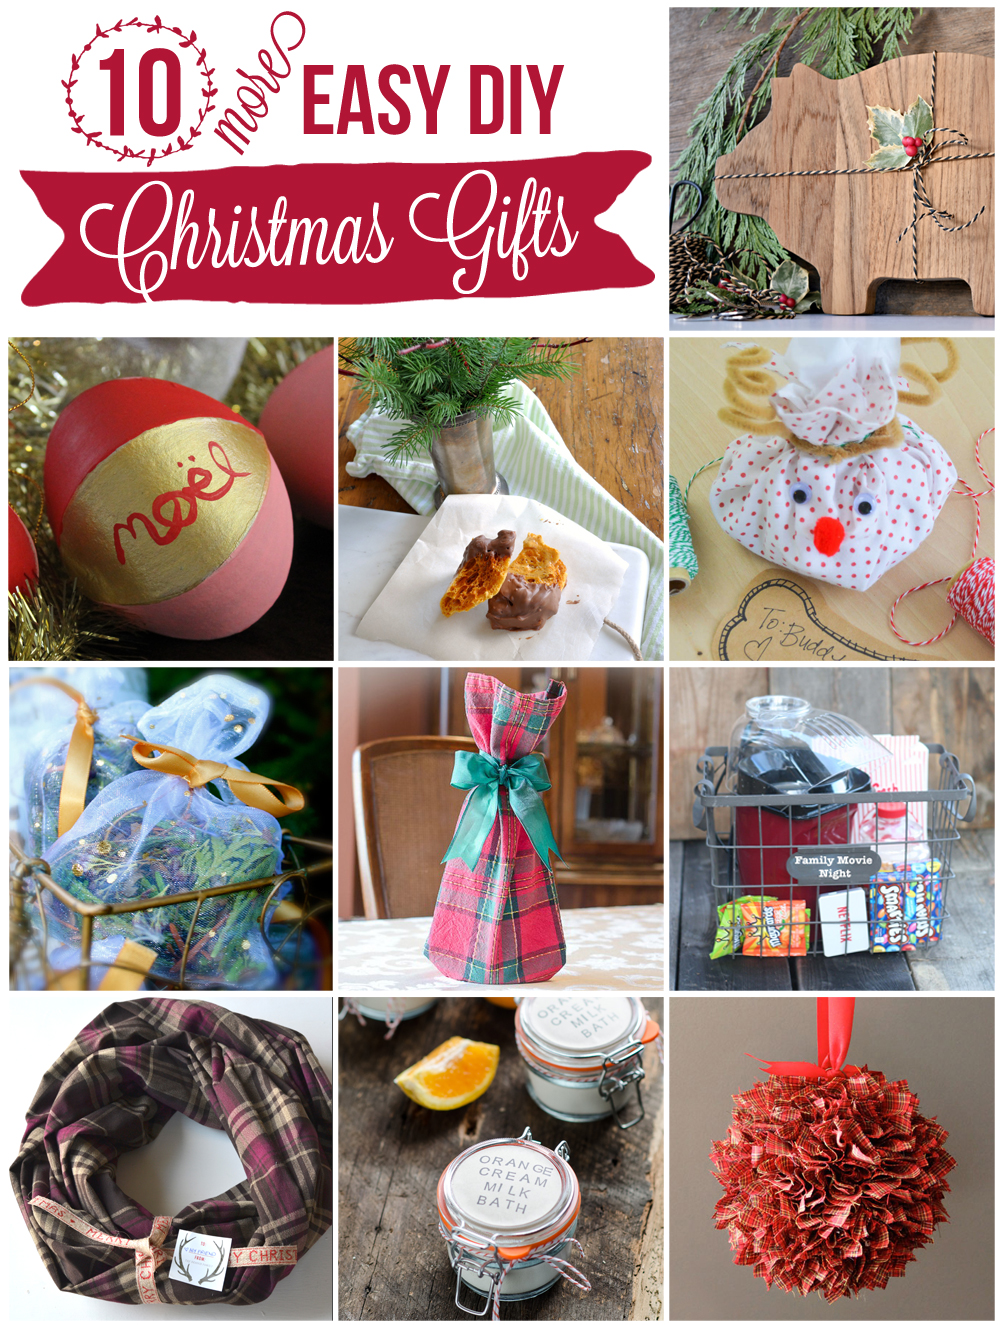
From the top, they are:
DIY Cheeseboard from Vin’yet Etc.
Christmas Ornament
from PMQ For Two
Sponge Toffee from Life Is A Party
Christmas Dog Bandana
& Reindeer Treat Pouch from DIY Passion
DIY Christmas Sachets from New House New Home
Easy Sew Christmas
Plaid Wine Gift Bag from Time With Thea
Movie Night in from The Inspired Home
Easy Infinity Scarf from The DIY Mommy
Homemade Orange Cream Milk Bath from Personally Andrea
Fabric Ball Christmas Decoration from Fresh Crush


48 Comments
This turned out beautifully! What a great idea.
Thank-you, AnnMarie, I love how he turned out.
You should be proud of this project!! It’s awesome, Laurie. I have an old tabletop in the garage just waiting to be made into cutting boards – each of my siblings is getting one this year as a gift. You’ve inspired me. Heading off to check out that butcher block oil.
Oh how cool is that? I’m so happy that you are inspired, that makes me so happy. I am very proud of this little pig and he perfectly fits into my farmhouse style. It was so easy… I can see me hunting for old cutting boards now.
Well, you know now all of your friends and family may expect one of these beauties for Xmas this year! 😉 What a smart diy!!
Haha, thanks Karen! It is a great gift idea and you can get elaborate and put him in a beautiful basket with all kinds of goodies or as is, either way this gift idea is a keeper for me… I may or may not start buying all of the old cutting boards in Kingston now… the possibilities!!!!
Oh my goodness I love this! I would love a gift like this. And you have such a lovely memory every day of your mother. Thank you for sharing! Pinned and tweeted.
Thanks so much, Jane! this little guy is very special indeed, the memories he evokes are beyond precious. thanks for sharing! xoxo
Awww, Lori your little pig is great! I love it!! Growing up we had a bunny cheese board and I’ve never forgotten it. This guy will surely be a statement piece for anyone lucky enough to be gifted one should you choose to make more 🙂
Thanks, Sheila! I will for sure be making more… I want to make a whale for a friend… I’m afraid I’ll now be at the thrift store looking for all of the cutting boards! It was so easy to do and so special to get a hand made gift.
What a great idea, Laurie! And, so touching you got the idea from memories with your Mom. Anyone would love to get such a thoughtful gift!
Thanks so much, Jen! I can see me making more of these this holiday season.
Oh my goodness Laurie, I thought Wilbur of Charlottes web fame was the only talking pig out there but your cute oinker is telling me loud and clear to Pig out on two of my favorite things – fruit and cheese! Lol Love seeing the old school with the tracing paper too!
I LOVE Charlottes web, that story still makes me cry! I’m such a baby! LOL Cheese may be my addiction, it’s sooooo yummy, paired with crunchy crackers, YUM! 🙂
That looks fantastic! I love it! Pinning!
Thanks for the share Bette! 🙂
Oh my gosh! Must have! Pretty please scan your piggy tracing and send to me???? And I’ll put my tracing paper on the computer screen too and my husband will absolutely die (as he always does at my lack of technical/math abilities!) And then I’ll ask him to cut it out for me too. Ha! Thanks so much for sharing Laurie!
xo
Pssst, you already have it! Open my post, right click on the photo that Johnny sent me and save as, then trace it. 😉 Yes for sure get him to cut it out if he’s like my Mr. VERY. PRECISE. I was terrified of cutting his ears and nose off, LOL.
This turned out great…and makes me want to eat some kind of cured meat and cheese. So cute.
Haha, glad you like it! Thanks for stopping in. ox
Oh I love it! I think it turned out perfectly, your Mom would be so proud.
Thanks Barb!!!! 🙂 I love the way it turned out and yes I agree Mom would love that I have the same cutting board as her. xoxo Miss you!
Now this is a very special gift Laurie for so many reasons. I so enjoyed reading the story behind it. Since it represents so many memories I really don’t think you should give it away. You are also so resourceful and clever with the way you made it. First of all starting with an inexpensive used cutting board and then I love how you were able to transfer the shape onto the board. So clever! Enjoy your new cutting board and thank you for the inspiration!
Thank-you, Thea! Your words always make me happy, thank-you so much! I won’t be giving this little guy away, but I can see making more like this in my future!
Oh my gosh that is TOO cute Laurie!! I wouldn’t give him (it’s a “him”, right?) away either – he’s a keeper!!! What a great story too, very special.
Thank-you Heather… I call him a him. 😉
This is so touching, and such a great idea! You find thrifted cutting boards all the time, and they’re not that expensive brand new! Now I just need a band saw 😉
Thank-you, Ariel. The whole world is different when the people you love are no longer in it… I look at everything differently now and having this little piggy gives me a piece of those special times. You are right, buying brand new is very reasonable, that way you don’t have to fuss with the cleaning. A band saw yes, but a jig saw would work too.
What a clever, cute idea. You are such a resourceful gal Laurie! Your project inspires so many other possibilities with other materials. I’ve got some large wood scraps in the garage beckoning me 😉
OH I am so glad Jelica! Can you email me on another topic, I’d love to chat with you, I’ve PMed you on your FB, but I think it may have gotten filed under, other.
Wow!! Such a beautiful and unique gift! I love handmade gifts!
He is adorable! I’m going to see if my husband can make me one. What size is he?
Hi Susan,
This little piggy is 15″ wide from nose to tail and 8 1/2″ tall from bottom of feet to tips of ears. I’m glad you like him, he is kind of cute!
Thank you Laurie! I hope to make one someday.
Ok, this is the sweetest story and I love, love, love the resulting craft! I am a big fan of the pig! 😉 Pinning and copying!
Thank-you so very much Kim! xoxo
Your little pig is adorable! Your mom would be proud!
Hi Pam!!! Thank-you, I think he’s pretty adorable too and I think you are right, Mom would have loved this project! xoxo
Oh my, this is so adorable! What a great idea turning an old board into something fun and new for very little cost!
Thanks Shauna! You are correct very little cost, the most expensive thing was the butcher block sealer, but I just used a tiny bit, so really if you break it into how much I used it hardly cost anything.
Oh my! You are amazing!!! What a fabulous gift and such a treasure to keep. Great job Laurie!!
Thank-you Alicia! I really appreciate that! 🙂
Love this! You make it look so simple 🙂
Thank-you so much Liz. 😀
What a cool idea!
Talk about personalizing your cheeseboard instead of having a plain and possibly dull square board.
A board with a history or memories…that makes it way more interesting 🙂
Well done!
Thank-you so much Karla! xo
I have a cutting board just like this, what a great idea!
Laurie, I love this idea. I just wish I had your talents. I’m sharing this on my Friday Faves this week. Thanks for adding it to the Bloggertunities Share Thread.