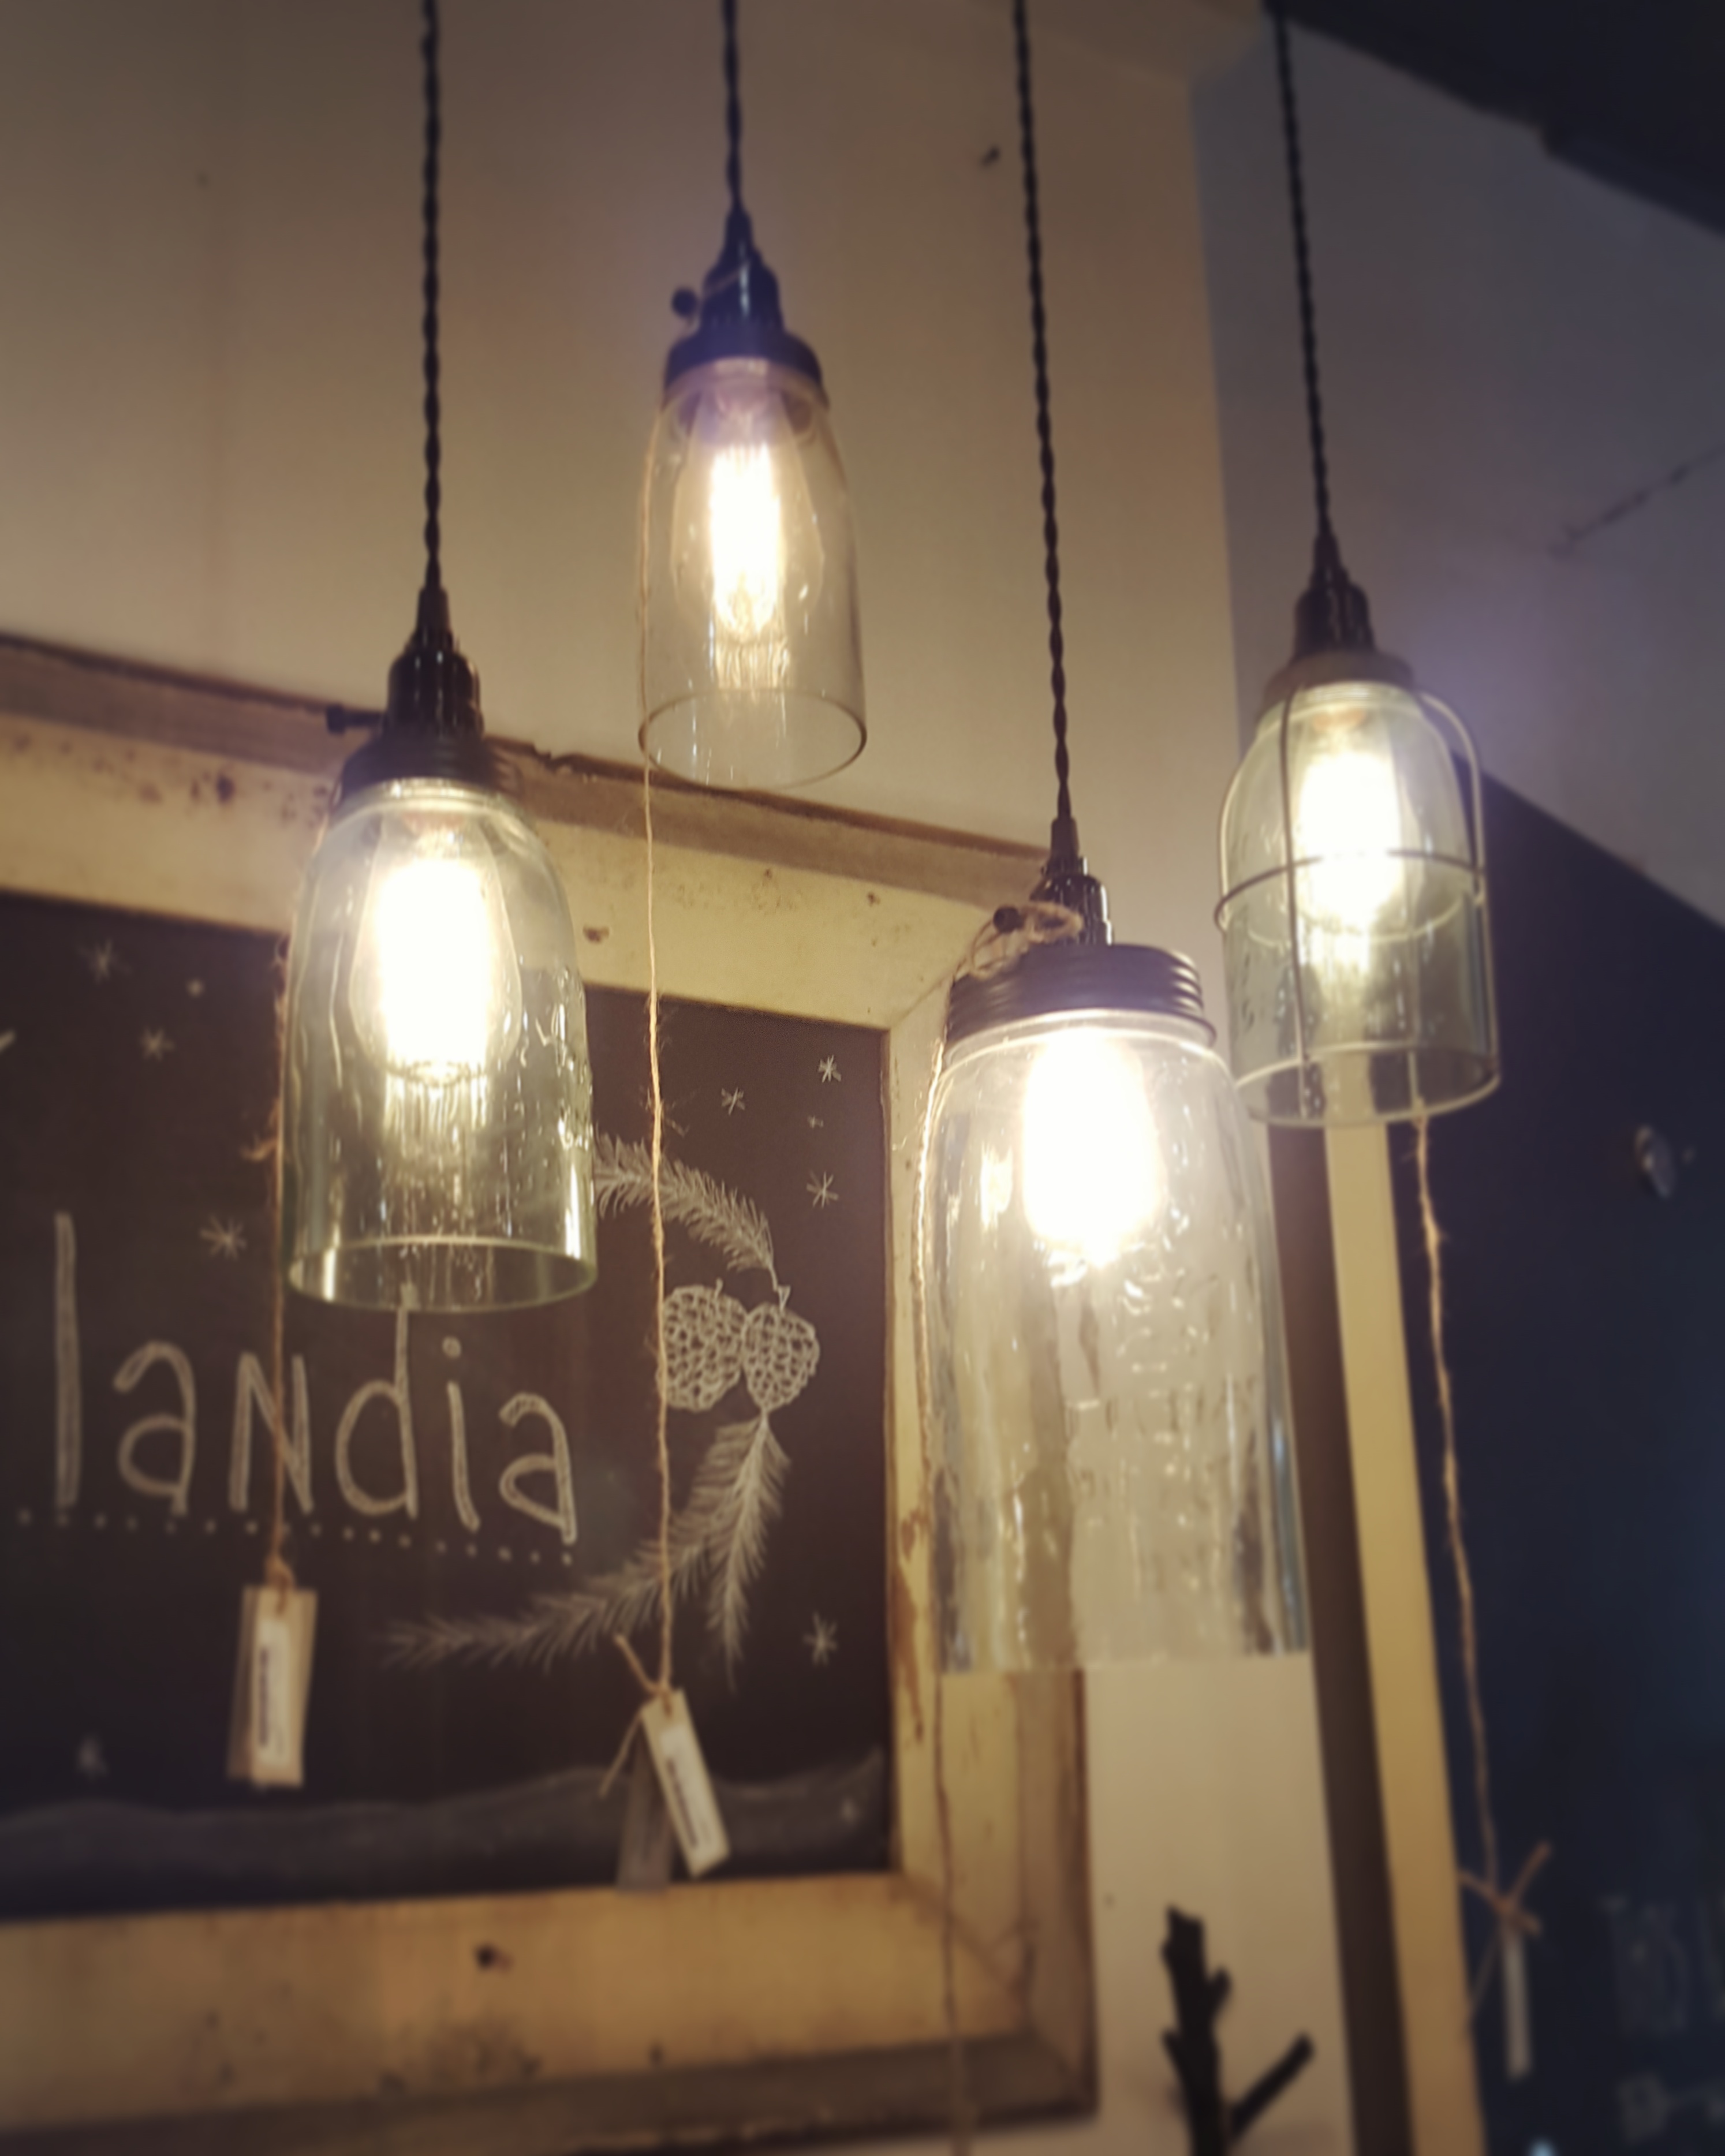
Ever since I saw these lights at my favourite little shop I’ve wanted them, aren’t they awesome!? I posted this photo on Instagram when I was there just before Christmas, the fact that it was just before Christmas though… I just couldn’t justify spoiling myself by getting one.
It’s funny how things work out sometimes, I’ve joined in with 11 other talented bloggy friends and we are participating in a 12 month creative challenge, every month for the next 12 months we will be creating something DIY with different materials, this month’s material is Mason Jars, anything mason jars. I knew instantly what I wanted to make, a DIY farmhouse light – with a mason jar.
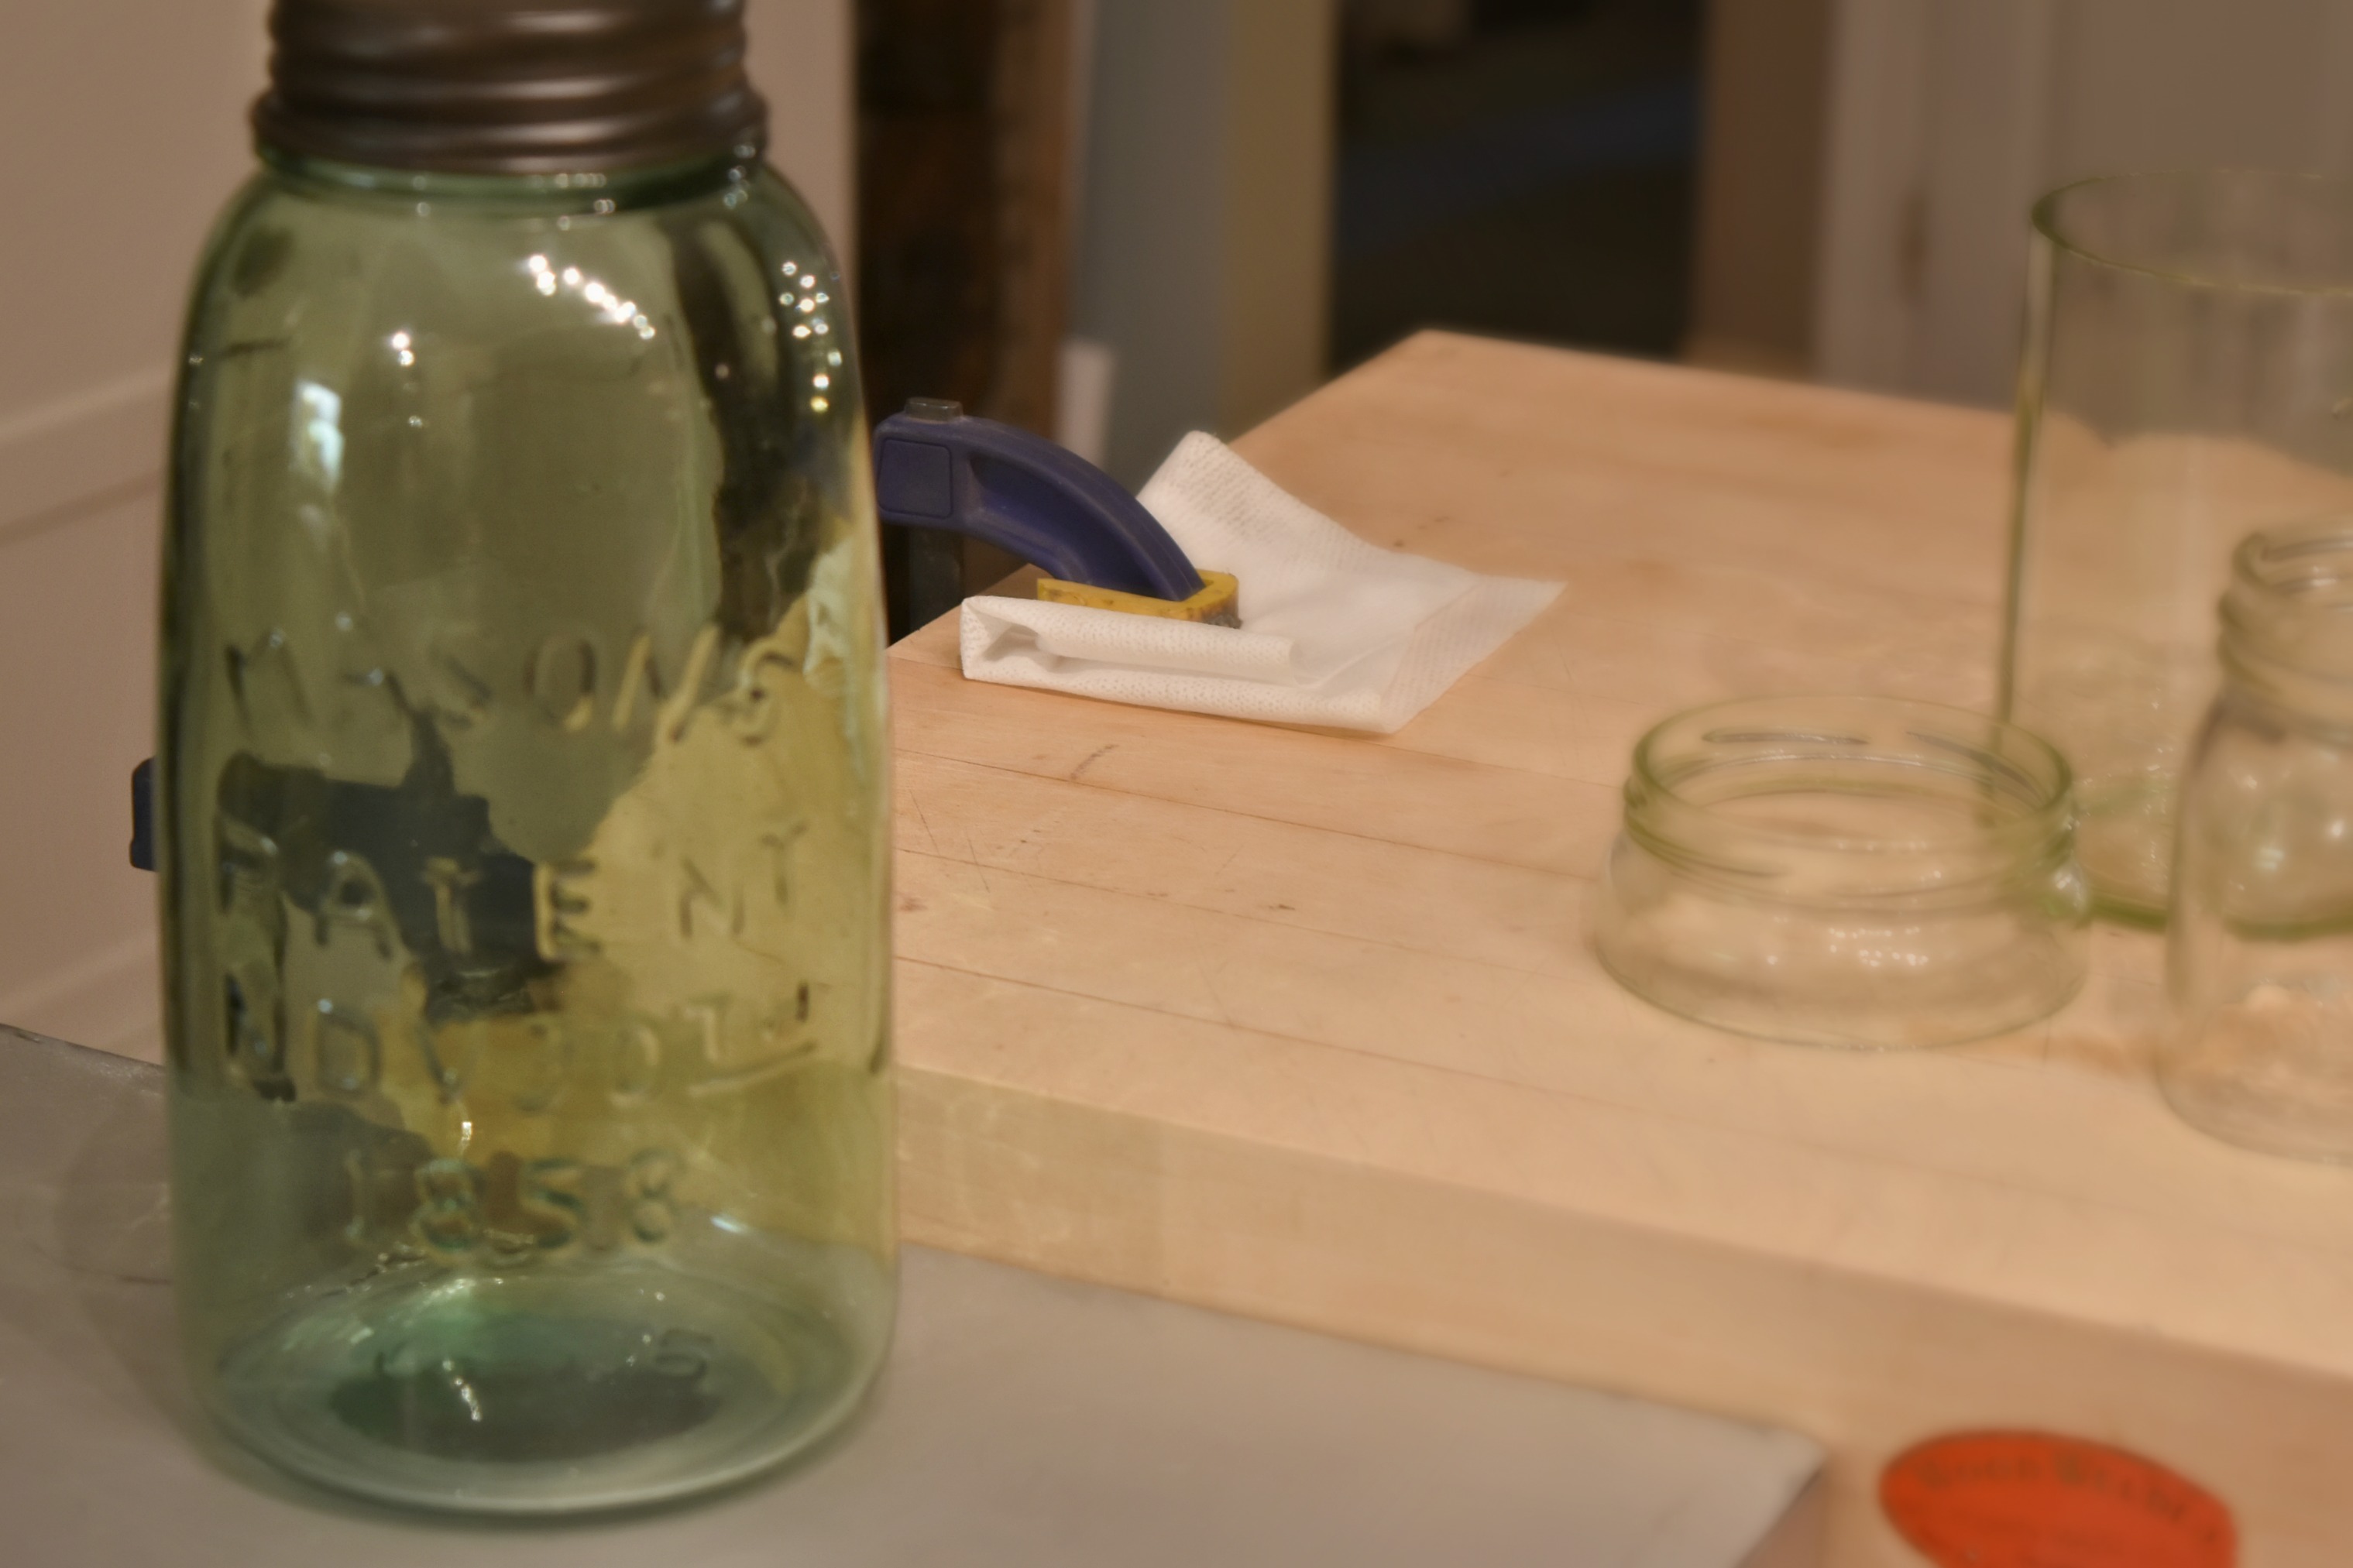
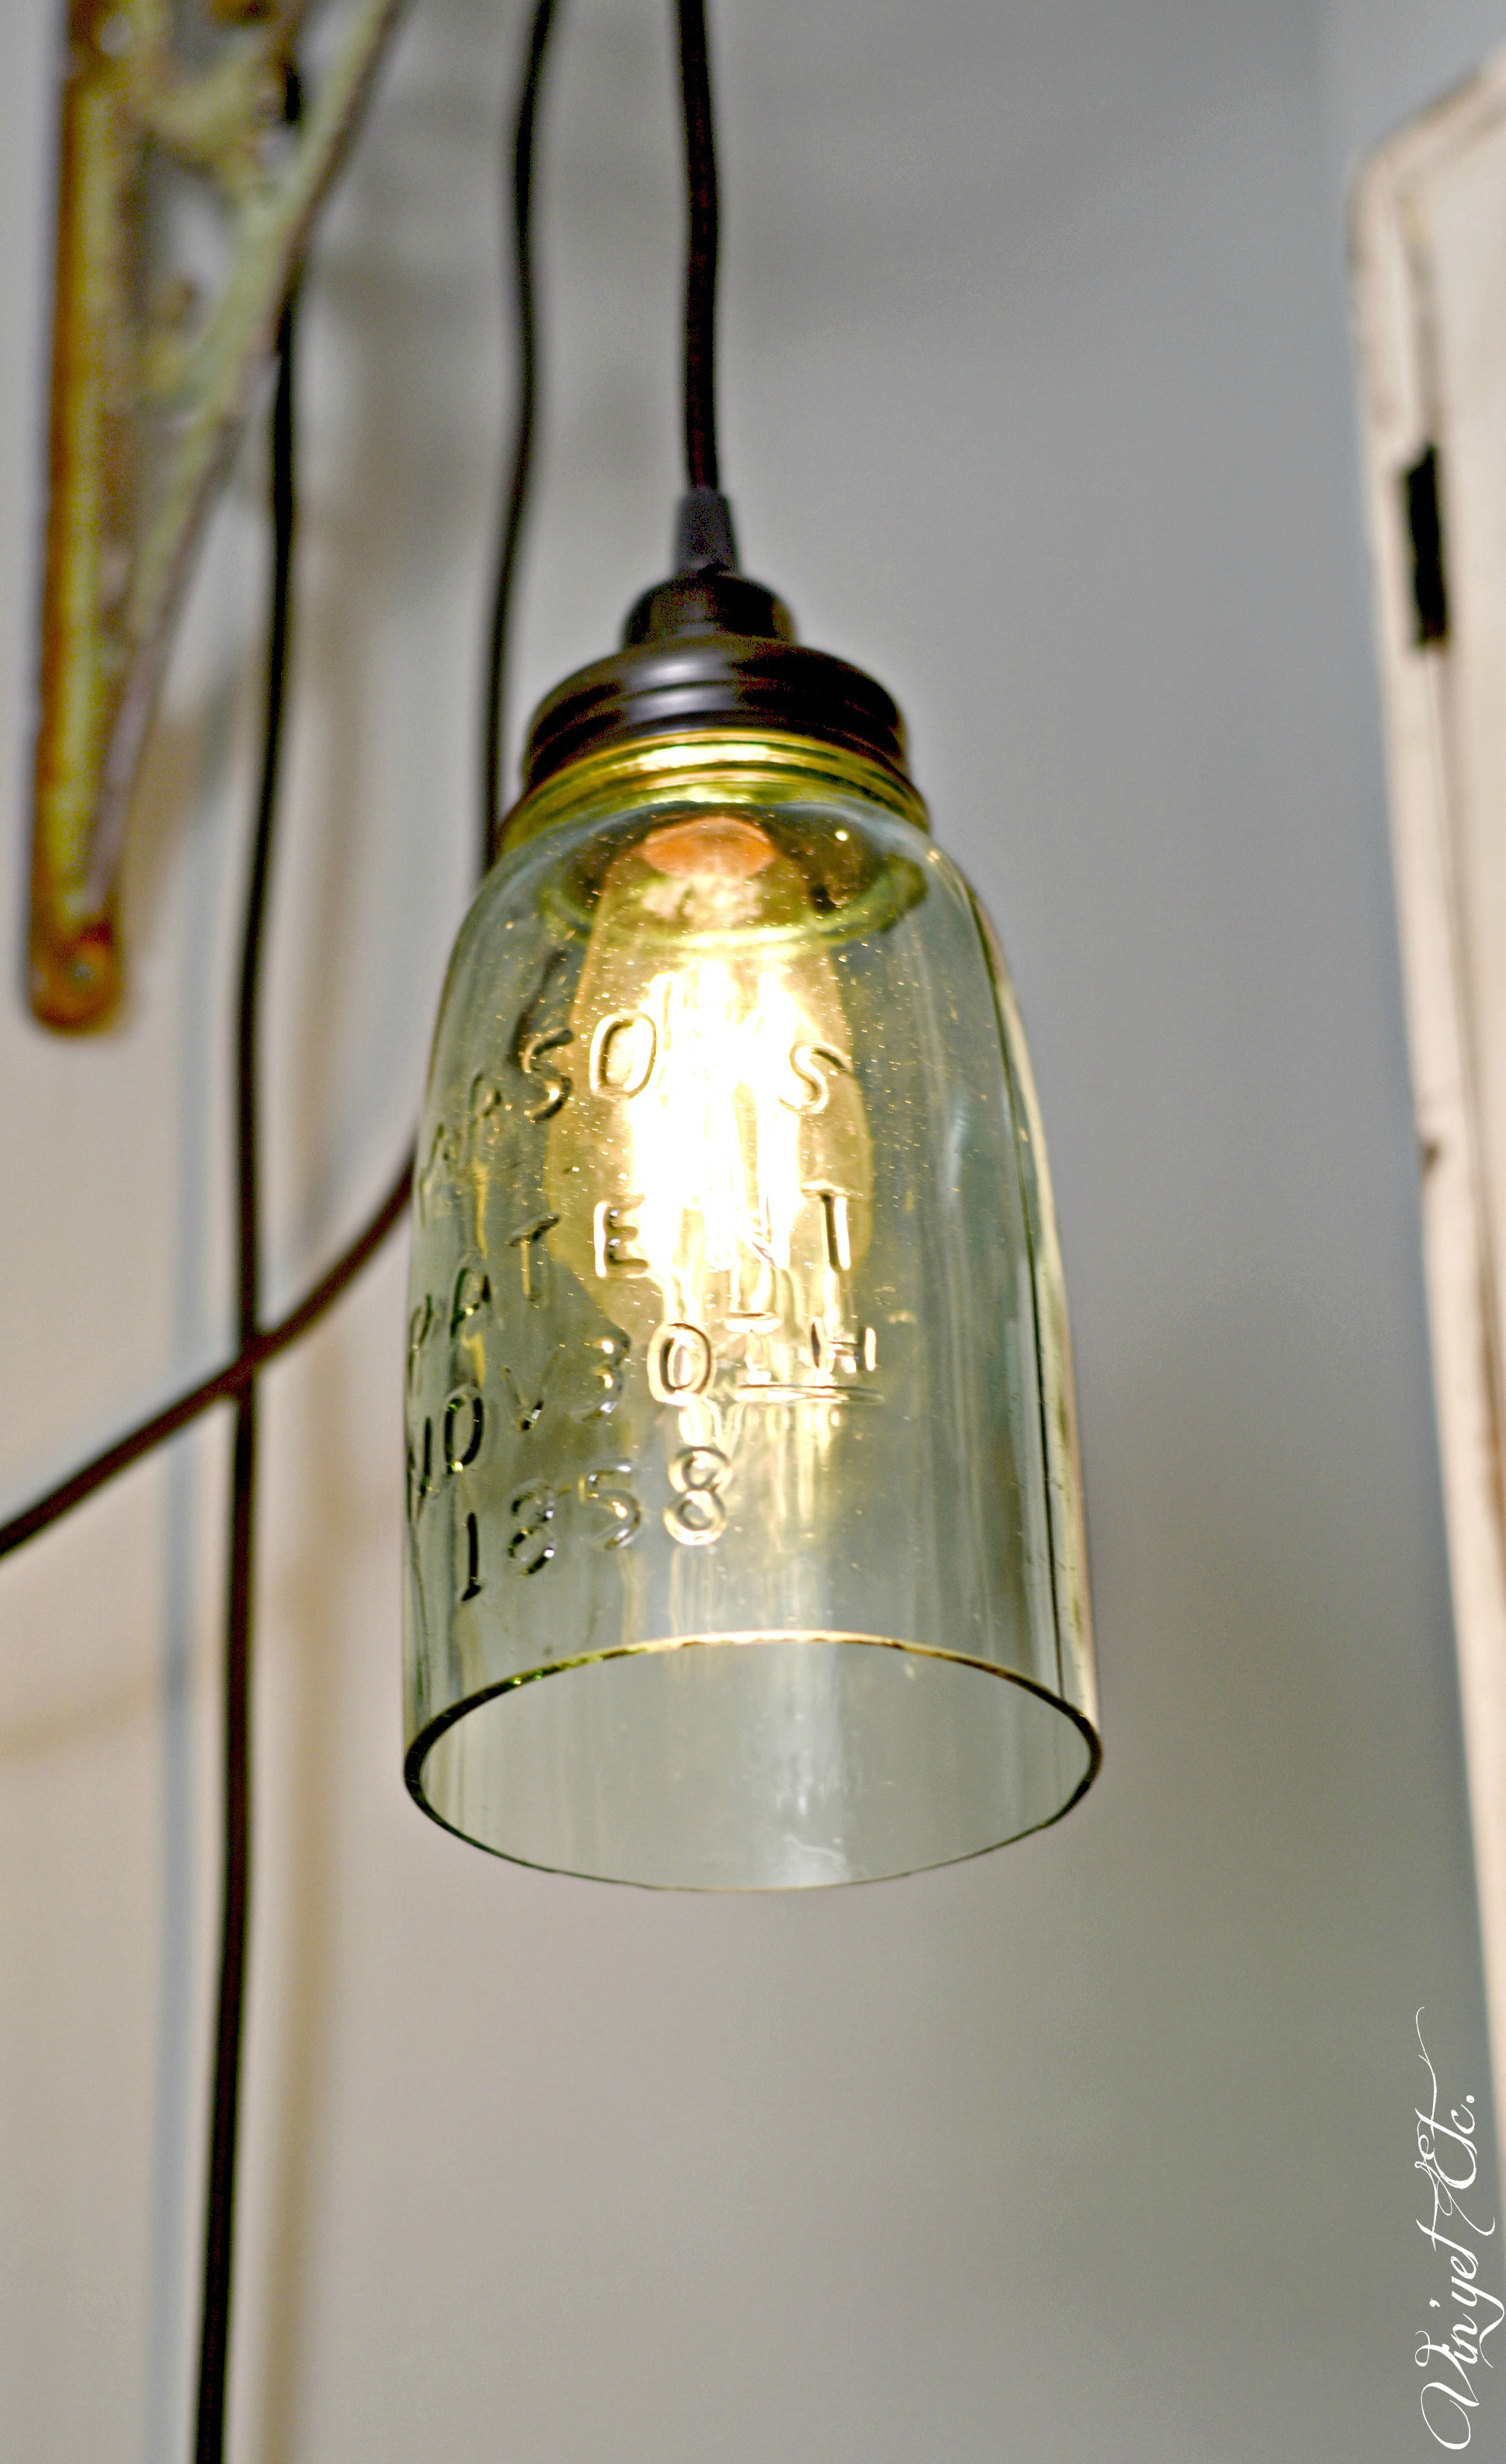
This mason jar to be exact, it’s an antique replica mason jar that I’ve had for so many years I don’t even remember when I got it, it’s been sitting on top of my cupboards collecting dust and grease for the whole time… basically it was begging to be used. I snapped this very fast photo while we were setting up the scoring process, you can see our glass cutting practice pieces on the right, the technique we used is awesome and worked perfectly every time (more on that later).
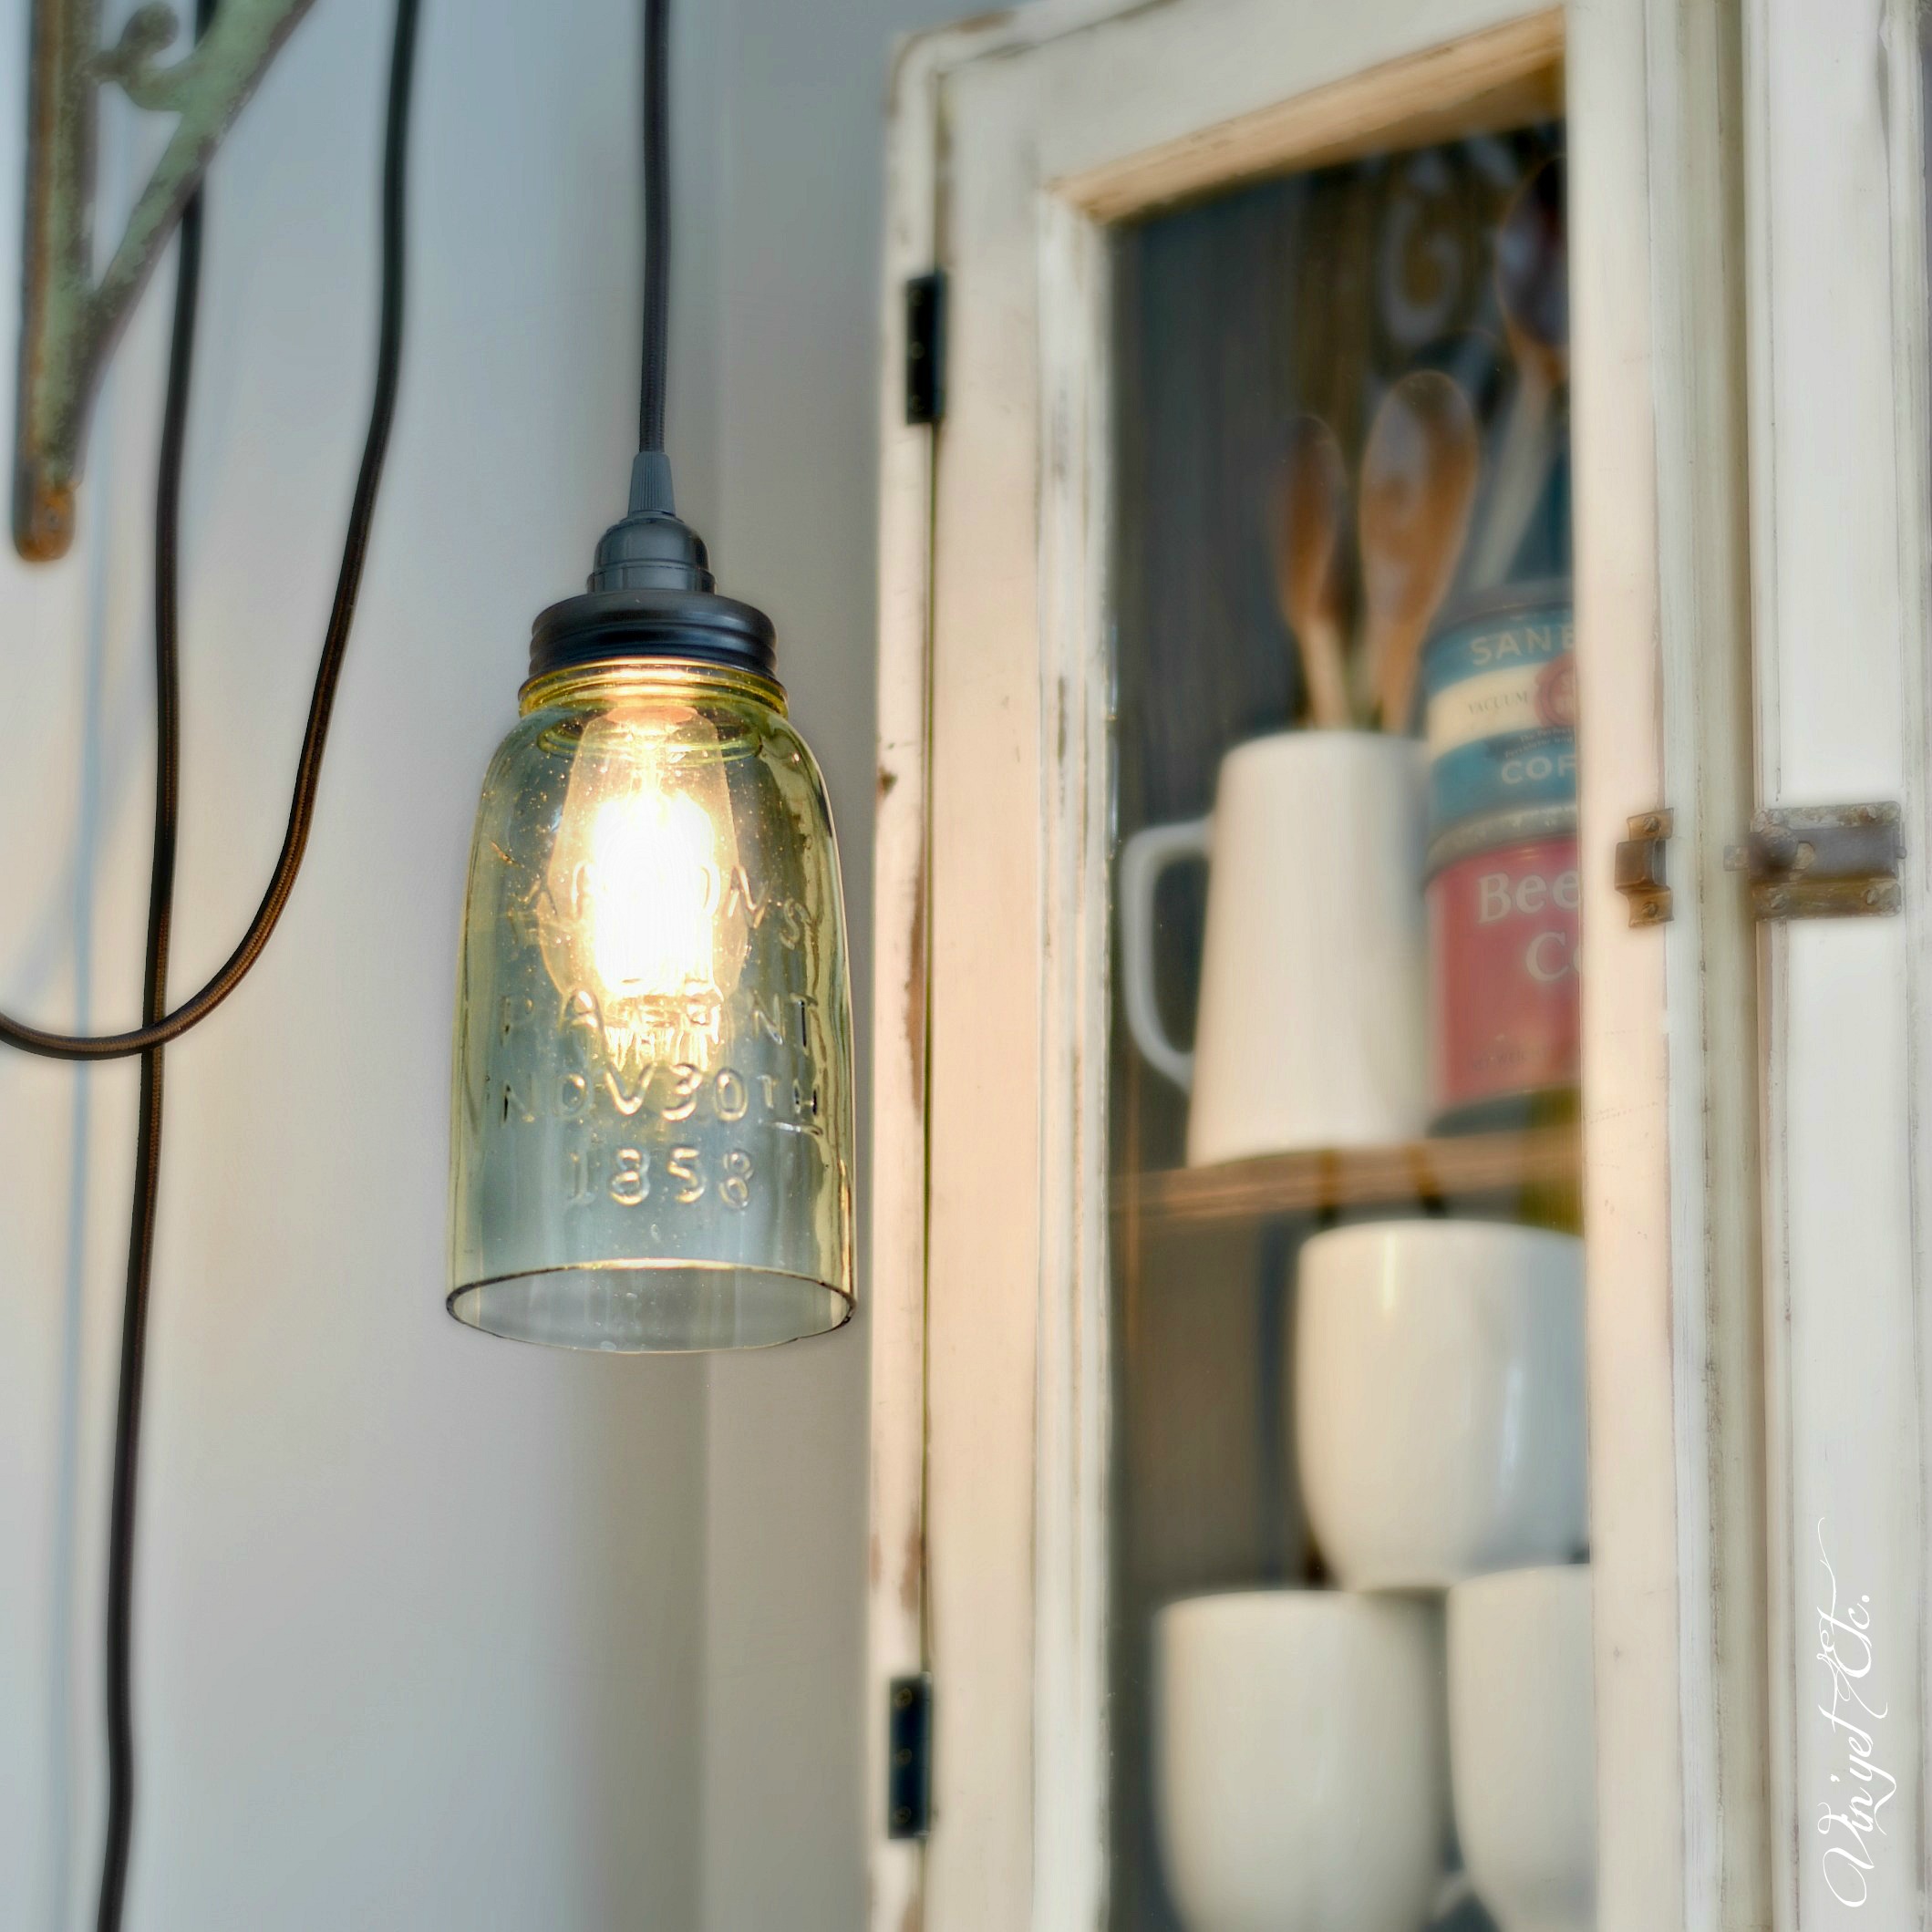
I’m very happy with the way this DIY farmhouse light has turned out… it really adds a nice farmhouse vibe to this coffee station in our kitchen.
Now on to the DIY part…
The items you will need on hand:
Eye protection
Gloves
Face mask (I’m sure I was being over cautious but better safe than sorry)
Kettle
Cold running water
Ikea lighting kit (approx $10)
A mason jar (as mentioned above I used an antique replica jar and this specific mason jar had a solid metal screw top)
Glass cutter/scorer
Clamp
Drill with sharp bits
Sand paper (220-600 grit)
Wire cutters
Dremel
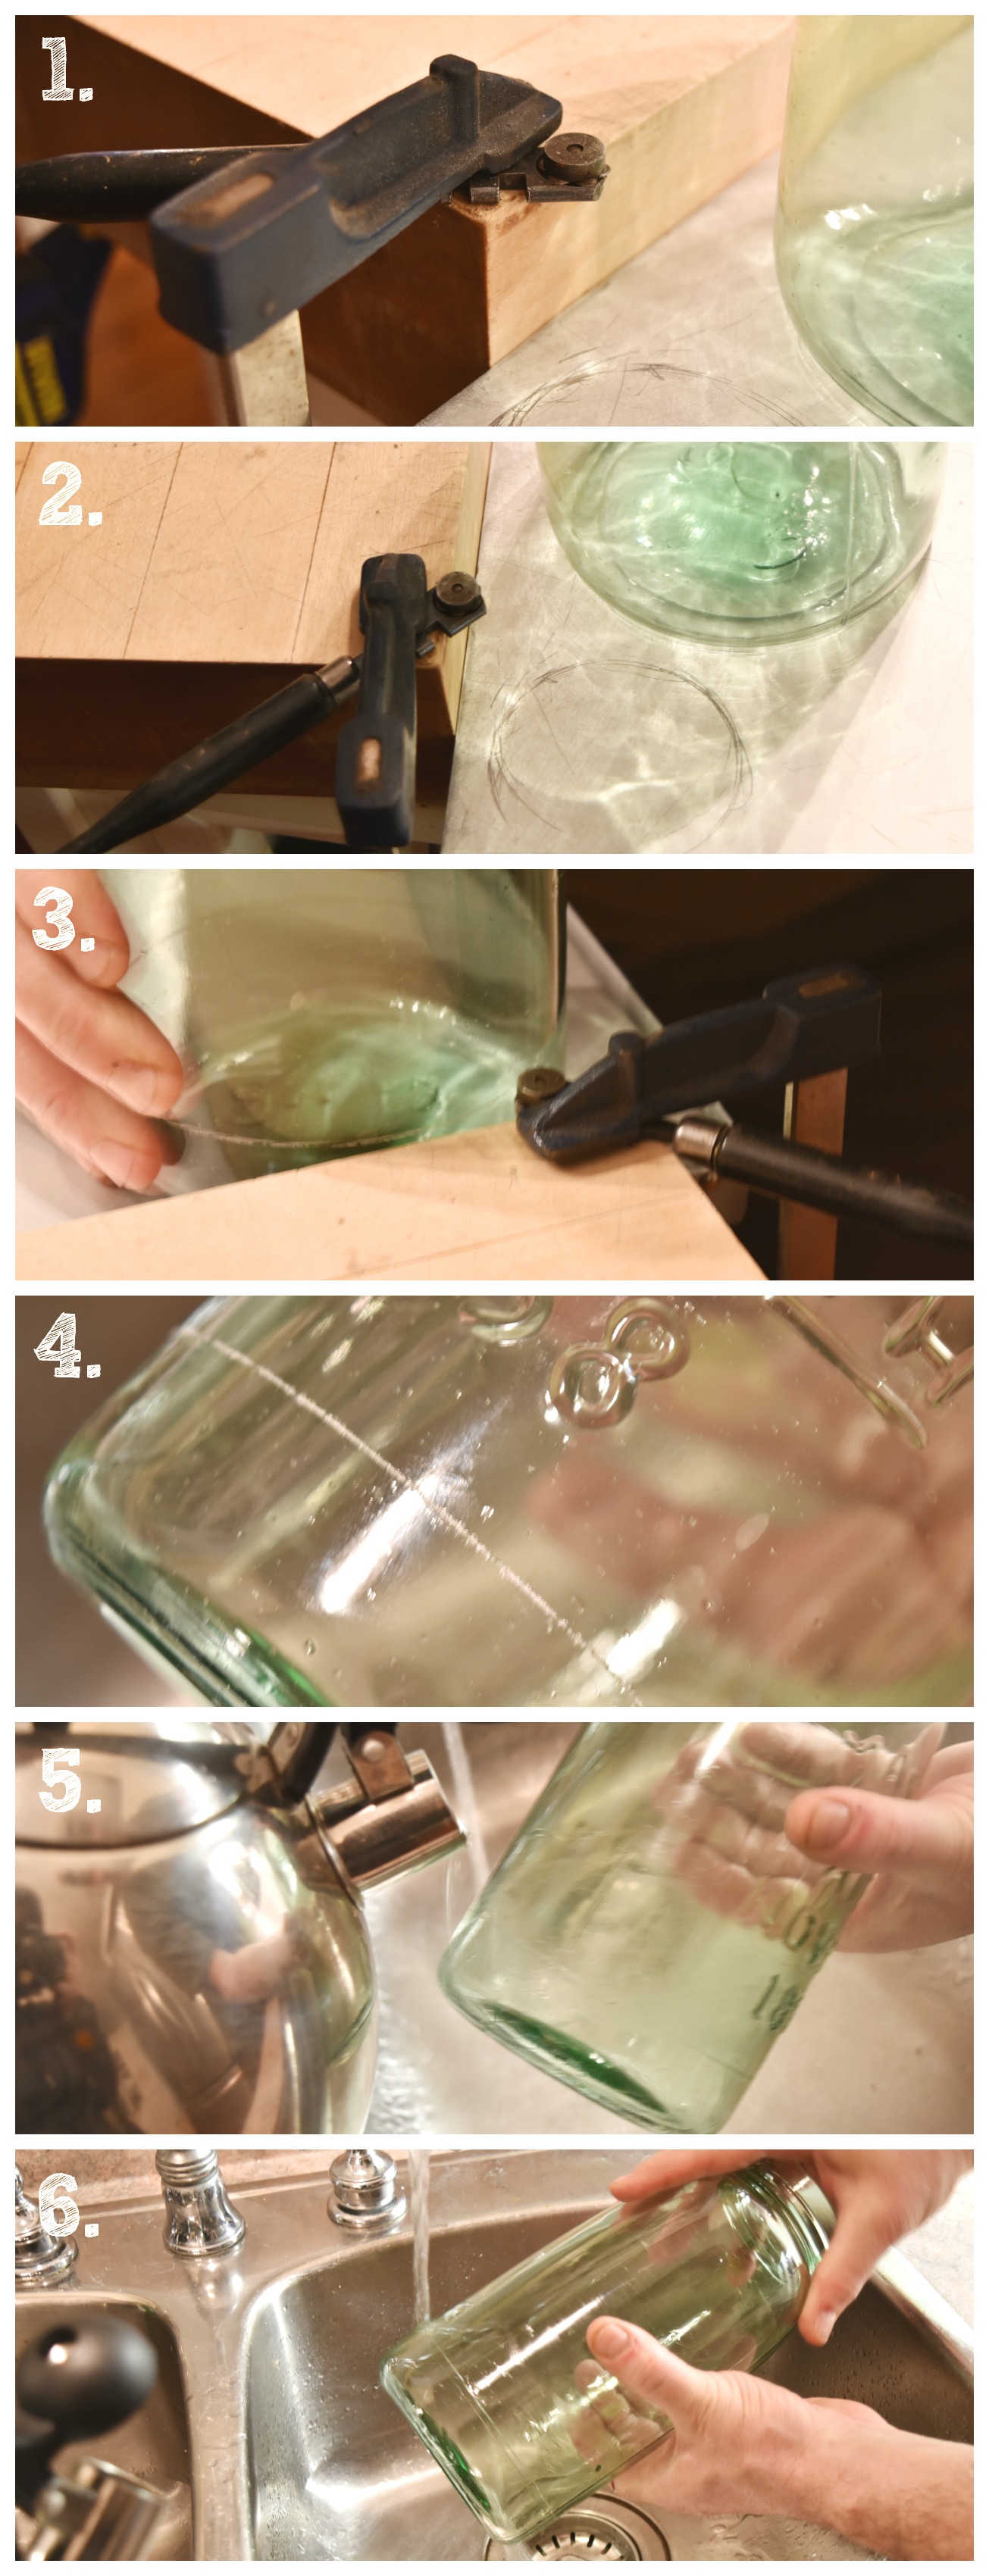
Glass cutting steps:
1. Clamp the glass cutter down onto a very secure surface that will not move.
2. Ensure the height of the cutter is where you want it relative to your mason jar.
3. In one movement press your jar very hard into the cutter and turn it all the way around until it meets where you started. Try very hard to make this only one move and do not go back over your score, this will weaken your glass and may cause it to break or crack where you don’t want it to break.
4. This is what your score line should look like, again press hard and turn against glass cutter just once.
5. Boil water in a kettle, over a sink pour the hot water DIRECTLY over the scored line only, turn it as you pour. You may need two people for this part, turn it a couple of times under just hot water.
6. Have your cold water running, take your mason jar and run the cold water DIRECTLY over the scored line only, turn the jar as you run cold over the scored line, turn it a couple of times under just cold water.
7. Repeat steps 5 and 6 until your glass separates, in this case the bottom of our jar just dropped into the sink, it was a very nice clean cut.
**Some of things we learned while scoring the glass, you will need to press very hard, we found it very helpful to clamp the glass cutting tool down onto a very secure surface that would not move. Score in just one move, make sure not to go back over your lines as this may cause cracking where you don’t want it. Pouring your hot and cold water on the scored line only will stress the score line and not the surrounding glass, again this lessens the chances of your glass breaking where you don’t want it to.
 Fitting cover to light kit steps:
1. Use the inner ring of light kit to determine the hole size for the top of your cover (inner ring is the ring that screws onto the light socket and holds the light shade onto the light).
2. I used a pencil crayon to trace this circle onto the top of the metal top.
3. Drill small holes closely together following the circle.
4. Follow the circle all the way to where you started.
5. Use wire cutters to snip the small spaces between the holes and remove the center piece completely.
6. I used a dremel to even out and smooth the edges of the open circle.
7. I drilled vent holes all around the very outer edge, this will let any heat from your bulb escape safely.
 Sanding your cut glass:
1. The tools I used, 220 & 600 grit sandpaper, a face mask, gloves, a soft cloth and eye pro.
2. Start sanding the cut edge of your glass with 220 until any imperfections are gone.
3. Finish with the 600 grit until the edge is very smooth to the touch.
When everything is cleaned up, assemble your new light and enjoy!

This challenge was a lot of fun & I am in love with how this farmhouse light turned out!
Now it’s time to see what my Canadian blogging friends have created, be sure to visit their DIY mason jar projects for some major inspiration.
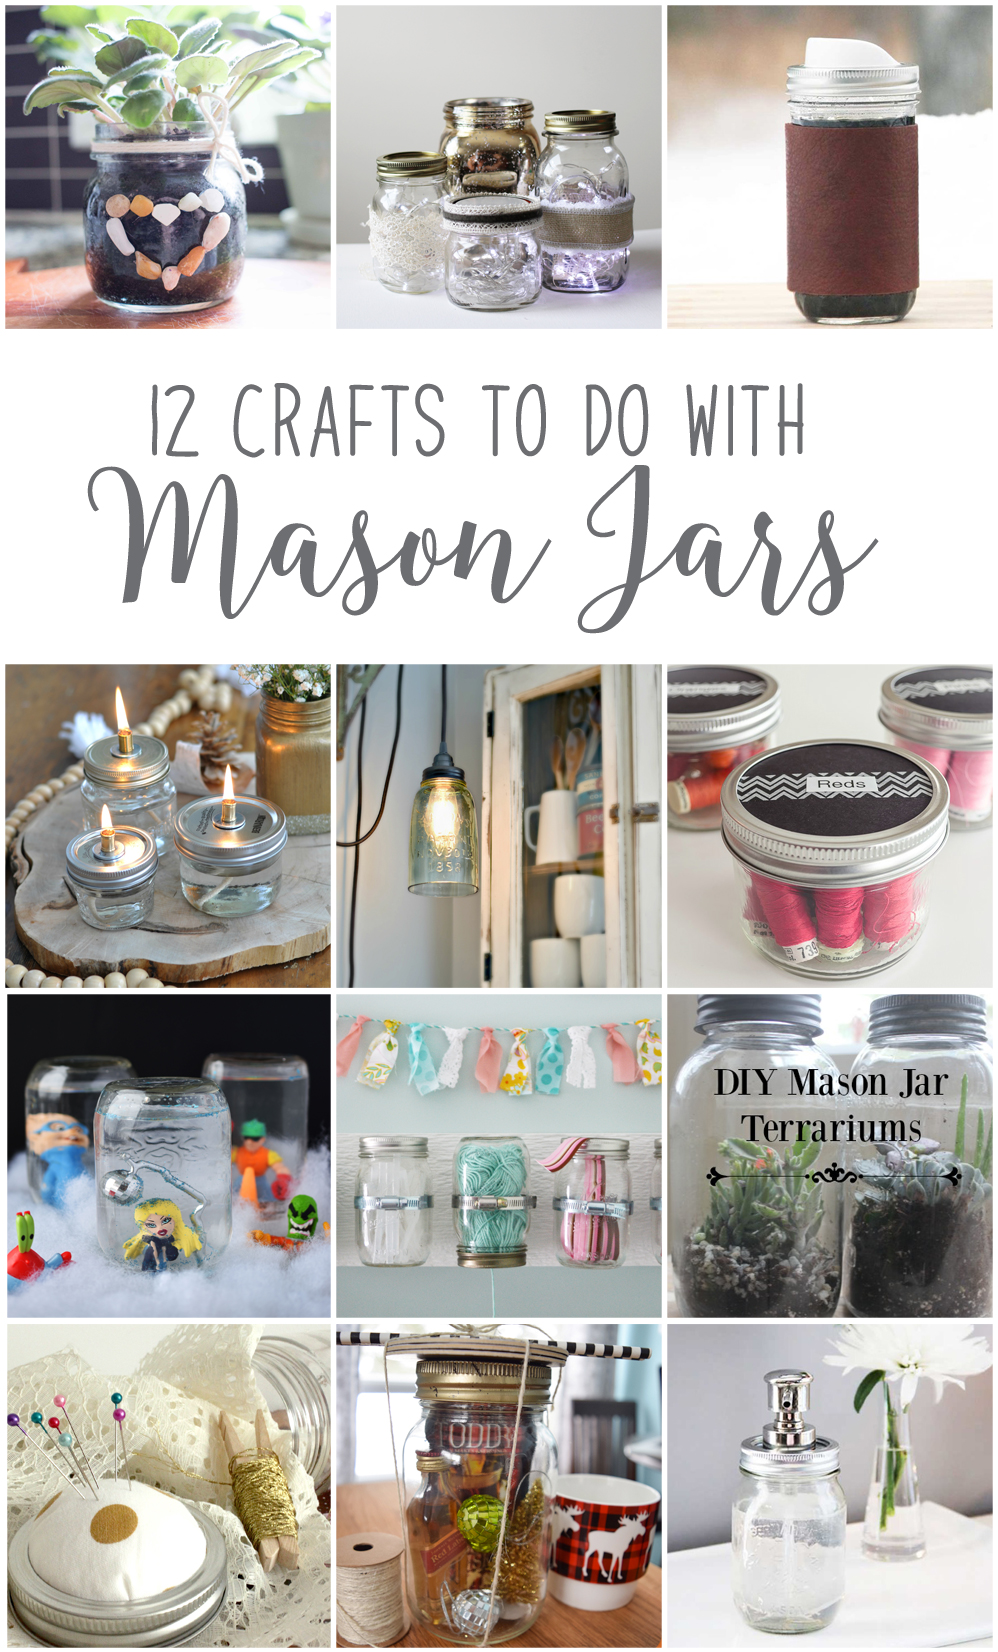
From the top left, they are:
Upcycled Mason Jar Planter from Sustain My Craft Habit
Mason Jar Fairy Lights from Brooklyn Berry Designs
Mason Jar Travel Cup from Fresh Crush
Mason Jar Oil Lamps from Life Is A Party
Mason Jar Farmhouse Light from Vin’yet Etc.
How to Store Your Sewing Thread Stash in Mason Jars from Time With Thea
How to Turn Old Toys Into Snow Globes from Woman In Real Life
Hanging Mason Jar Craft Storage from The DIY Mommy
DIY Mason Jar Terrariums from New House New Home
Sewing Kit in a Mason Jar from Mommyzoid
Hot Toddy in a Mason Jar from PMQ For Two
Mason Jar Soap Dispenser from Fresh Crush
Thanks so much for stopping in!
![]()
37 Comments
Wow amazing! I love this, it turned out so great. Has me thinking….where could I put one of these in my house? lol. Great job.
Thanks Dannyelle! The nice thing about this little project, it can go anywhere. 🙂
Oh Laurie, that looks really, really good!! I’d be afraid to cut the glass but you make it look doable – thanks for your tutorial!!
Thanks Heather, really so easy to do!
Fantastic!!! Love this.
Thanks lady, you’re so supportive and awesome! xo
It is brilliant! Your ideas are always fantastic and the tutorial for this one is so well done!
Thanks Cynthia! xo
We were just in a restaurant over the weekend that had something like yours hanging all over. So beautiful!
Thanks Shauna, I am really happy with the way this light turned out, perfect for our coffee corner!
How cool! You even made cutting glass look easy!
LOL, Thanks Pam, it is pretty easy, that boiling water and cold water trick is the ticket! 😉
Love how the mason jar turned out. It so reflects your fabulous farmhouse design style. Your tutorial was also so detailed and easy to follow!
Thanks Thea! 🙂
This is such an amazing idea. Cutting glass terrifies me for some reason. I love the lights!
Thanks Brooke, it used to scare me too, seriously the boiling water and the cold water works every time… and I practiced a lot. 🙂
Wow! Wow! Wow! I’m wondering where I can hang one of these in my house! It’s perfect hanging from the bracket like that in your place.
The nice thing about this project is… you can gear it towards your own style, if you have a particular jar that suites your style, it’s so easy to make it into a light shade… and these lights can go anywhere… 🙂 Thanks!
This is so beautiful Laurie! You did an amazing job. And now I want one… I have a bunch of vintage jars and I need to get my husband working on this with me! 🙂
Thanks Joann, it was so awesome to turn a jar that was collecting dust into an awesome light, I love it, you totally have to make one!
Of course you did this 😉 How perfect for your stunning farmhouse. Can’t wait to see what you do next month.
Hahaha, oh oh, I’m becoming practicable! 😉 Thanks! xo
Laurie,
Great idea, awesome results! One thing that jumped out at me, though. I do Stained glass work, and the bottoms of those jars could be cut down and ground(Or sandpapered) into cool vintage rondelles and incorporated into a window panel. I have used the lids, but no reason why you couldn’t use the bottoms. If you don’t do stained glass, maybe pass them on to someone who does..it’s a 2-for-one!.
Hi Kathie! That’s a perfect solution, thanks so much! I actually have kept the bottom of the mason jar I used for the light… I wanted to smooth the edges and use it as a ring catcher, the others I recycled. I love the look of the rondelles in a beautiful vintage window, if I do this again, I will for sure same my cut off pieces, thanks for that idea! 🙂
HI Laurie It looks great, The size and shape of the light bulb make it even more impressive. great job! Cathy
Thanks Cathy! 😀
Very impressive! The idea of making lights has always intimidated me but you make it look so easy. Great job.
Thanks Sonja! So easy, you really should give it a try!
This is just EXQUISITE! Now you make me want to give cutting glass a try. Thanks so much for sharing the tutorial and for joining our crafty year of DIYs! So glad!
Yah, I’m so glad to be apart of such an awesome group of Canadian goodness! Cutting glass, it’s not as hard as it seems, especially with the boiling water and cold water trick, works every single time! PS I love that word, exquisite! 😉
Great DIY! I am a big farmhouse style lover and may just have to find a way to work this into my decor. Your post was shared at the Make and Mingle linkup party and is a feature this week! Here’s a link to where you can find it http://bubblesandboxwood.com/make-and-mingle-linkup-party-2/
Have a wonderful weekend and keep inspiring!
This is so cool, Laurie!! Totally pinning. 🙂
Thanks sweet friend! xo
You took on two things that I’m totally chicken about: cutting glass and rigging electrical. You did such a great job! Maybe I can get brave enough to tackle this one…
The glass cutting was fairly simple, the electrical was easy!!! It’s a light kit from Ikea, so it’s literally plug and play! 😉
You did a fantastic job Laurie! I love the classic/vintage look. Thanks for sharing on our page!
Oh my goodness! The next time I go to Ikea I’m picking up one of those light kits. Nothing says farmhouse more than a Mason jar light!!! Thanks for sharing on our new FB page. Pinning this great project of yours!