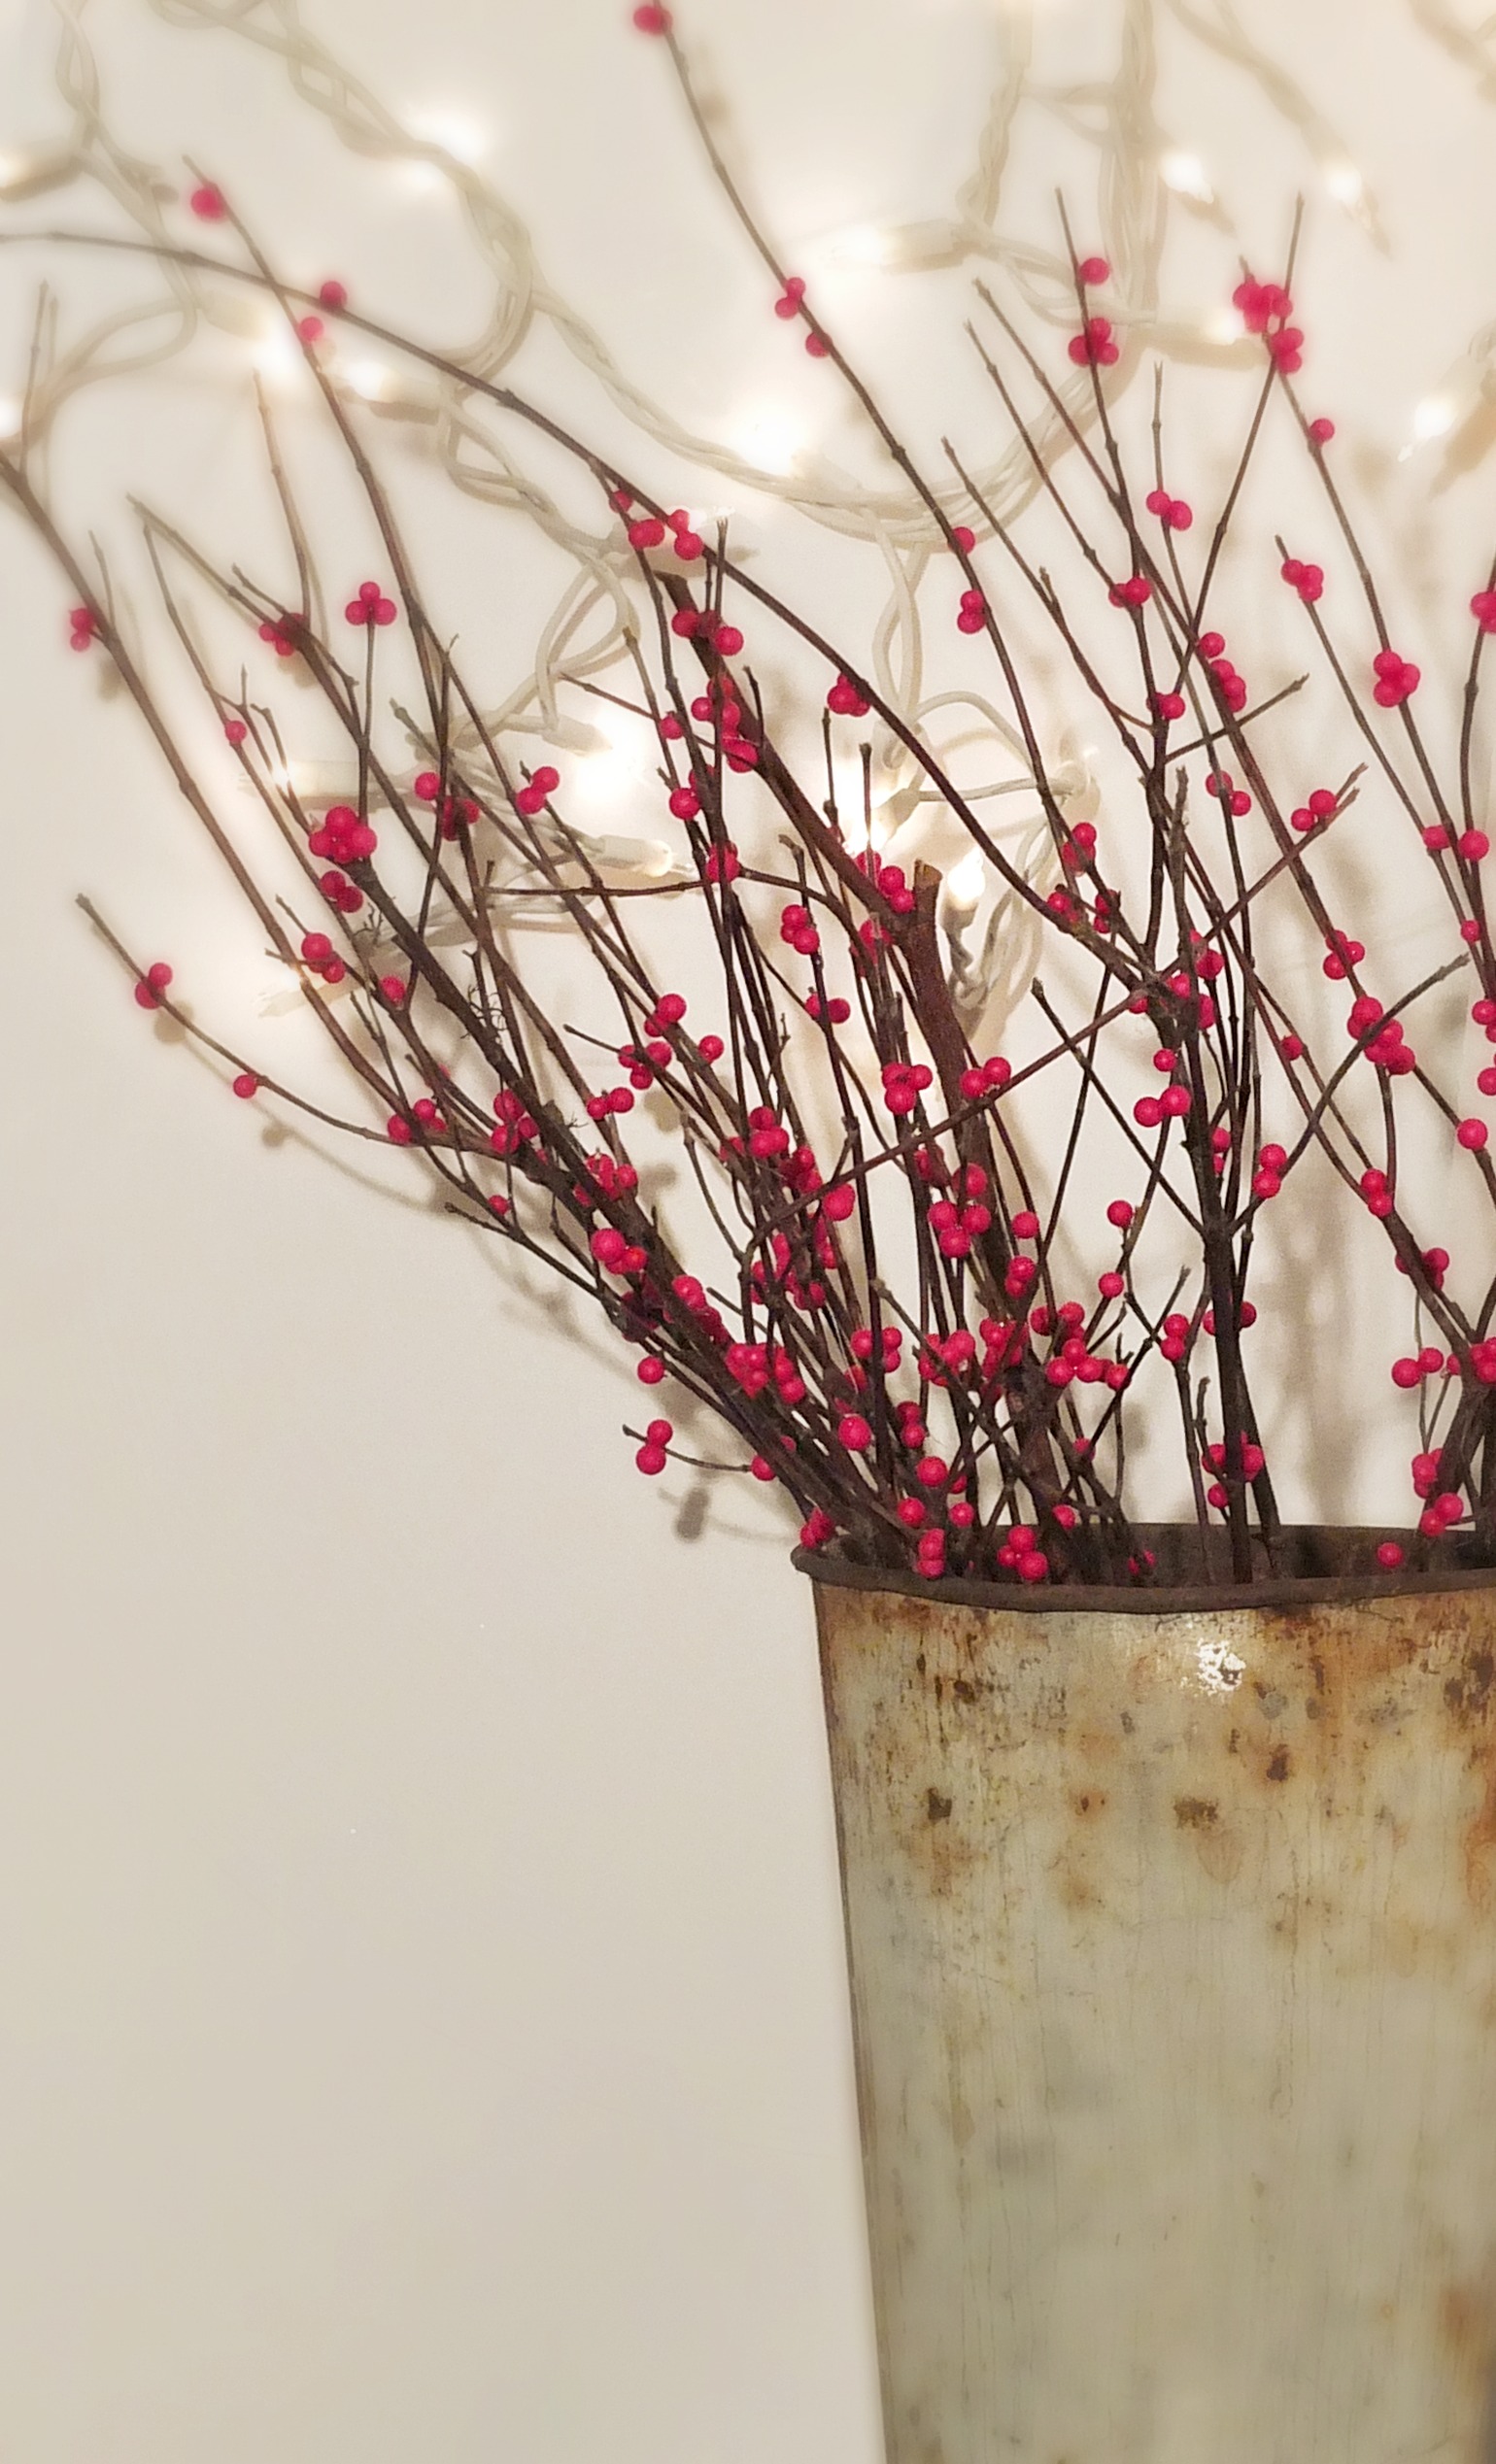
Ever since I first saw these beauties I’ve been in love, these gorgeous little berries are called, Winterberry.
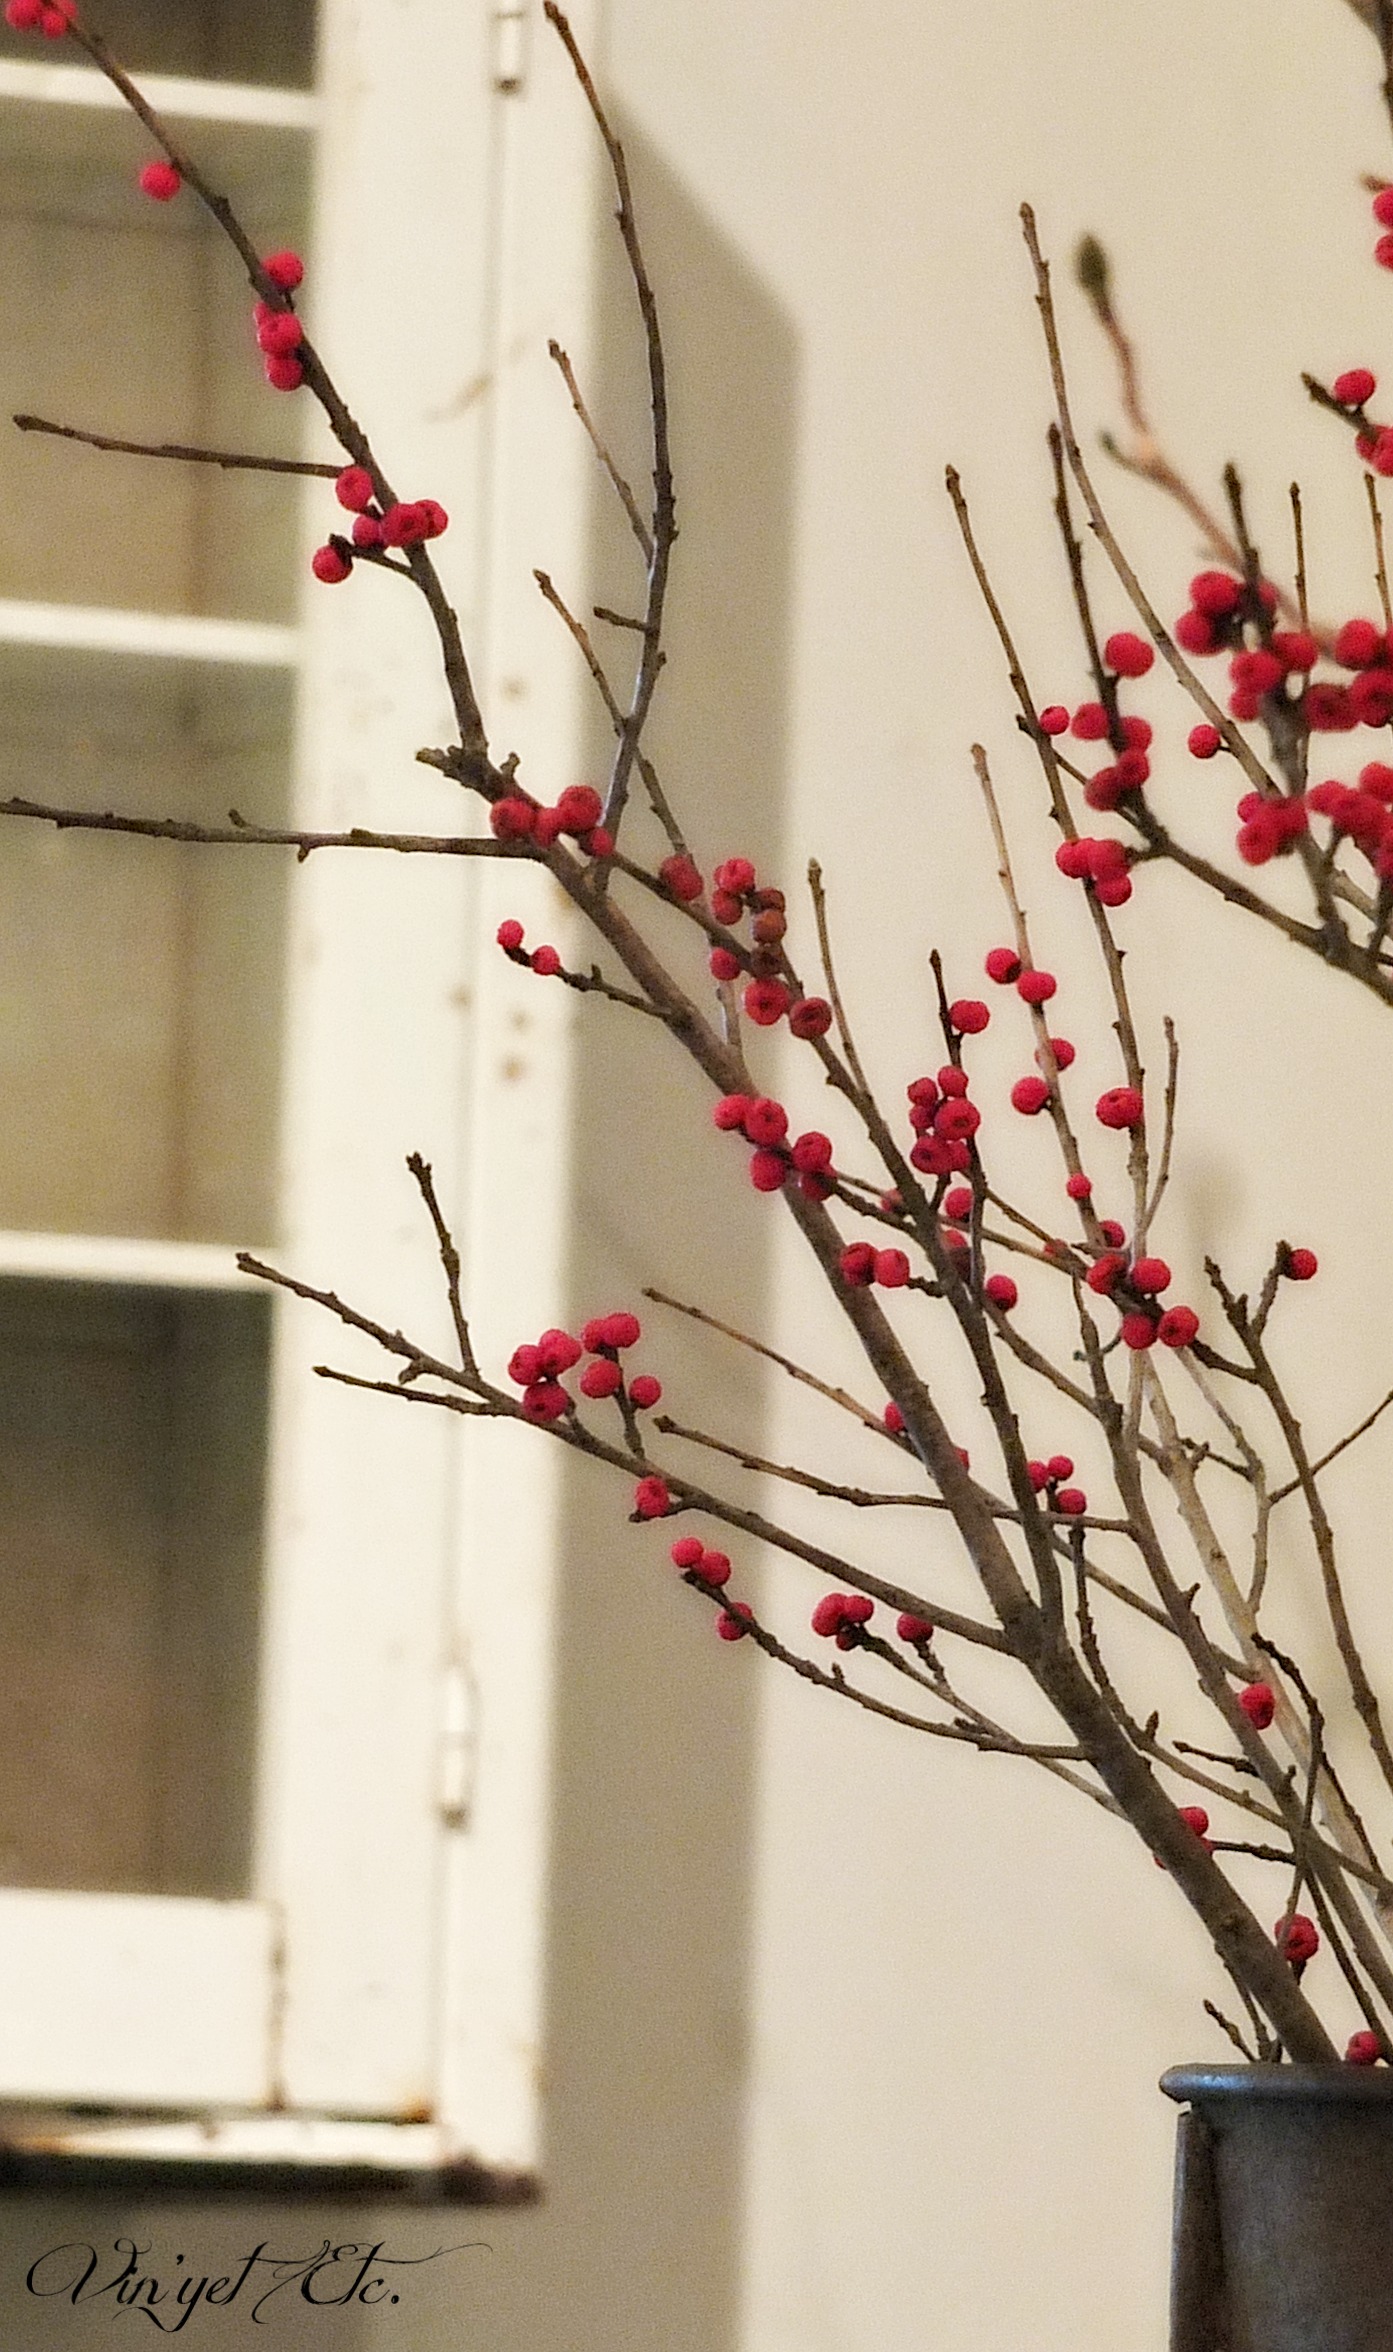
They add such a pop of colour, that red = swoon! It’s especially wonderful around Christmas time… and that is why I decided that this was going to be my first project this holiday season. An easy and inexpensive way to add this beautiful pop of red to our home.
I have wanted my own dried winterberry since forever and since I don’t have my own Winterberry bush (yet) I needed to figure out how I was going to get them into the house! I just couldn’t imagine myself buying the expensive knock offs.
I decided that I was going to make them after a swoop through the dollar store one day when I found these red decorative balls!
TaaaaDaaaaa!
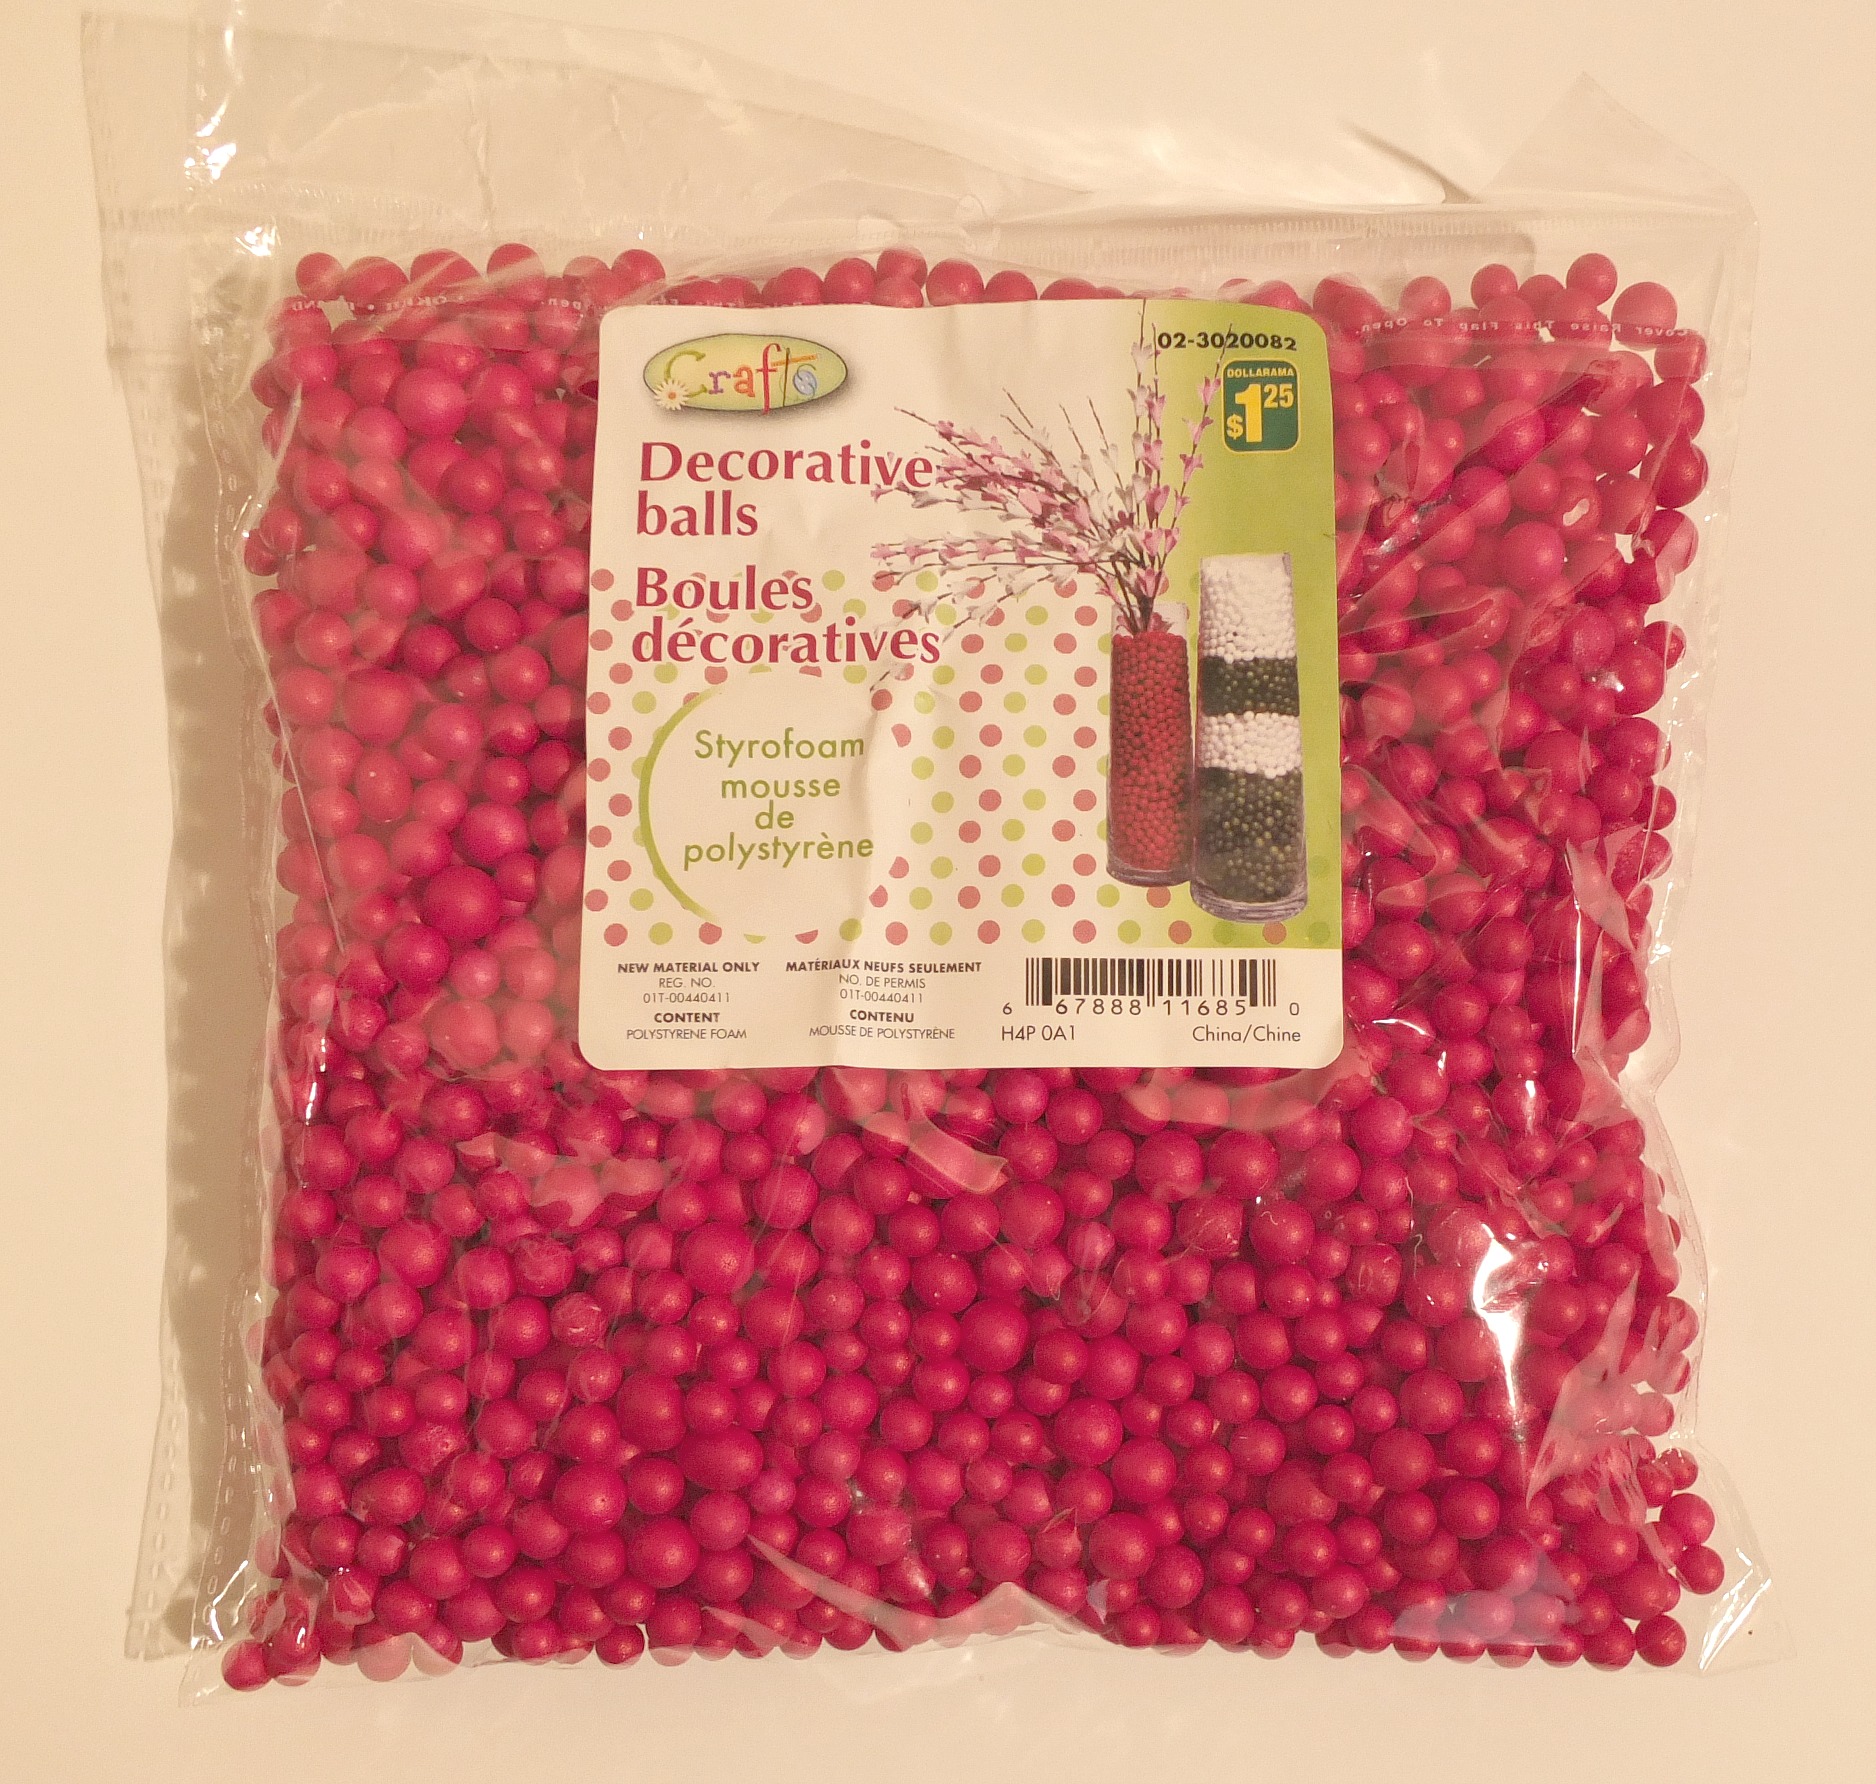
Okay, so maybe a bit too much excitement for red styrofoam balls, but they are the perfect size and colour, when paired with these lovely branches…
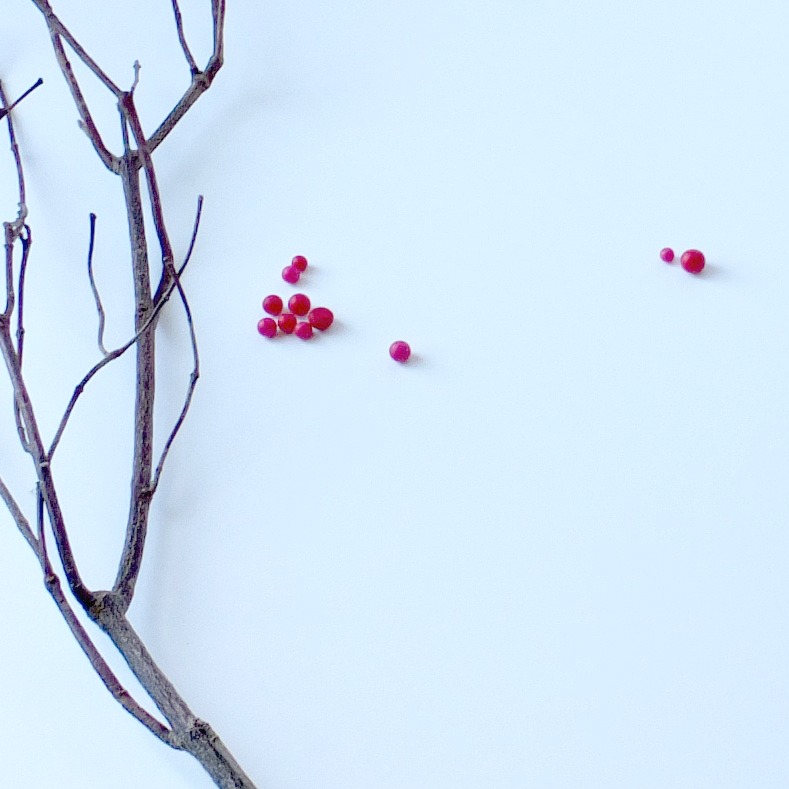
They are perfect!
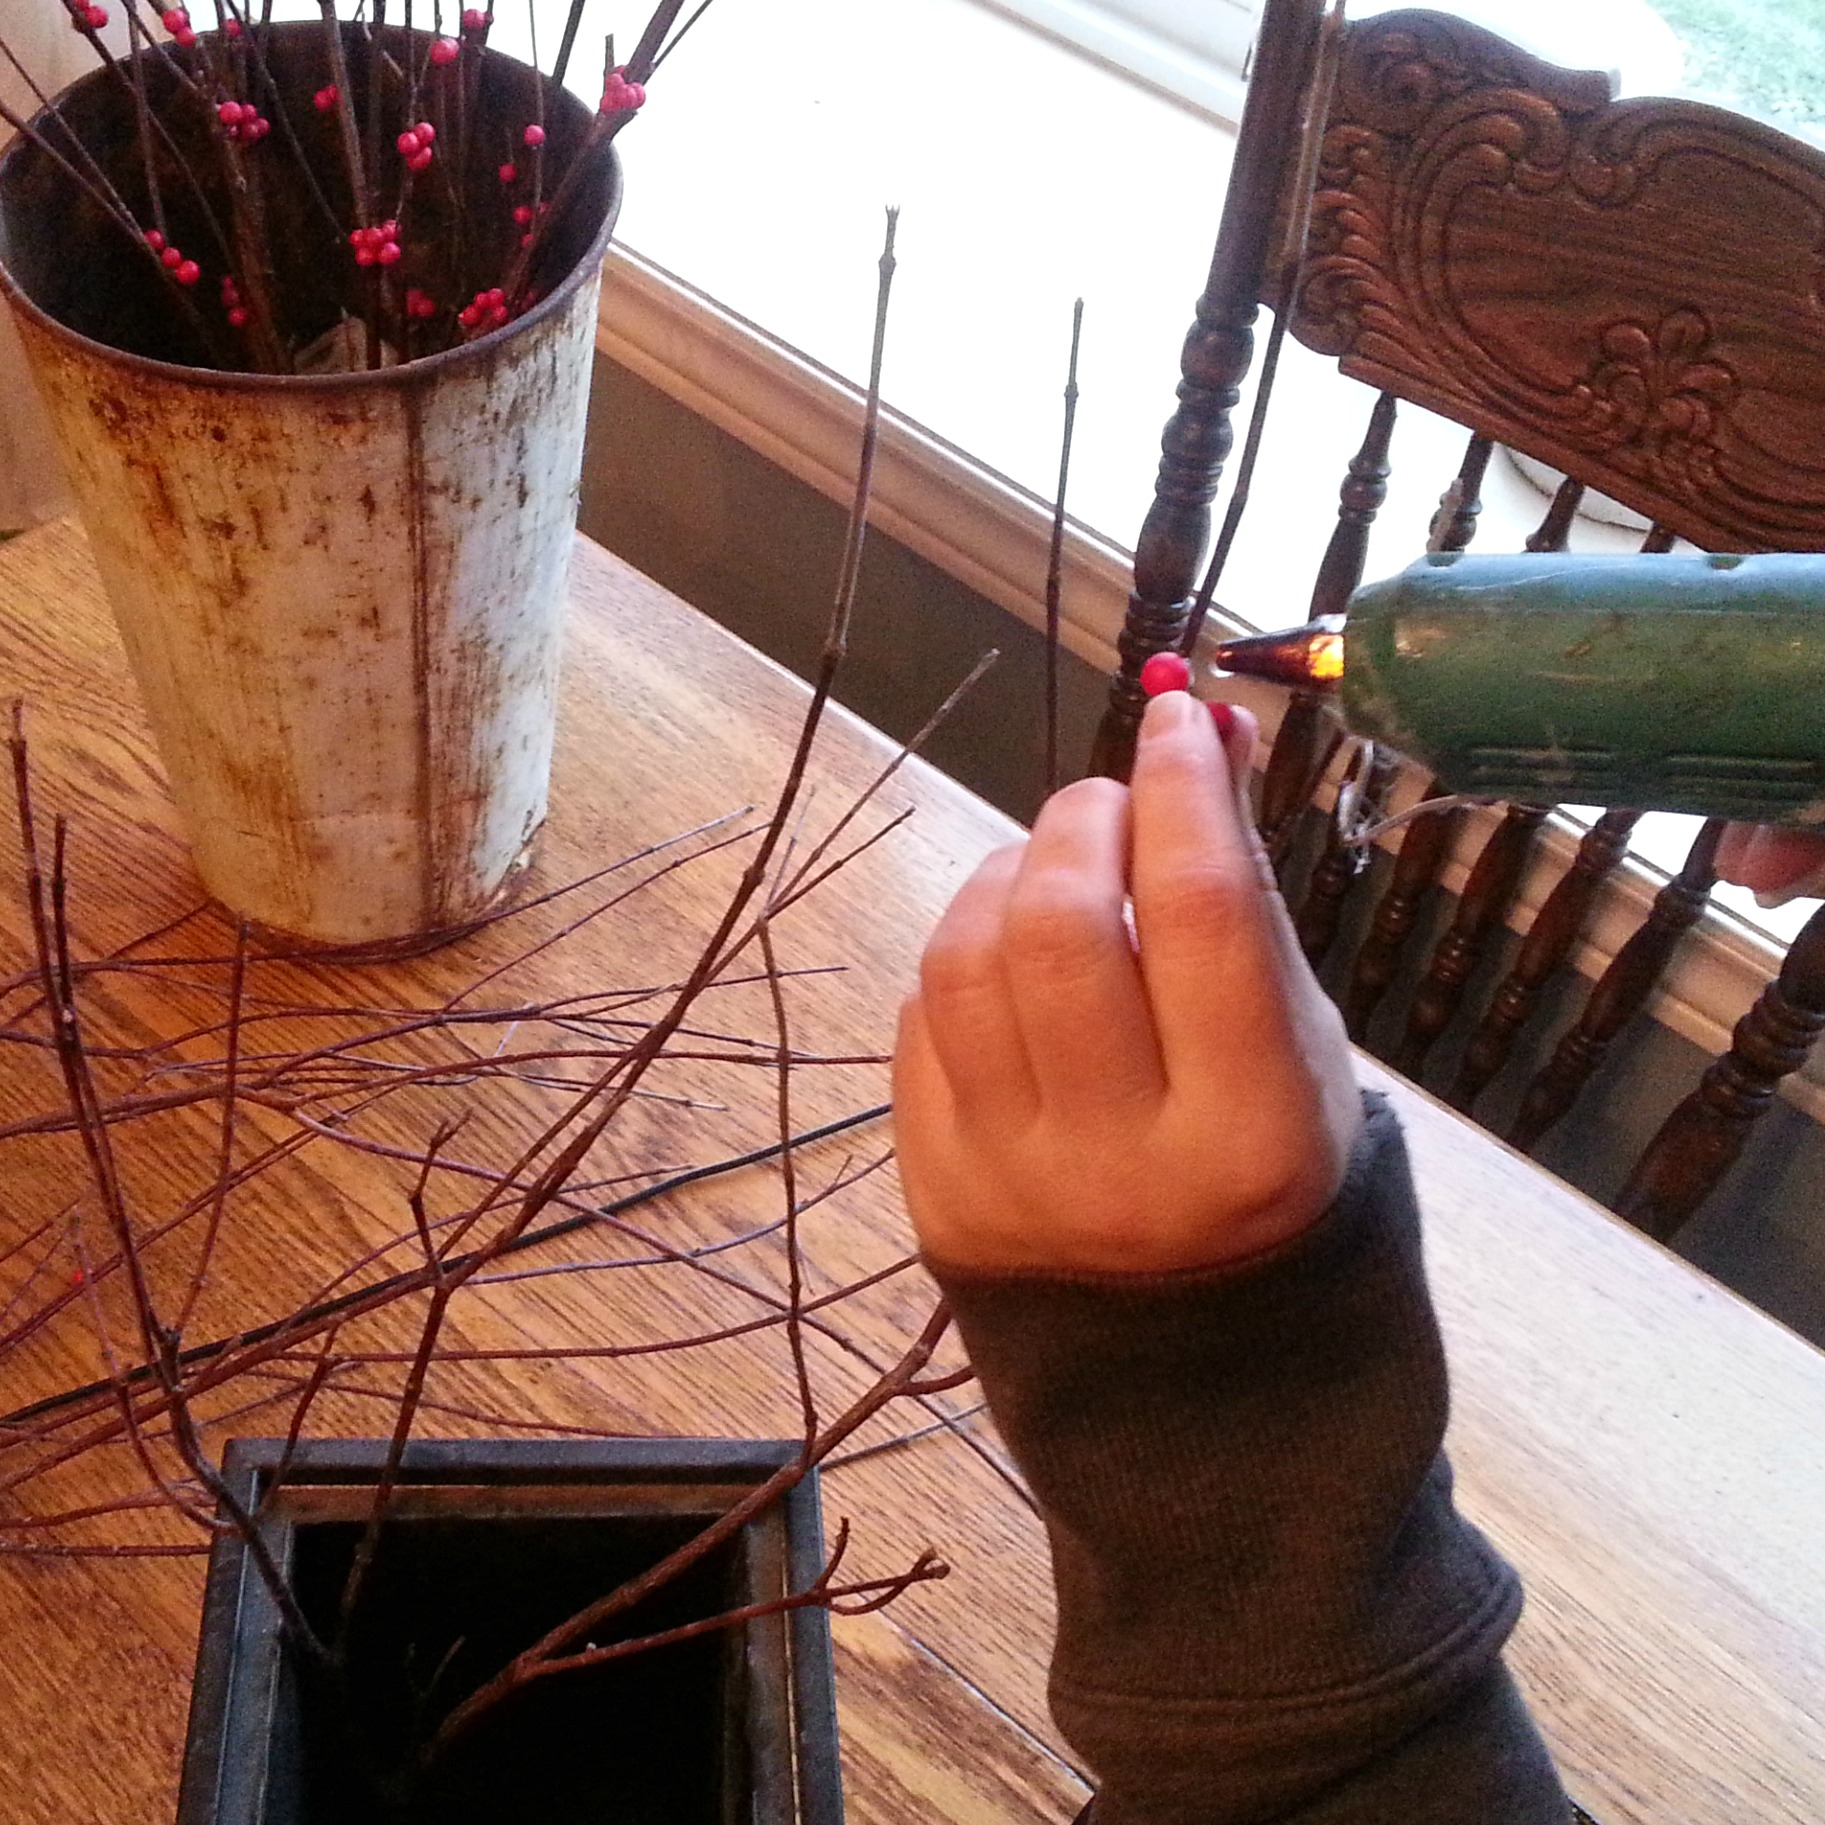
The tutorial is rather simple… I used a photo of some real dried winterberry, the first photo in this post and basically hot glued the little “berries”, using that photo above as a guide…
I told you, simple!
*no fingers were harmed in the making of this Christmas craft*
I was pretty pleased after just the first one.

Okay, so here is the low down, the total cost… $1.25! Yes you read that right! I had the branches kicking around the house and didn’t even need to step outdoors to branch hunt! This whole process took me less than an hour, cost less then 2 dollars and in my opinion look just as good as the real deal.

I can see these beautiful branches used to make gift swags, added to a vintage vase for that special someone or alone and wrapped in cellophane with some beautiful ribbon, I know I would be thrilled to receive these lovely branches as a gift! I will be adding touches of winterberry all over our home for Christmas as decor, they will be the perfect addition to our Christmas and to the gifts we will be making this year, a little extra touch of magic.
There you have it, my kick off craft for Christmas, I hope the rest of the projects go this smoothly. I must admit I am getting excited for Christmas and have tons of plans dancing through my head… wish me luck in getting everything done! 😉
Make sure to check out all of the wonderful handmade holiday ideas by following along at #CDNHandmadeHoliday
![]()

51 Comments
Your winterberry branches look great! I have bought the fake stuff and it’s the same styrofoam balls, but much more expensive. Great idea!
Thanks Sheila!!! I know, i just couldn’t bring myself to shell out the money for the fakes… I’m a cheap-o! 😉
You have more patience than I my friend! Great job and very pretty idea!
HA, actually this took NO time at all, much easier than any craft I’ve ever done! 🙂 xo
These are a great knock-off. So creative, and I love how they turned out…wonder if I could make them with white? Thanks for the inspiration.
Hi Dannyelle, Thanks! As a matter of fact the little white Styrofoam balls are the only reason I saw the red in the first place. I was making a garland for a client and when I spotted the red I just knew I needed them. Thanks so much for stopping in!
Holy turds this idea is genius!! You can’t even tell they aren’t legit!! Great idea
Hi Virginia, I think I have a new favourite comment in the history of forever now! Holy turds, I must incorporate that into my daily lingo!!! LOVE it! lol Yep, genius, except I missed the fact that it was supposed to be a gift, I’m a huge dork… trying to do too much! :/ Thanks so much for taking the time to pop in with that amazing comment! <3
Every day there’s a new reason to love the dollar store. I never buy the winterberry boughs cuz they’re so expensive! Solved!
xo
I know right! I never thought to go into the dollar store for past projects, I kick myself now. You bet that’s where I look first when I need bunches of something. 🙂 I just made some more of these beauties last night… Easy!
Well – genius! I would never have thought of doing that, but your faux winterberry looks like the real deal. And you really had me at “easy”!
I loved this idea! So simple and so beautiful.. I’m totally going to give this one a try!
GHreat Idea ~ Gonna be making some of my own winter berries as I too do not yet own a winter berry bush ~ Thanks for sharing Laurie
Oh I would never know the difference between the real ones and the fake!! Nicely done Laurie and now you’ll have some winterberry branches to decorate with every year!
Laurie – this is genius! I didn’t know you could do this! I’m definitely picking up some of these Dollarama balls. Wowza!
What a fabulous idea! I love the variation in the size of the red balls..definitely something to get excited about.
Great idea! I saw those foam balls at the dollar store too. I may need to do this.
Wow! I love this idea. You seriously can’t tell the difference! They look amazing.
Have your fingers healed yet? 😉
This is such a great idea Laurie! And I’m glad you didn’t burn your fingers – glue gun burns are THE worst LOL!
You are so crafty, Id have every finger burnt off if I did this girl
It is beautiful
How fantastic! What a clever idea… now, if only I had the patience you do!!
Can’t wait to see all of your beautiful holiday decorating. I always get wonderful ideas from you!! 🙂
I am going to look for these, what a neat idea.
For : Danyelle:
I have seen a tutorial for the white and they used ends of q-tips.
I have seen the q-tip idea… but these little red balls also come in white… that’s my next craft project. 🙂 Hope you find them!
Absolutely unreal and amazing!!! I want to do this!
LOVE THIS!!!!! I’ve always loved this look but like you said, the branches are so expensive!! I bet white birch branches would look lovely too!! Thank you for sharing this craft. PINNED!!!
Did I miss where you purchased the red balls?
Hi there, I purchased the red balls at the dollar store. The one I go to is called Dollarama. 🙂
Those are so pretty! I thought that they were real. What a lovely idea.
You are brilliant… these are beautiful!
Thanks so much Susan! xo
I would like to get email updates from you but I can’t join your eamil updates. It says that emails updates aren’t embeded.. Which I think means it won’t work. You might need to check it out by someone at your end.
Thanks Wanda, I’ll look into that. Appreciate you letting me know. 🙂
I love this! I wanted some too and couldn’t find any that looked like the real deal–and the ones I found were $7 a stem.
At which dollar store did you find this? Dollar Tree, 99 cent only store, or another?I’ve found that not all stores carry the same things and I’d love to only use gas going to the right store 🙂 Please share; I really want to make these right away!
Hi Brandy, the dollar store I went to was called Dollarama. We live in Kingston, Ontario. I sure hope you can find one in your area? Good luck! 🙂
Thank you for sharing! I’m in the states, but I will look for these! I have wanted some for years and I never see any that look real; yours do!
Laurie, they look great–those buggers are expensive! Thanks for saving me some $! Im doing this too!
Cool Karen, let me know how you make out. They are very expensive, that’s exactly why when I saw these little balls the light bulb went off.
I love the look of this! Think if you sprayed it with spray adhesive and dipped in epsom salt it would look iced? I’ve been looking at the faux iced branches but it would be hideously expensive for the amount I want. I want to go looking for these little styrofoam balls, but it’s black Friday and I hate crowds…but I want these branches…but I hate crowds…
Hi Emily! I’m not sure about the epsom salts, I know that they do pretty much everything so maybe give it a whirl? 🙂 I hear ya, the crowds would be intense for sure. I’d be curious to hear back if your idea works. I know they also sell sparkly snow in craft/dollar stores, that might be an option too?
Husband is out in the woods doing his hunting thing and I’ll be left home alone (well, with kids, dogs and cats) to experiment! If you don’t hear back, you’ll know it didn’t work out so well.
Very creative idea and love cheap too! Thanks for sharing! Like Emily’s idea about epsom salt. Never heard of using but worth a try. That would look good on pine cones too. I sprinkle glitter on pine cones but use mod podge for the glue. I tried the adhesive spray before and it stays sticky in the spots where the glitter does not stick and then it collects the dust.Happy decorating!
Oh my goodness you have so much patience!
Winterberries are just about one of my favorite Winter things. Something about the red and rustic, lol. Your’s look so real. I’m gonna be on the look out for some of those red styro foam balls because i want to make these!! Sharing ;D
What a fantastic idea! They turned out so beautiful and realistic looking. Pinned!
Lovely, how long did it take to glue all those little balls on?? Looks tedious, but very cute!
Hahaha Annette, that is the beauty of this project, I am a very impatient person, instant gratification kind of stuff… it looks tedious, but is not. This took me less than an hour, place a bit of glue on the branch and stick a ball on… easy and fast. Thanks, I love the way it turned out.
Am I the on person who is unable to locatballse the red foam balls
Hi Diane,
I am so sorry you are not able to find these red styrofoam balls… are you in Canada? That is where I get them, at my local dollar store here in Ontario, it’s called the Dollarama. Here is a link to it, maybe you can have a look on their web site and see if they can ship them or have your local dollar store order them in? http://www.dollarama.com/
These turned out amazing, Laurie! I don’t know how you kept from getting hot glue everywhere (like I would have), but I’m impressed!
Hahaha Angie, it’s such a funny thing, me and the glue gun, I can work on fussy little things and be clean as a whistle and give me something bigger and I have glue every where… my husband doesn’t like when I try to do the caulking for a project, it’s like it has a mind of it’s own. 😉 Thank-you, I am glad you think they turned out good, I still have the ones I did last year tough little buggers. 🙂
You did a phenomenal job! Yours looks just as nice as the real thing. But yours will last a lot longer. You truly are an artist!