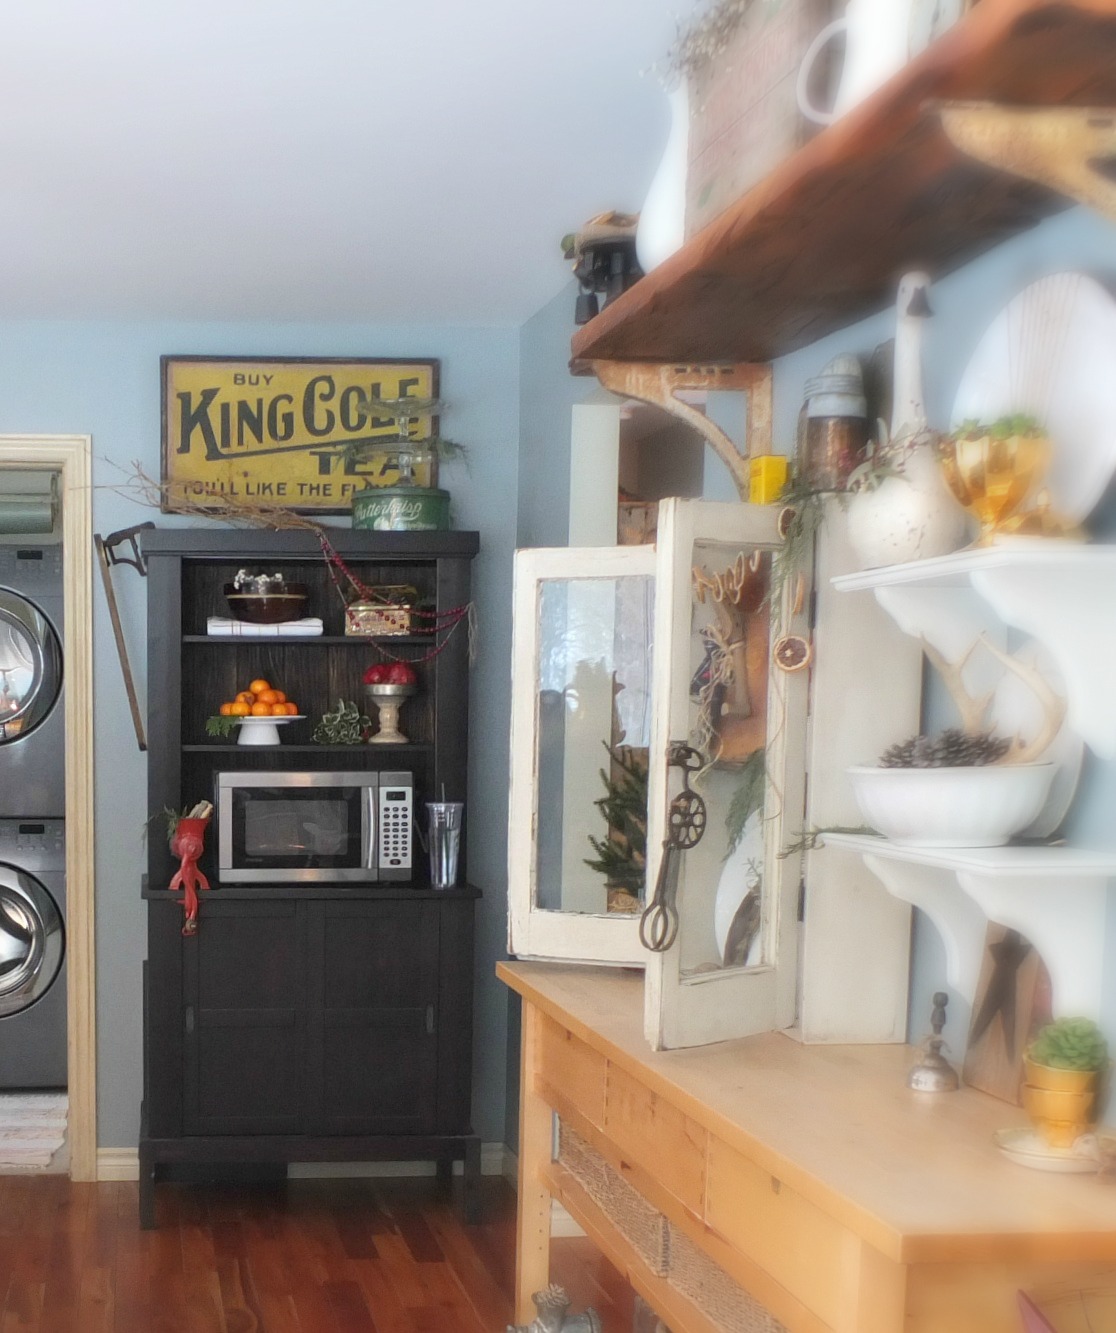
We’ve had this black Ikea cabinet for a loooooong time, so long in fact that I don’t even remember what it’s called, I’ve looked online and I can’t seem to find an image of it… if you happen to know the name of this cabinet, I’d love it if you shared it with me.
Please forgive this awful photo… my intention as I said was to find an image online to show you what it looked like brand new, what ended up happening was… I dug around in my bajillion photos (can you say photo hoarder) to find something, anything! So this is it.
*Note to self, take better and more, before photos for the next project, lesson learned.
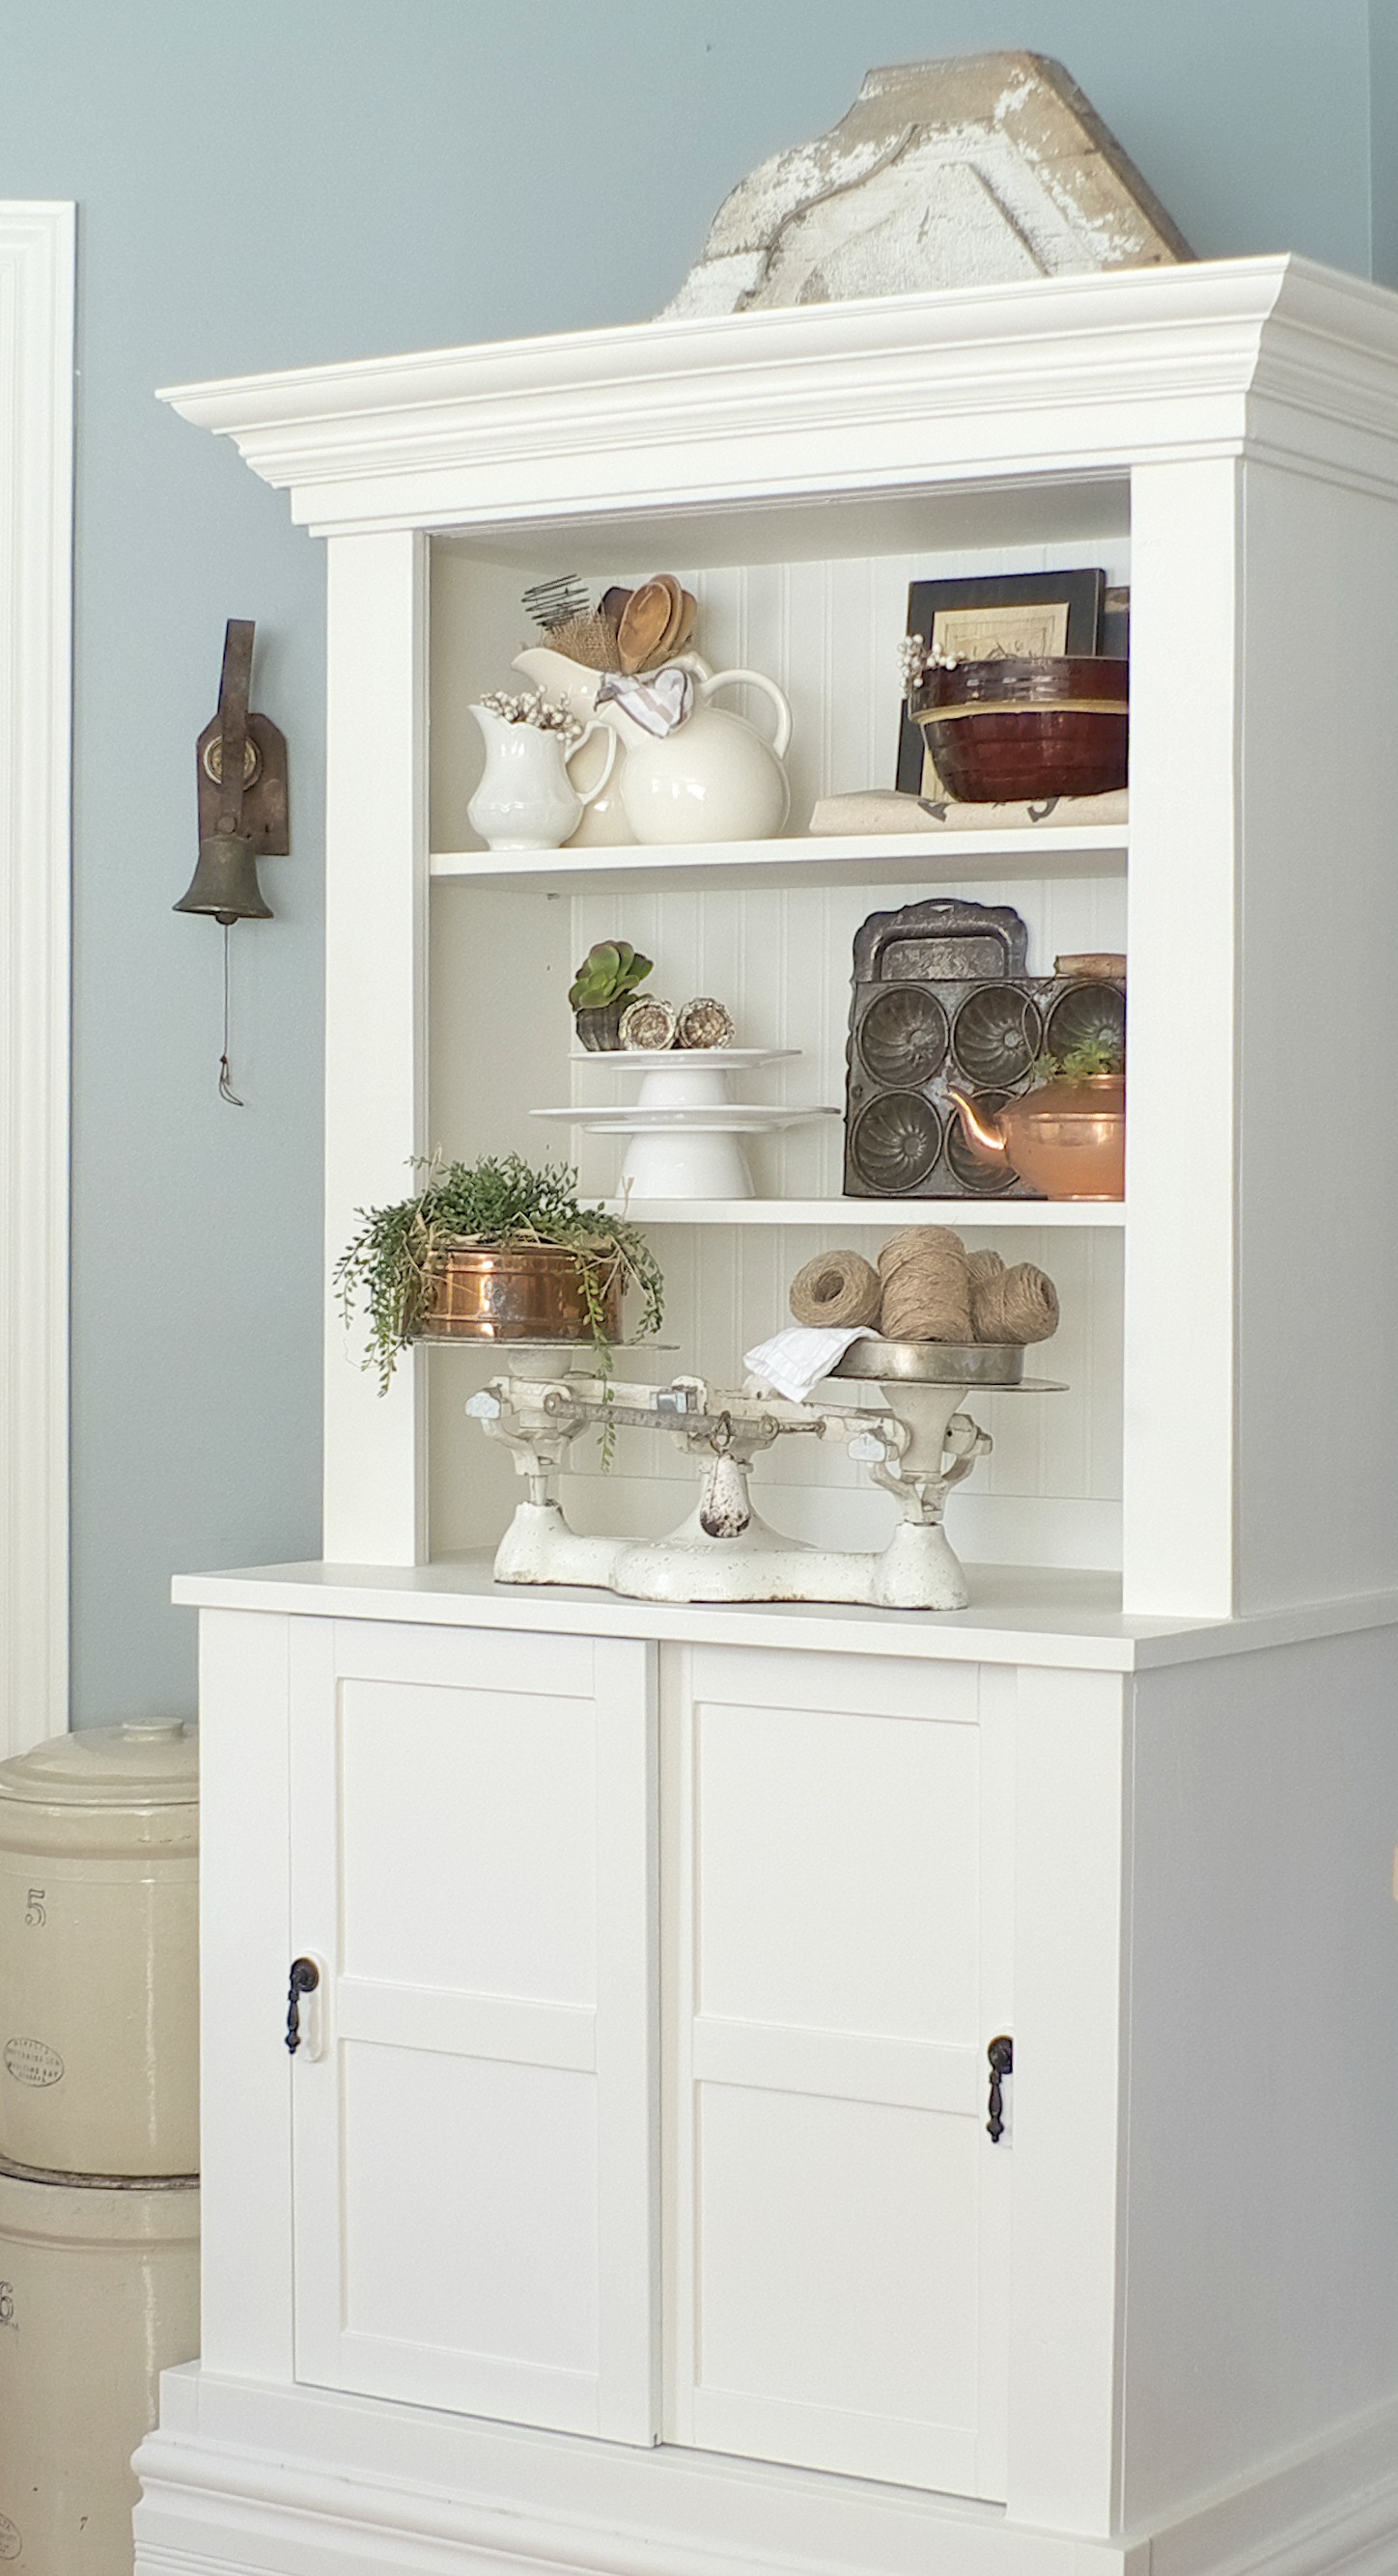
The reason I wanted to show you this cabinet new is because it’s changed a lot through out the years. There were sliding glass doors in the upper portion, I removed those… the glass and the black didn’t really bode well for seeing the pretty things inside and even lighting inside the cabinet wasn’t successful, not the way I thought it should be, so… the glass doors came off, I used those in another project and you can have a peek at that HERE. I also removed the backing in the upper portion and added barn boards, it was very nice but still dark, dark, dark. It seemed to suck all of the light out of our kitchen and it was driving me mad. I’ve used this little Ikea cabinet for wine glasses and decanters… and I’ve used it to display my Nanny’s wedding dishes, you name it this little cabinet has been a real work horse for us and it’s held many cherished things over the years, it’s even been our microwave stand for the longest time… ugh! Not it’s finest moment.
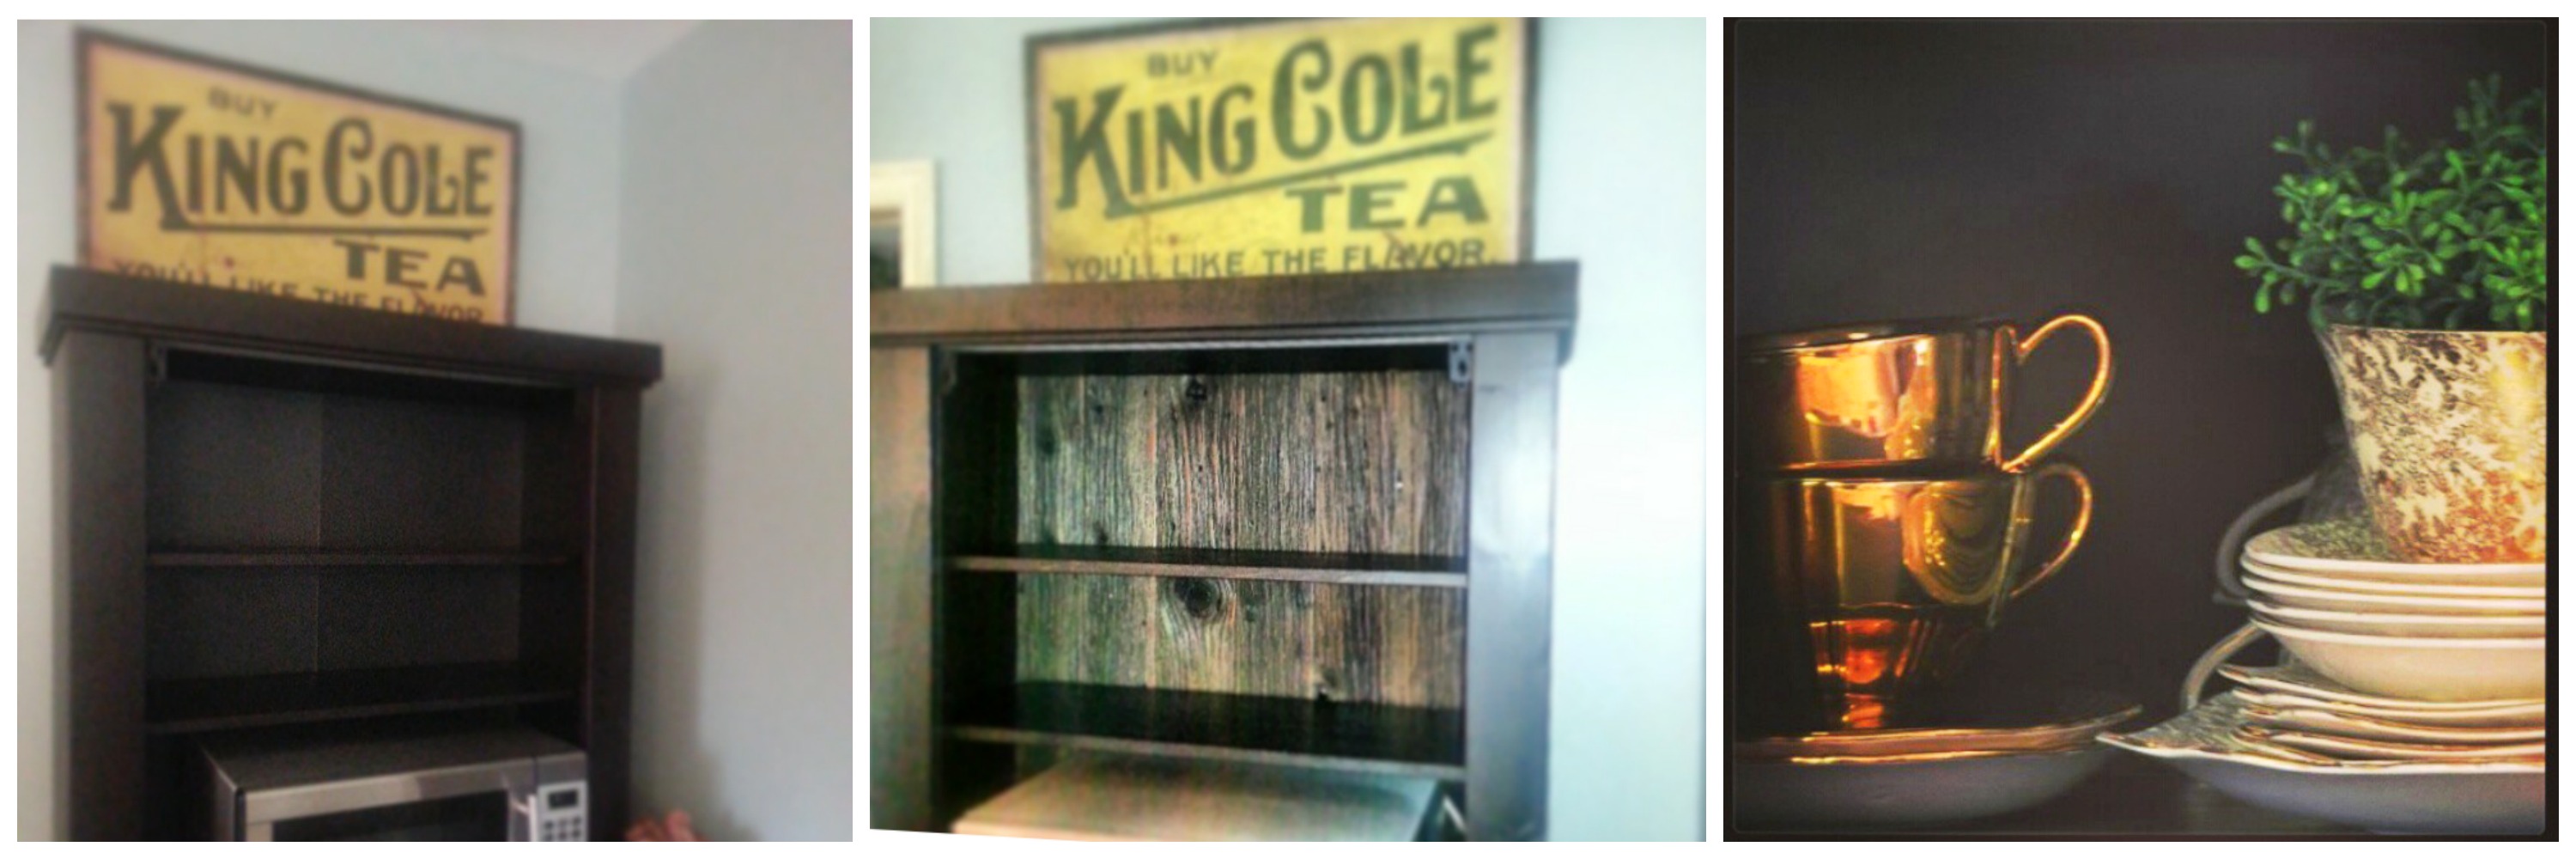
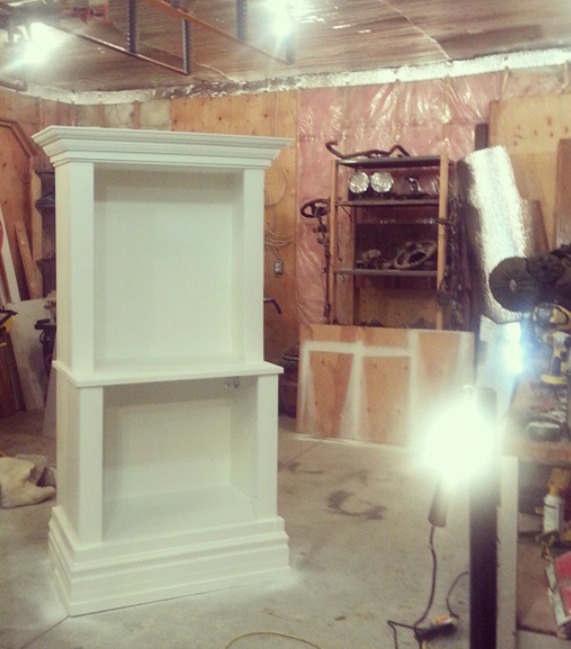
More horrific photos… I think you get the idea, the before was very BAD!
This black cabinet became the focal point in my large kitchen… it sucked all of the natural light out of a very bright room… this functional cabinet that held our microwave became U.G.L.Y. to me and just before I decided to paint it I was going to throw it out! Yep, it became a pain in the butt, I just wanted it gone.
When I decided to paint it I figured I had noting to loose, you see I’m not an expert furniture painter… so if I ruined it, no biggy, it was changing regardless of donation or paint. I am so glad I stepped out of my comfort zone and painted this cabinet!
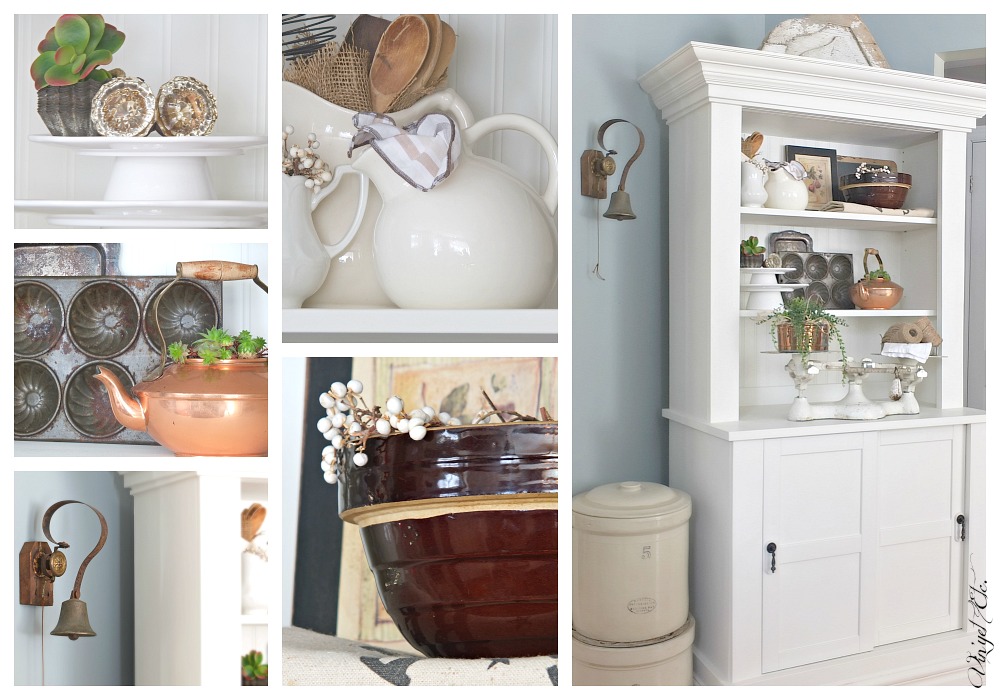
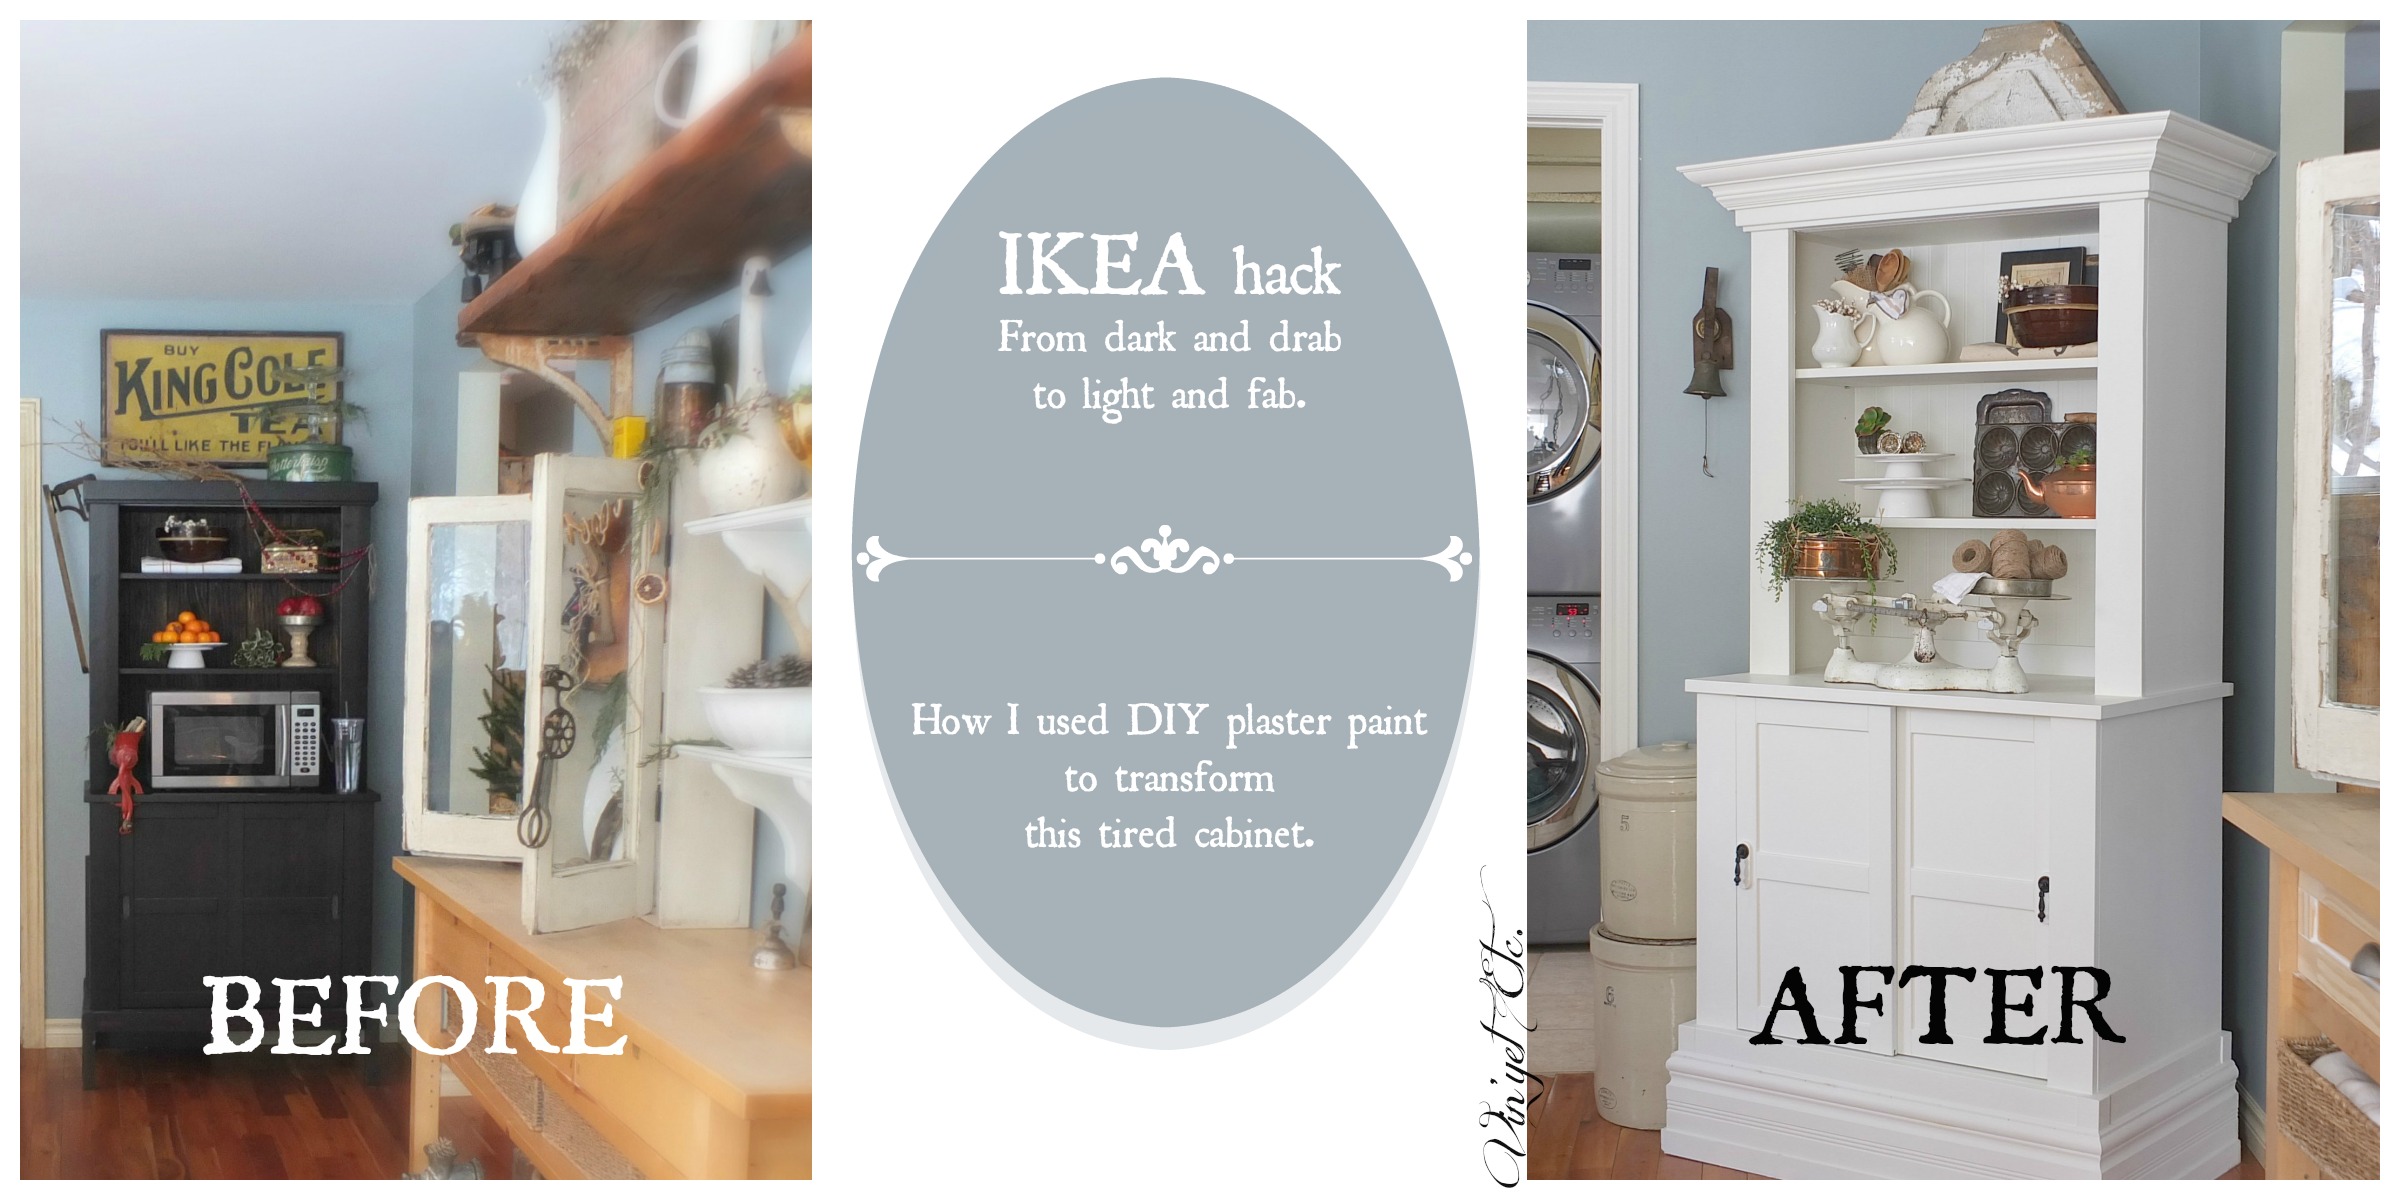 This is how I changed this BLACK hole of a cabinet and turned it into a farmhouse fab, HA at least I think it’s FAB. 😉
Firstly, I found a recipe online for plaster/chalky paint… I modified it a bit to suit what I thought would work in my sprayer, it goes like this:
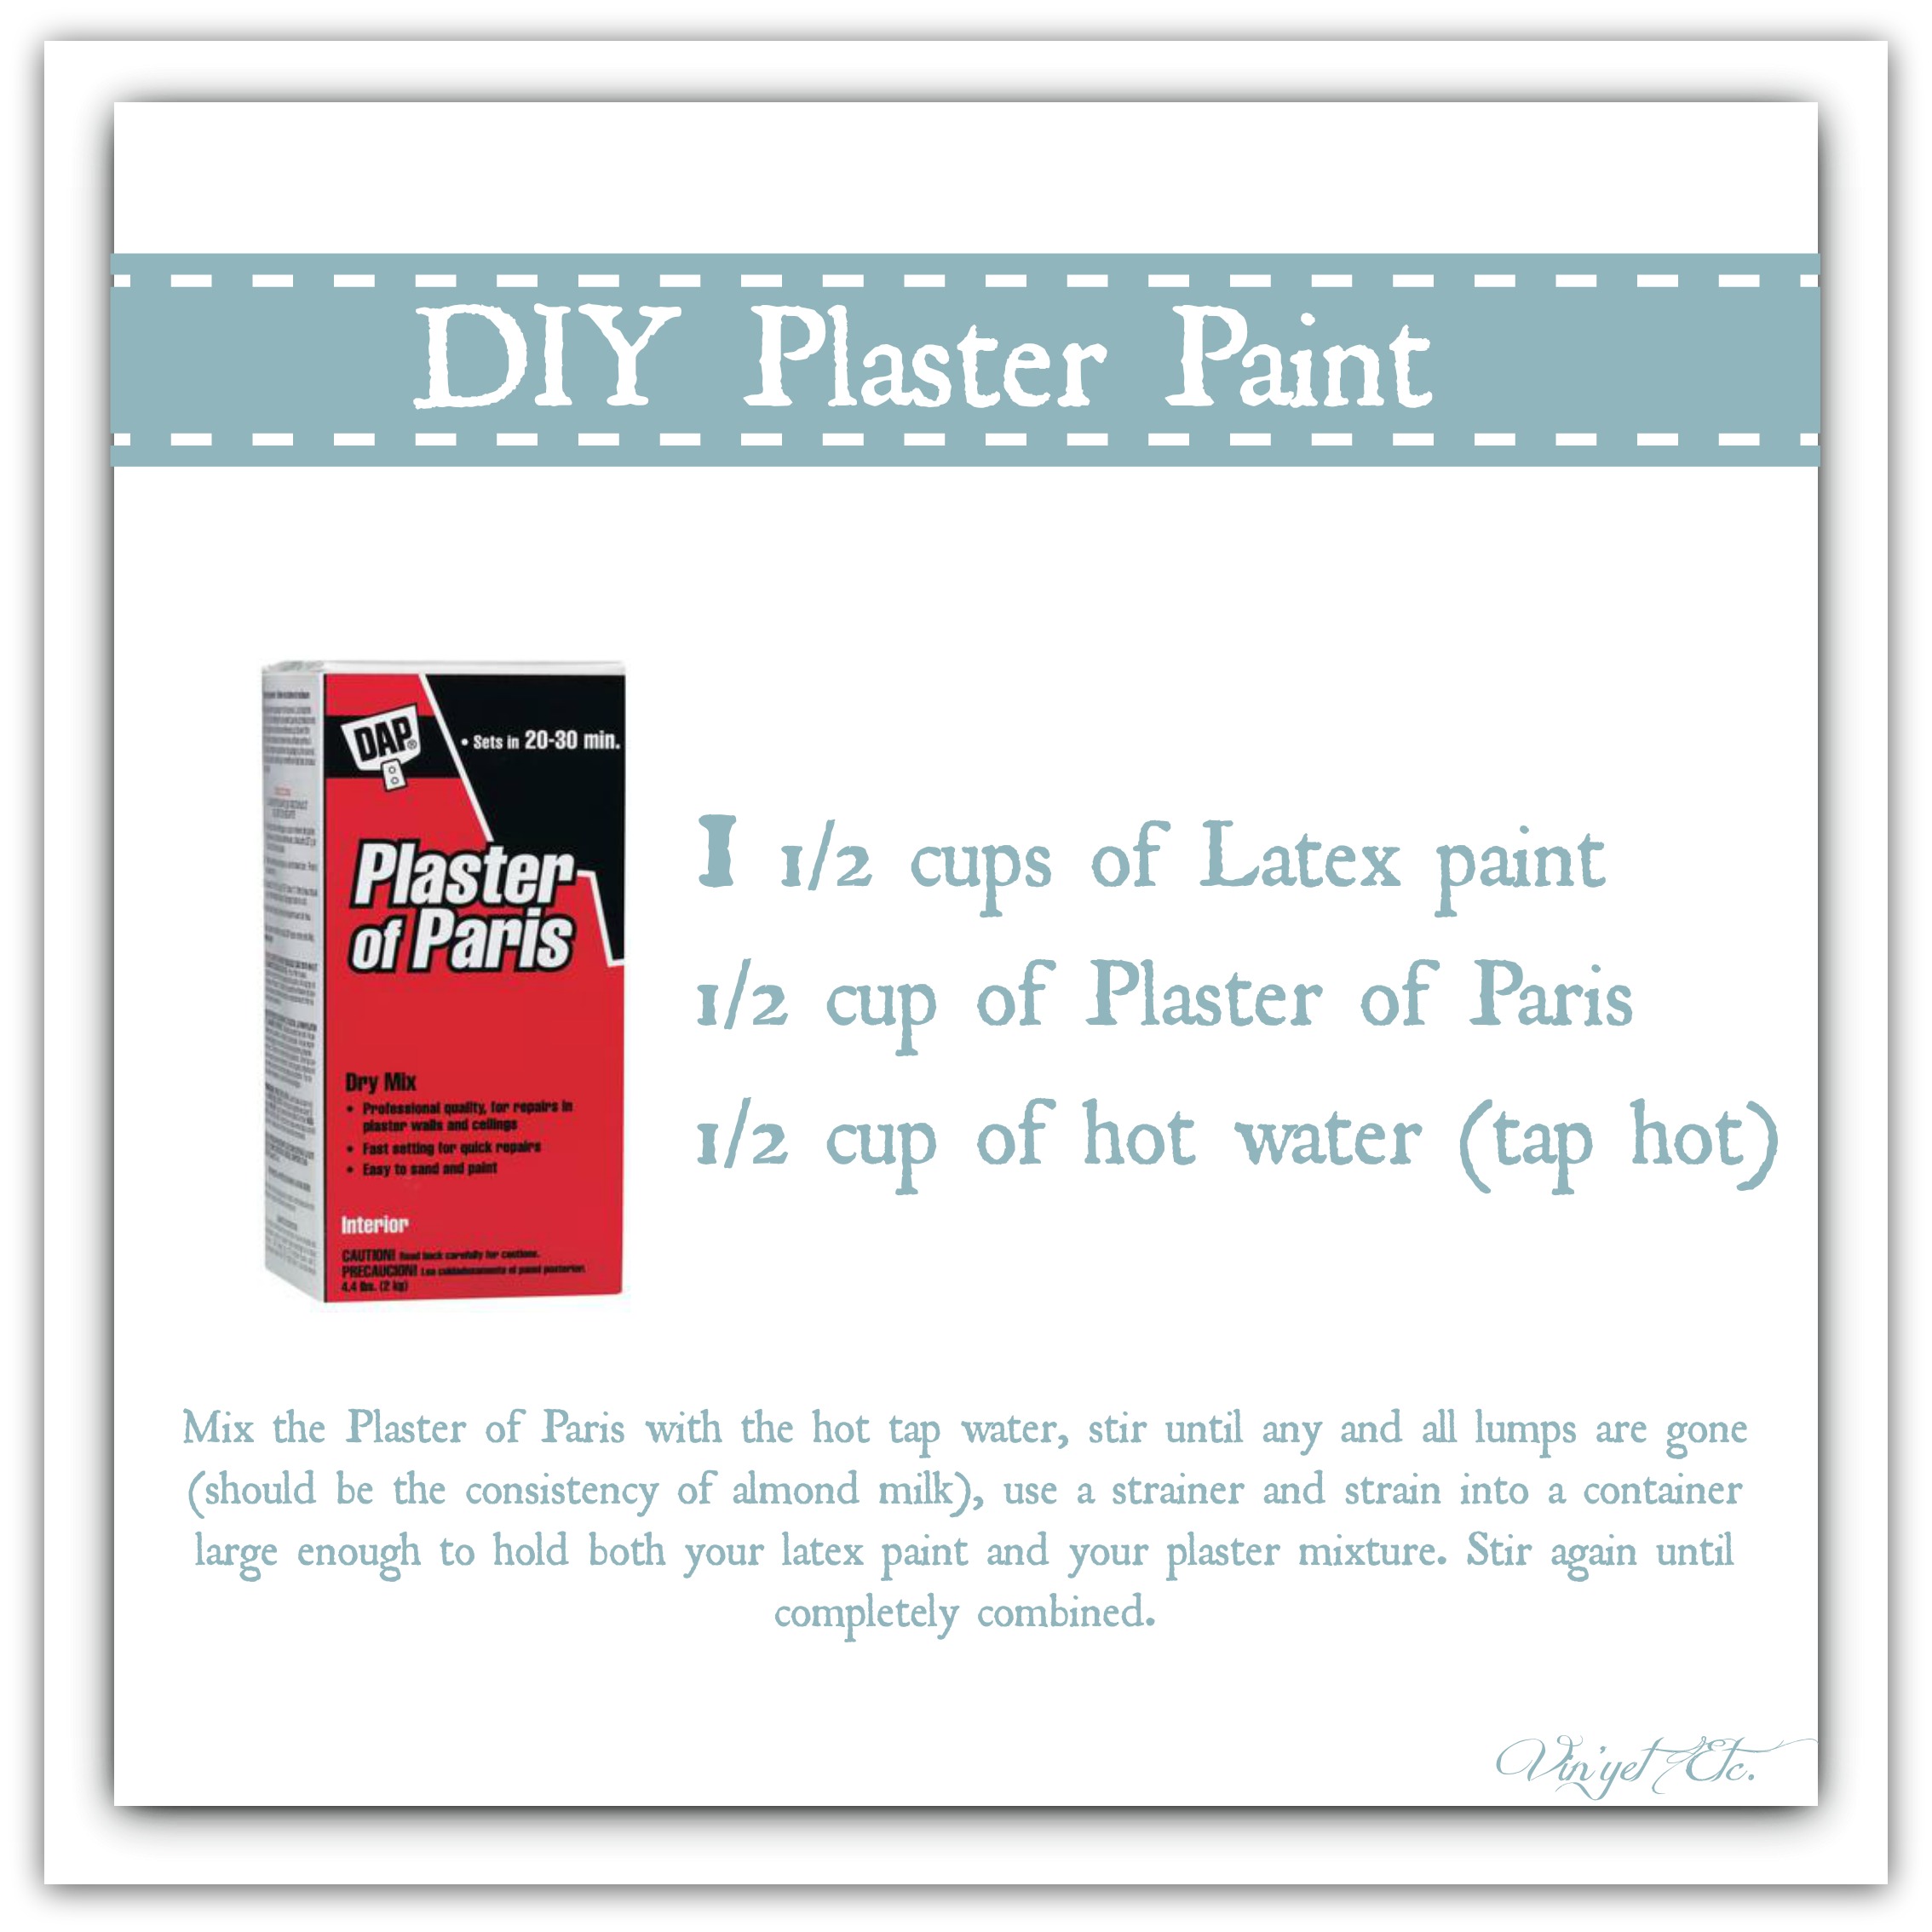 *There are many, many recipes out there… look around and use the one that suits you, I just happened to settle on this little mixture.
Secondly, I decided on a colour ~ I used Benjamin Moore, white dove – eggshell finish. This is my favourite white paint and I use it everywhere!
Thirdly, I decided to trim this cabinet up with crown and base trim, I went to my local Habitat ReStore and bought some crown molding and some baseboard, that was a grand total of $6, I know, I’m a big spender! I measured and cut the new to me trim to suit. Cutting this trim was made easy with our mitre saw, I’m very familiar with power tools… they are loud and a bit intimidating at first but if you use them safely, wear your eye and ear protection you’ll be just fine. Actually, a little thing that really helps me relax while using any saw is ear protection, I find it easier, it’s not so loud and screamy.
I also found this most brilliant tutorial online… this guy is the best and his tutorials are so easy and CLEAR! Best one I’ve found out there, this is how I tackled cutting my very first crown. I’m pretty happy with how it turned out.
Okay… so I’m one of those annoying bloggers that really gets into her projects and doesn’t take a blow by blow picture of how I did it all, I know, I’m sorry, I’ll try to be better. In a nut shell though this is what I did, I attached the crown and baseboard with, no more nails and my brad nailer. Then I caulked all of the seams… I mean I caulked everything, I can’t stress this enough, caulk any crack or gap you see. When you paint it will become a seamless piece and it will look so much better than having seams everywhere, trust me! I used latex paintable caulking to seal all the gaps.

Once the caulking was dried I used a Wagner spray gun, and painted thin layers, leaving it to dry 24 hrs between coats, in total there are 2 coats and between each coat I lightly sanded the entire thing with a 220 grit sanding foam pad. The plaster paint is thin enough for a spray gun and it worked like a charm and the spray gun also cleaned up like a charm, and best thing? No brush marks!
This is one shot during drying time… I used lots of lighting, to make sure every little inch was covered. Once I was happy with the coverage I waxed it with Minwax finishing wax. I was a little concerned at first that this wax seems almost orange, but I tested it on a small area and it didn’t change the colour, or I should say it didn’t hurt the colour, it actually warmed it up a bit.
Now on to the fun part!
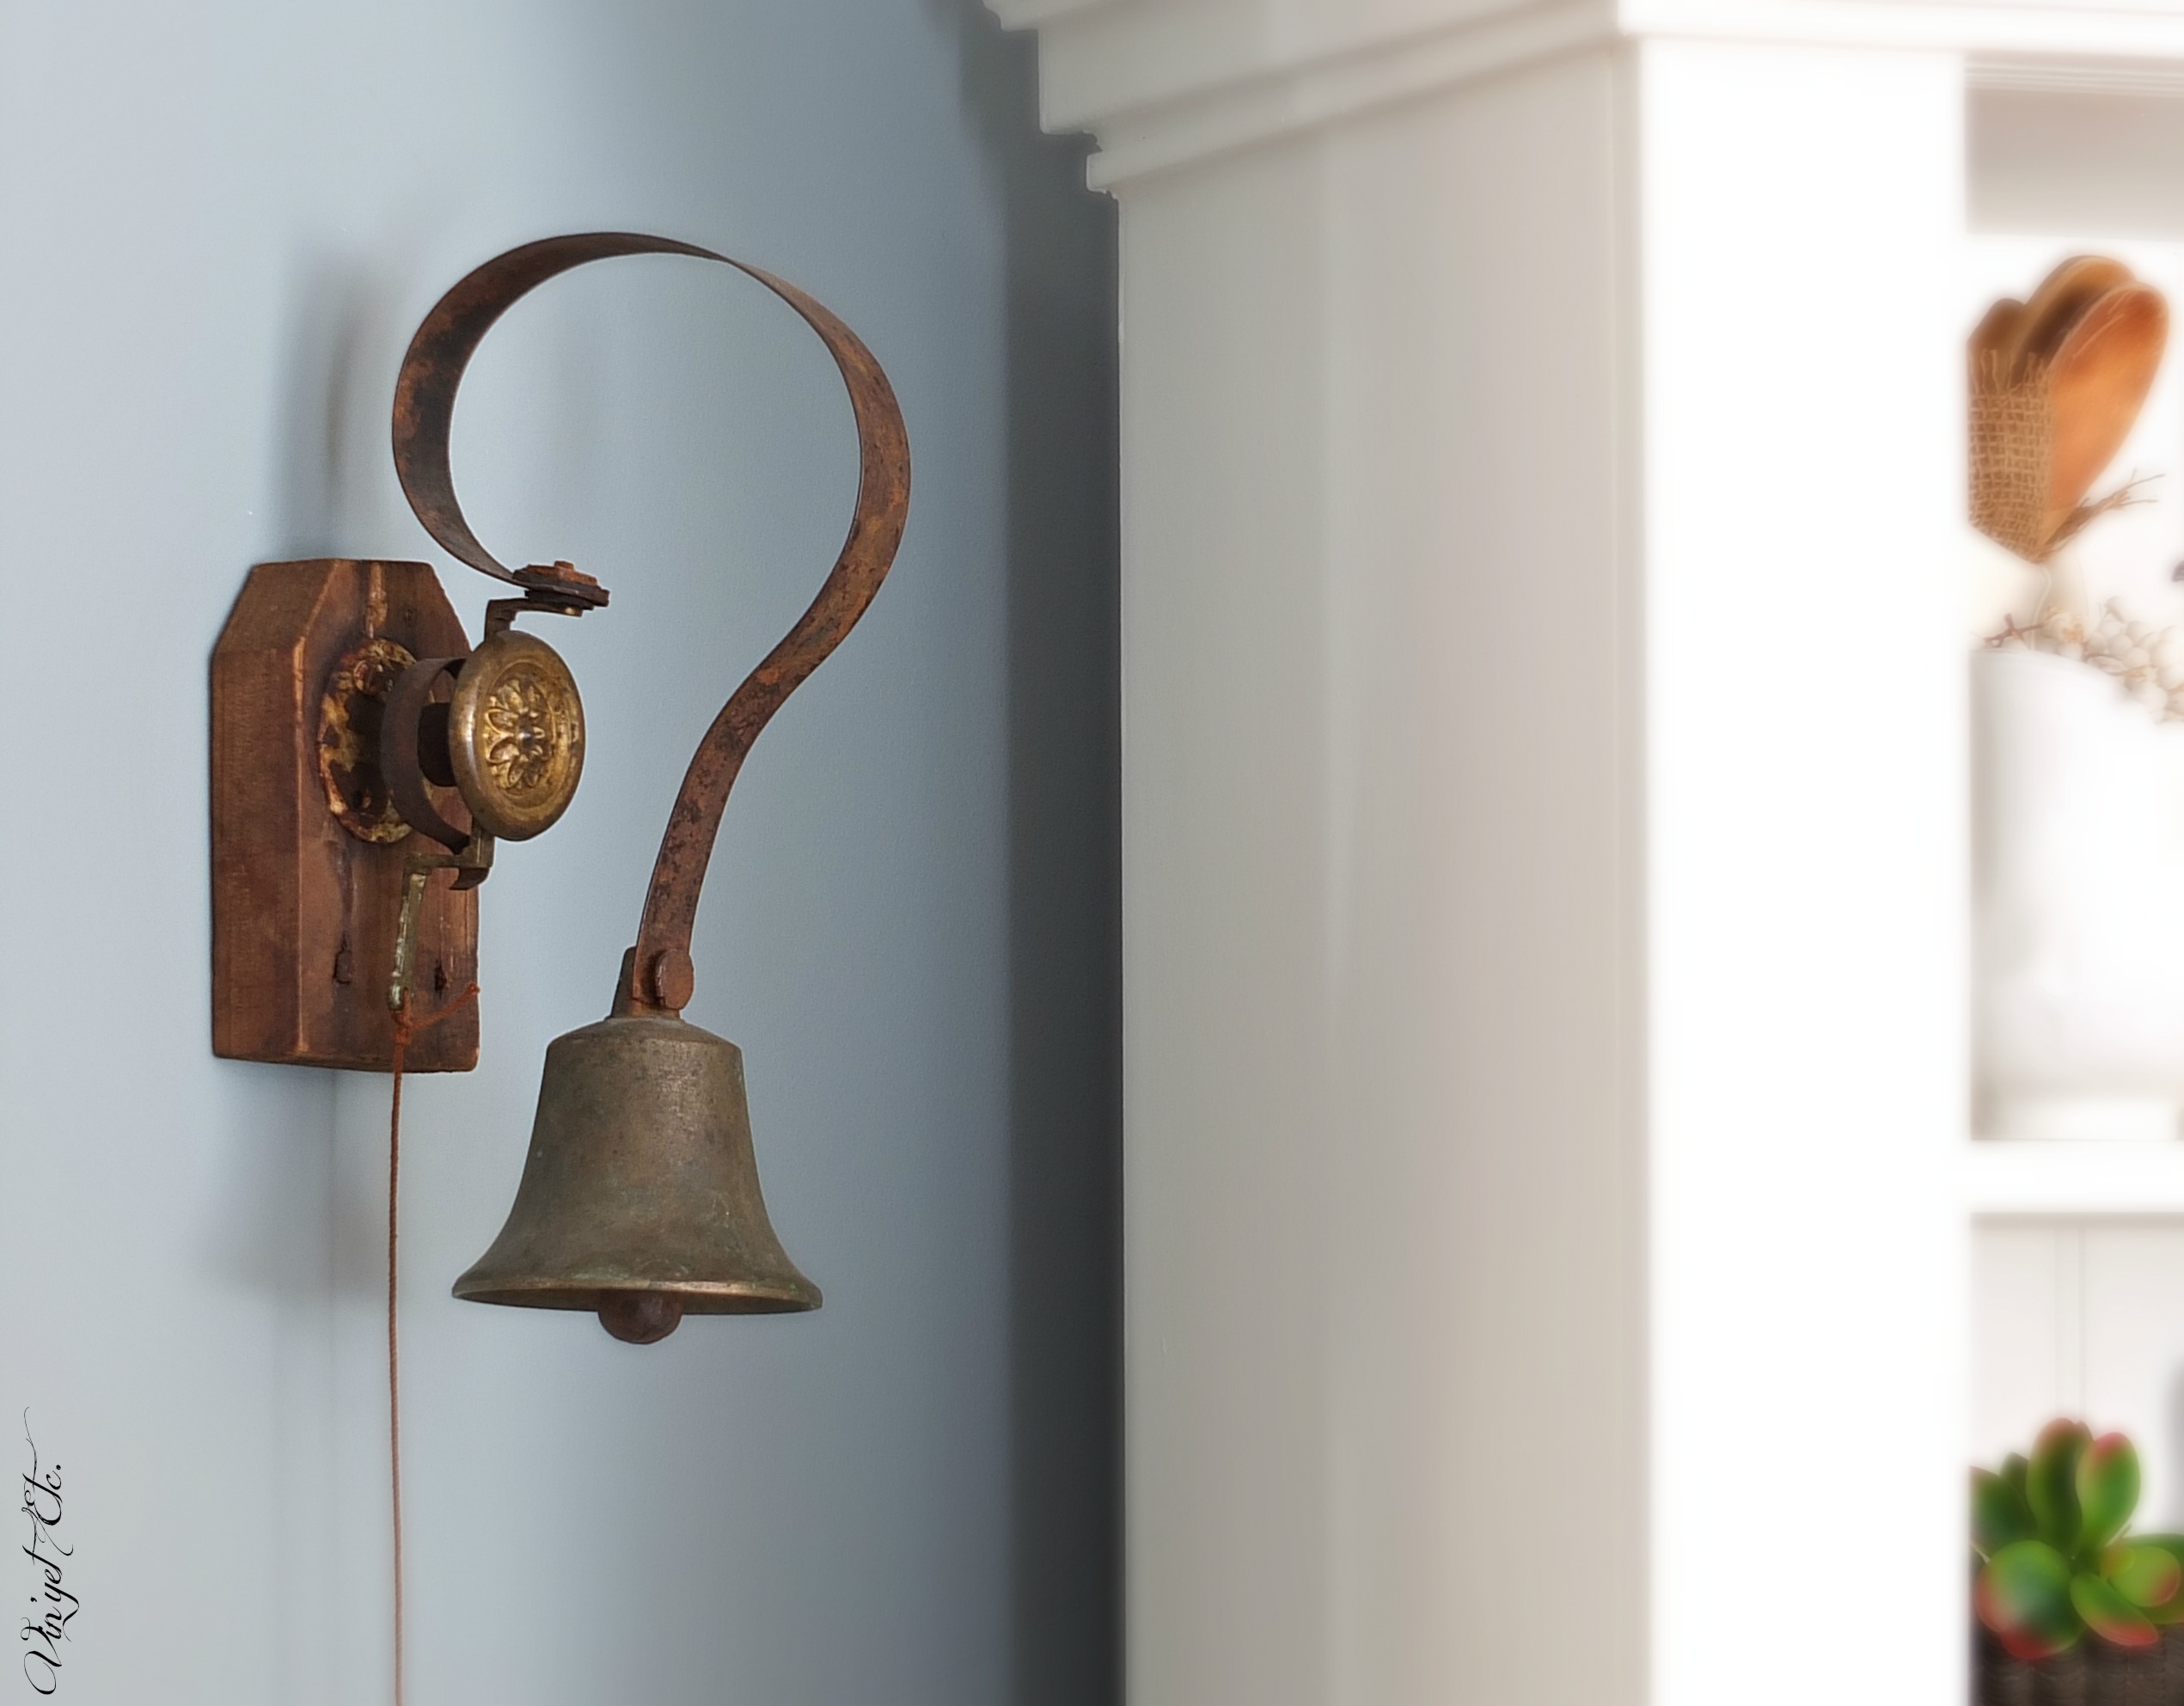
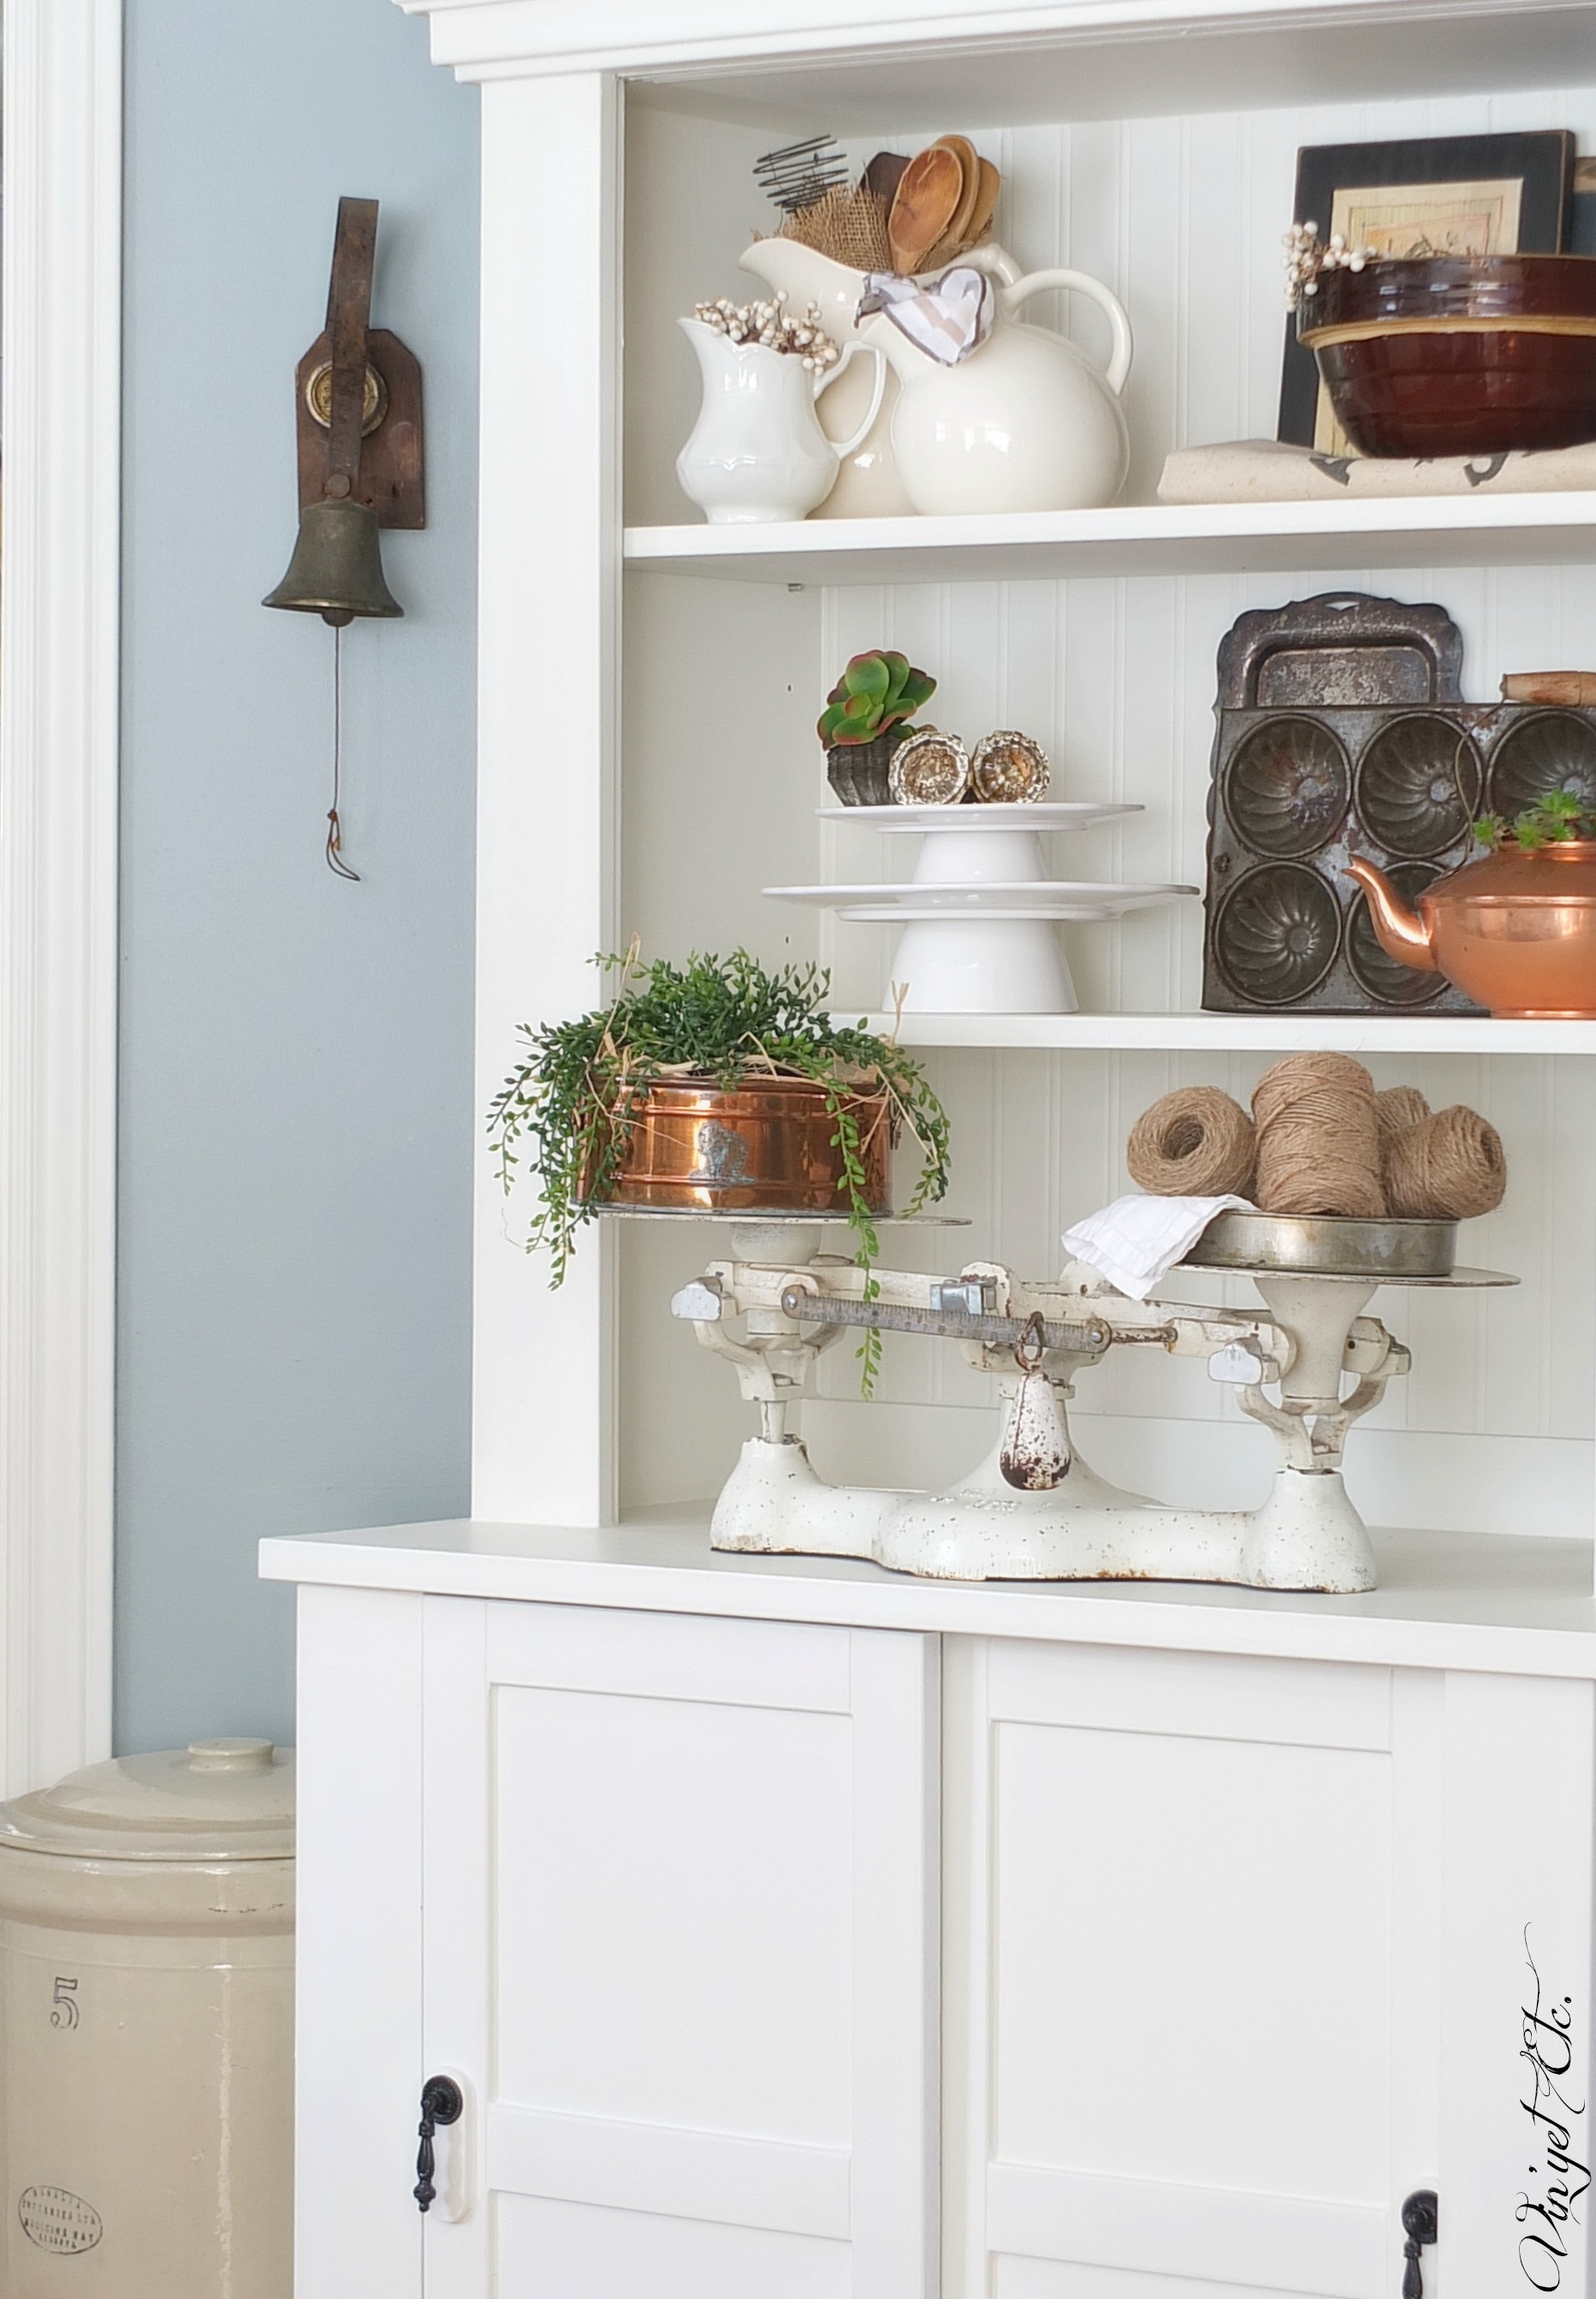 Do you see that little Downton Abbey bell beside the cabinet? That little bell was a very special gift from my Uncle for our 25th wedding anniversary, he knows me so very well. I love how it’s cocked to one side after you ring it.
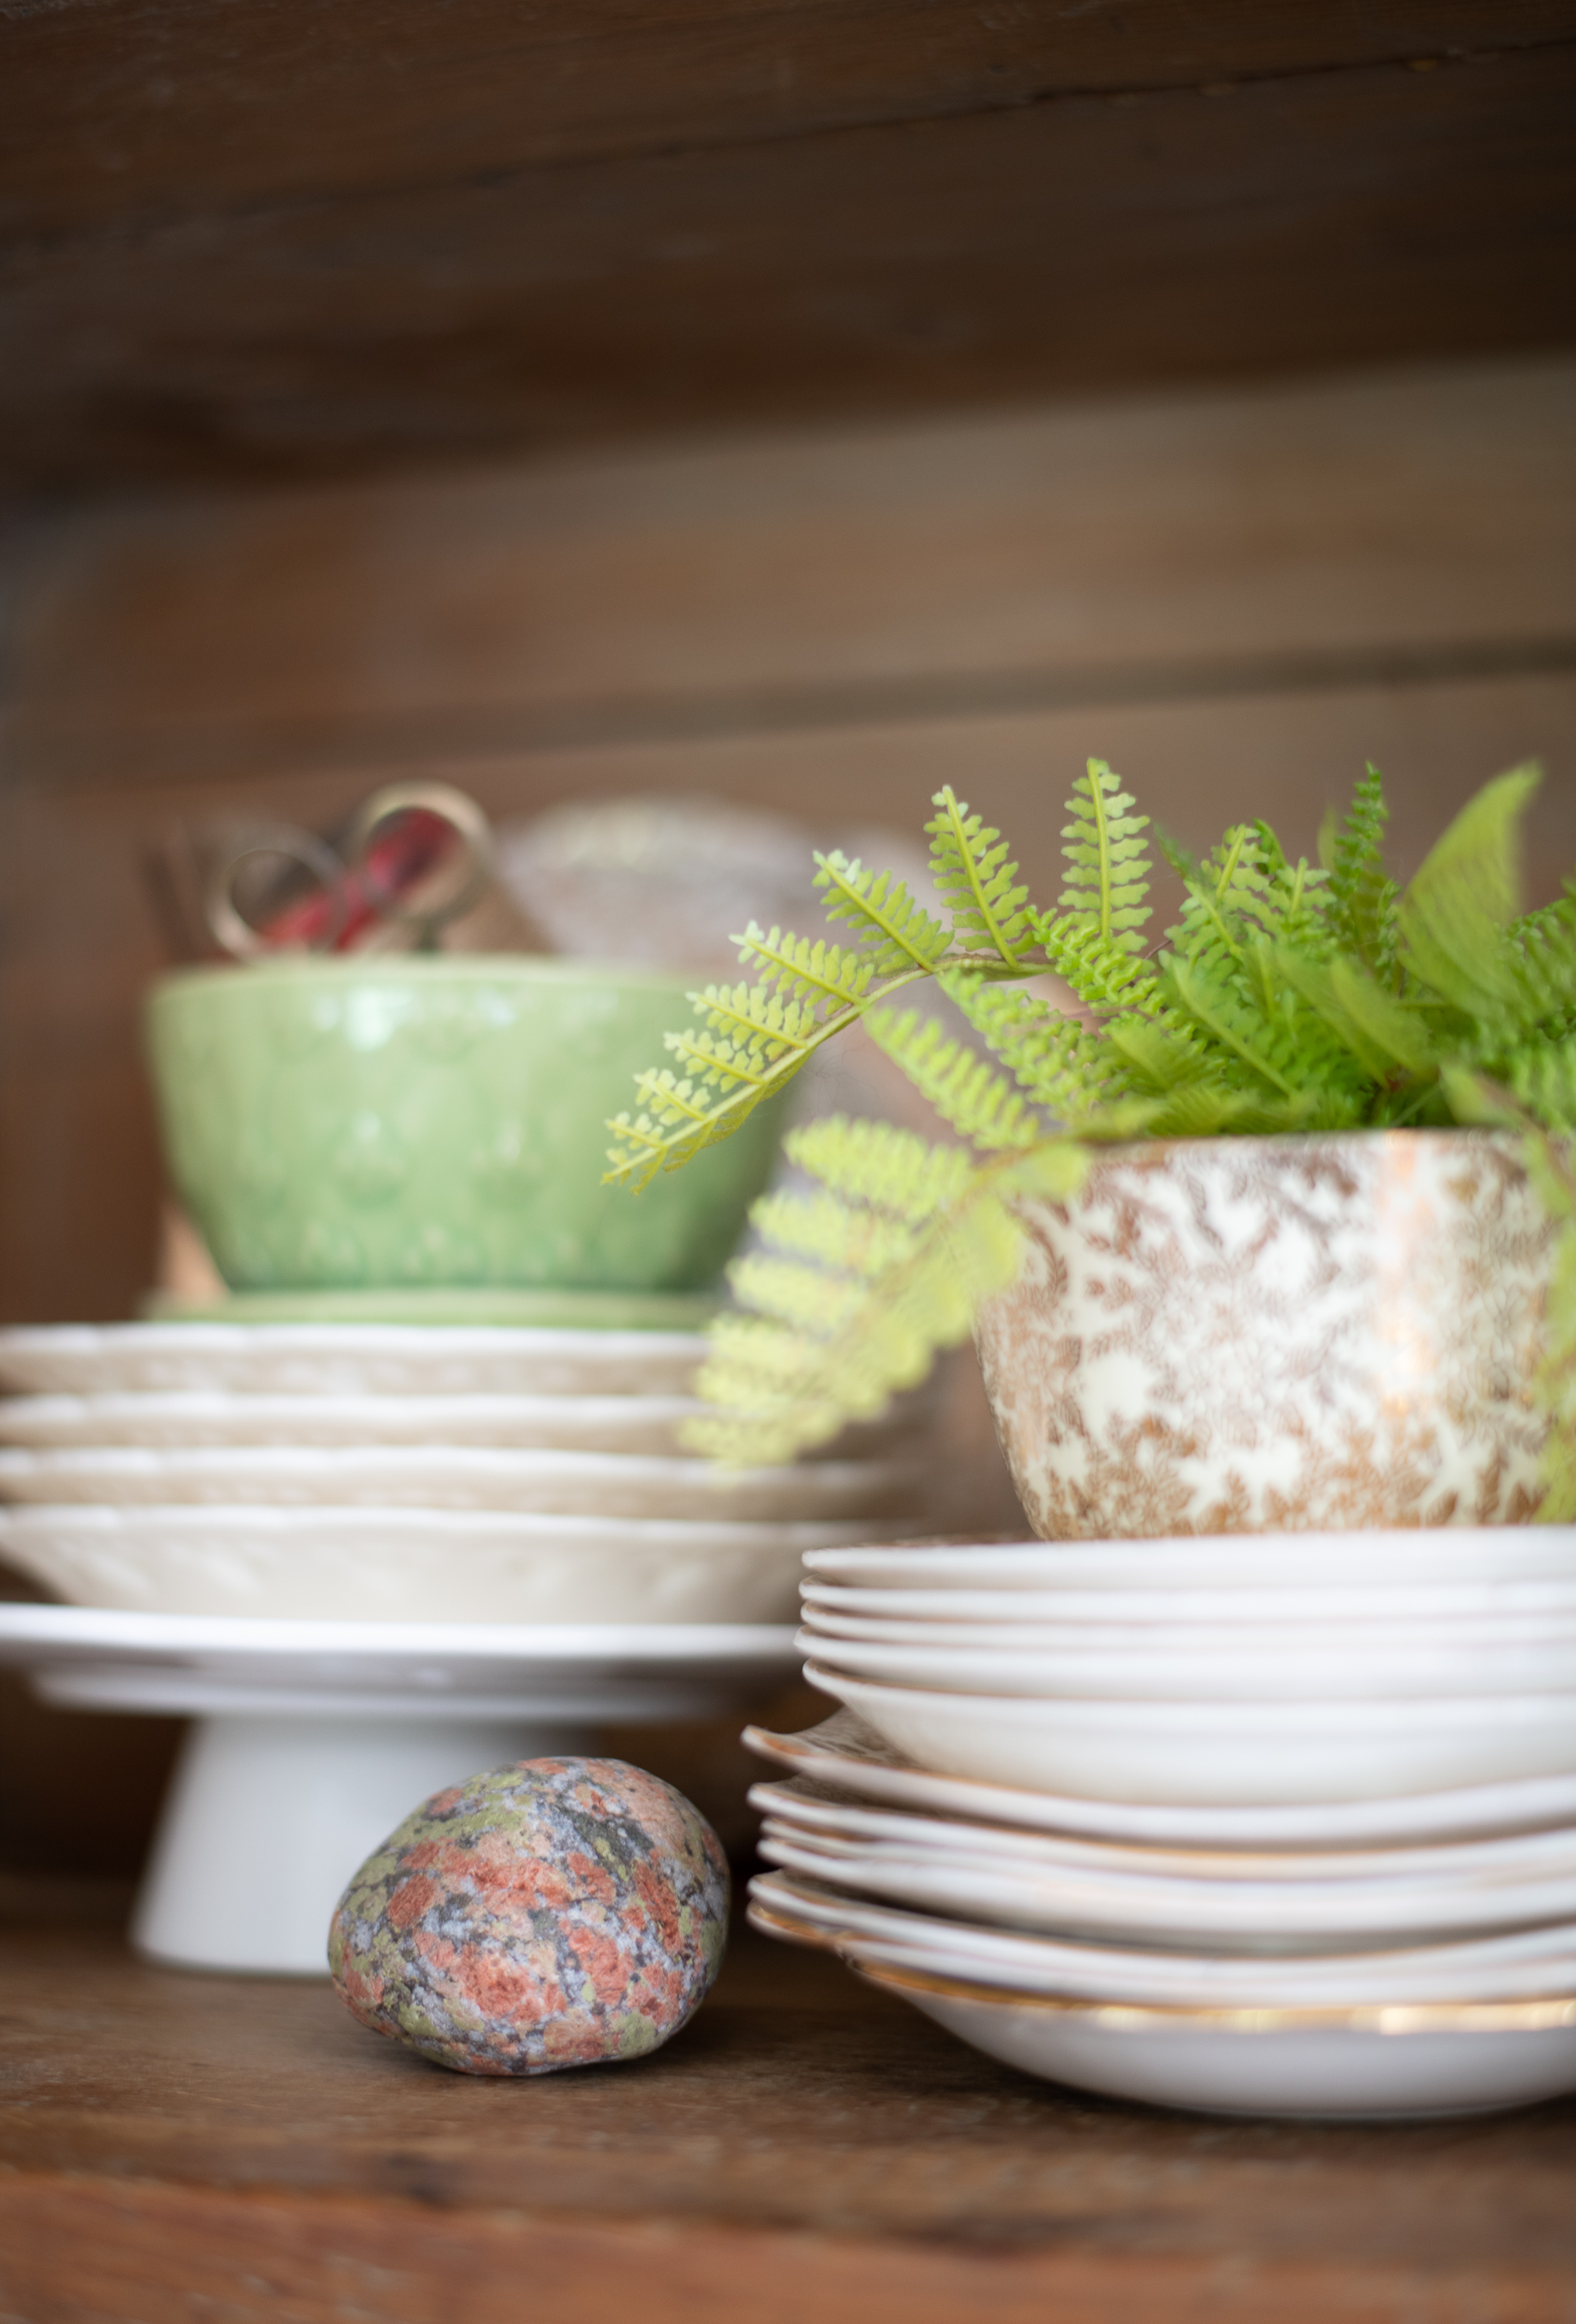
 I love this little guy, he’s too cute! I’m looking for just the thing to hang below my Downton bell, in the mean time though I’m kind of giddy with how this corner turned out.
I can’t wait to paint my next piece! There’s a tiny sneak peek in this post… and yep, it’s another Ikea hack! Why not reinvent and reuse what you already have? No reason, as far as I can see. Thanks for joining me on this painting adventure, I think I’m hooked!

39 Comments
Just beautiful Laurie! Love the styling too – and I want that bell!!!!!!!!!!!!!
xoxox
lol, I know right, I wanted that bell so bad, the guy at the antique store didn’t want to sell it to me. I asked him to keep me in mind when he was ready to part with it. Months and months went by and I kind of forgot about it… when my Uncle came to visit he had a gift for us, our 25th wedding anniversary. As soon as I moved a tiny bit of tissue paper, I knew exactly what it was, I even started crying like a baby! lol Not only is it pretty, it has some wonderful memories attached to it. xo
This is an excellent makeover, it’s beautiful and I pinned it!
Thank-you so much Bliss!
Wow – that turned out beautiful Laurie, you’ve done a lovely job with that cabinet!
Thanks Heather, I figured I hand nothing to loose… that corner was changing one way or another! 🙂
Sooo beautifully styled Laurie!!! The transformation of the cabinet is stellar but you had me at the styling… Bravo!!
Thanks friend, I am so glad you like it! xo
Wow! That is amazing!!! It looks absolutely lovely!
Now this piece turned out fabulous! It doesn’t even look like you had painted this piece at all. I love how it turned out. Awesome!
Beautiful results and I love how you styled it too! Awesome!!
Smart! I love..LOVE how you made this piece substantial with the molding. It would cost a fortune in a store. Pinned and sharing! P.S.- No wonder I’ve always loved your posts & photos..didn’t realize you were a designer..duh..
That definitely brightens up the room! It came out awesome 🙂
I love your vision and how you made it reality It’s beautiful.
Like it! What is it about white that draws us in. I’m really loving that scale!
wow now that is stunning a complete new lease of life I think I might try your mixture of chalk paint too, great idea also with the moulding
wow this is amazing great DIY congrats!
Beautiful job. I want to try this on a chifferobe that my daughter wants to paint purple. Love the sprayer idea. I know we have one somewhere. I’ll have to dig it out. Thanks.
Oh wow, that is absolutely beautiful. I have a table I want to redo but I’m nervous about it because I’ve never used a sprayer before.
I absolutely agree that Farmhouse Fab is 100% better! That was a daunting task, but you made it look amazing! I’d love to have that tall cabinet with shelves in my dining room!
beautiful job!!! you are so talented to do this because it would never turn out for me
That turned out great! I don’t mind dark cabinets, but it definitely looks better after its makeover.
It looks wonderful. A friend of mine just down the road does it for others to make some extra cash 🙂
You’d never know it was the same piece of furniture. That looks soooo good, and everything you put on it afterwards looks fantastic!
Great job, it looks wonderful!
Love the bell! You did a fabulous job on your crown molding too! Amazing what a few coats of paint can do for something. You’ve styled it beautifully.
Amaaaaa-zing! This is incredible, Laurie! Please come over to my house and do some hacks for me?
absolutely fabulous…way better than what it used to be…great job!
Wow! What a difference. It certainly is fabulous farmhouse. I love the way that you decorated the shelves, those are some precious pieces. Love the bell too. I cannot believe how much the molding changed the entire look. Great job.
It turned out gorgeous!! I never would have thought to caulk all the creases-I bet it made a huge difference! Now I want a project! 🙂
I LOVE IT! It looks SO.MUCH.BETTER now. And with all the vintage treasures displayed, it’s farmhouse perfect!
Thanks Lani!!! I adore farmhouse, can ya tell? 😉
I love how it turned out! =D
Great job
Love how that turned out. What a difference.
And I LOVE your Downton bell. 🙂
Laurie, I had no idea that you could use the homemade “chalky paint” in a sprayer! Such an amazing transformation. I’m glad you decided to paint rather than to ditch the cupboard! Your styling talents are amazing and I loved the story of how your uncle gifted you with the bell. So special!!!
Okay have I been living under a rock? How did I miss this? I so needed this post! I have an old dresser with a can of paint and box of plaster of paris sitting beside it, and it just seemed too daunting. YOU USED A PAINT SPRAYER! You’re a genius my friend. Plus the styling is to die for, of course! Pinned.
xo
Do it now! 😉 Thanks for the pin!
I really do love this makeover! I’ve already pinned it and had my moment, but just wanted to stop by and take another look! It makes me want to pin it all over again!!
Holy Hacks!!!!
This is fabulous.
Pinned and sharing 🙂
LOVE IT!!!!!