How To build an Industrial style desk ~ or 2
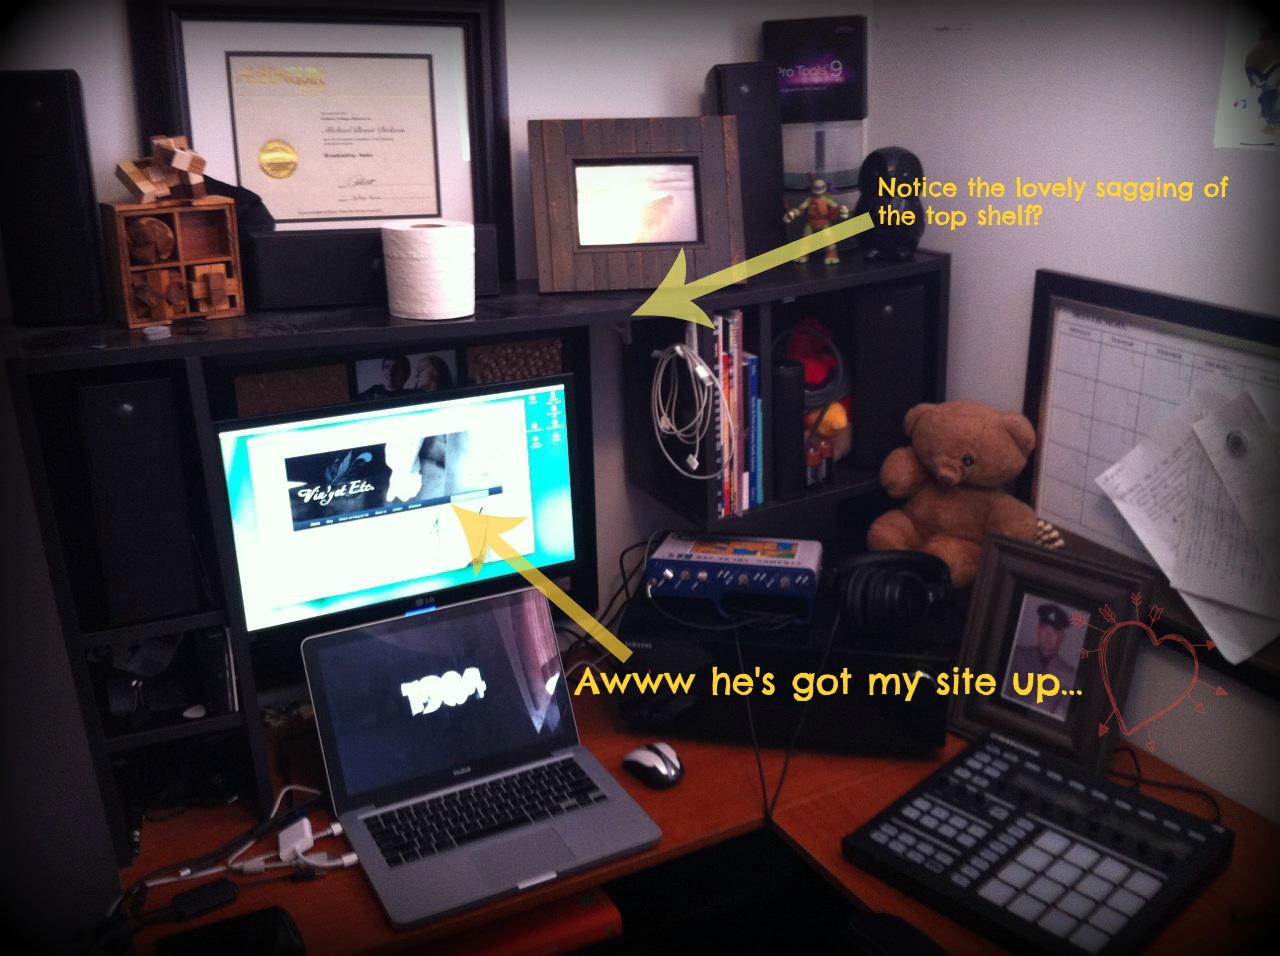 To recap, we built our son Michael, 2 Industrial style desks for his birthday, he is going to OIART in September to study audio engineering and his saggy pressed board desk just wasn’t cutting it. We would have done a couple of things a little differently ref the building of these desks, hind-sight being 20/20, this was our first project of this type. Over all though we are very happy with how it turned out and the end user, Mike, is very happy with it…
Welcome to the technical part of the series. :/
We asked for a sketch and Michael sent us this…
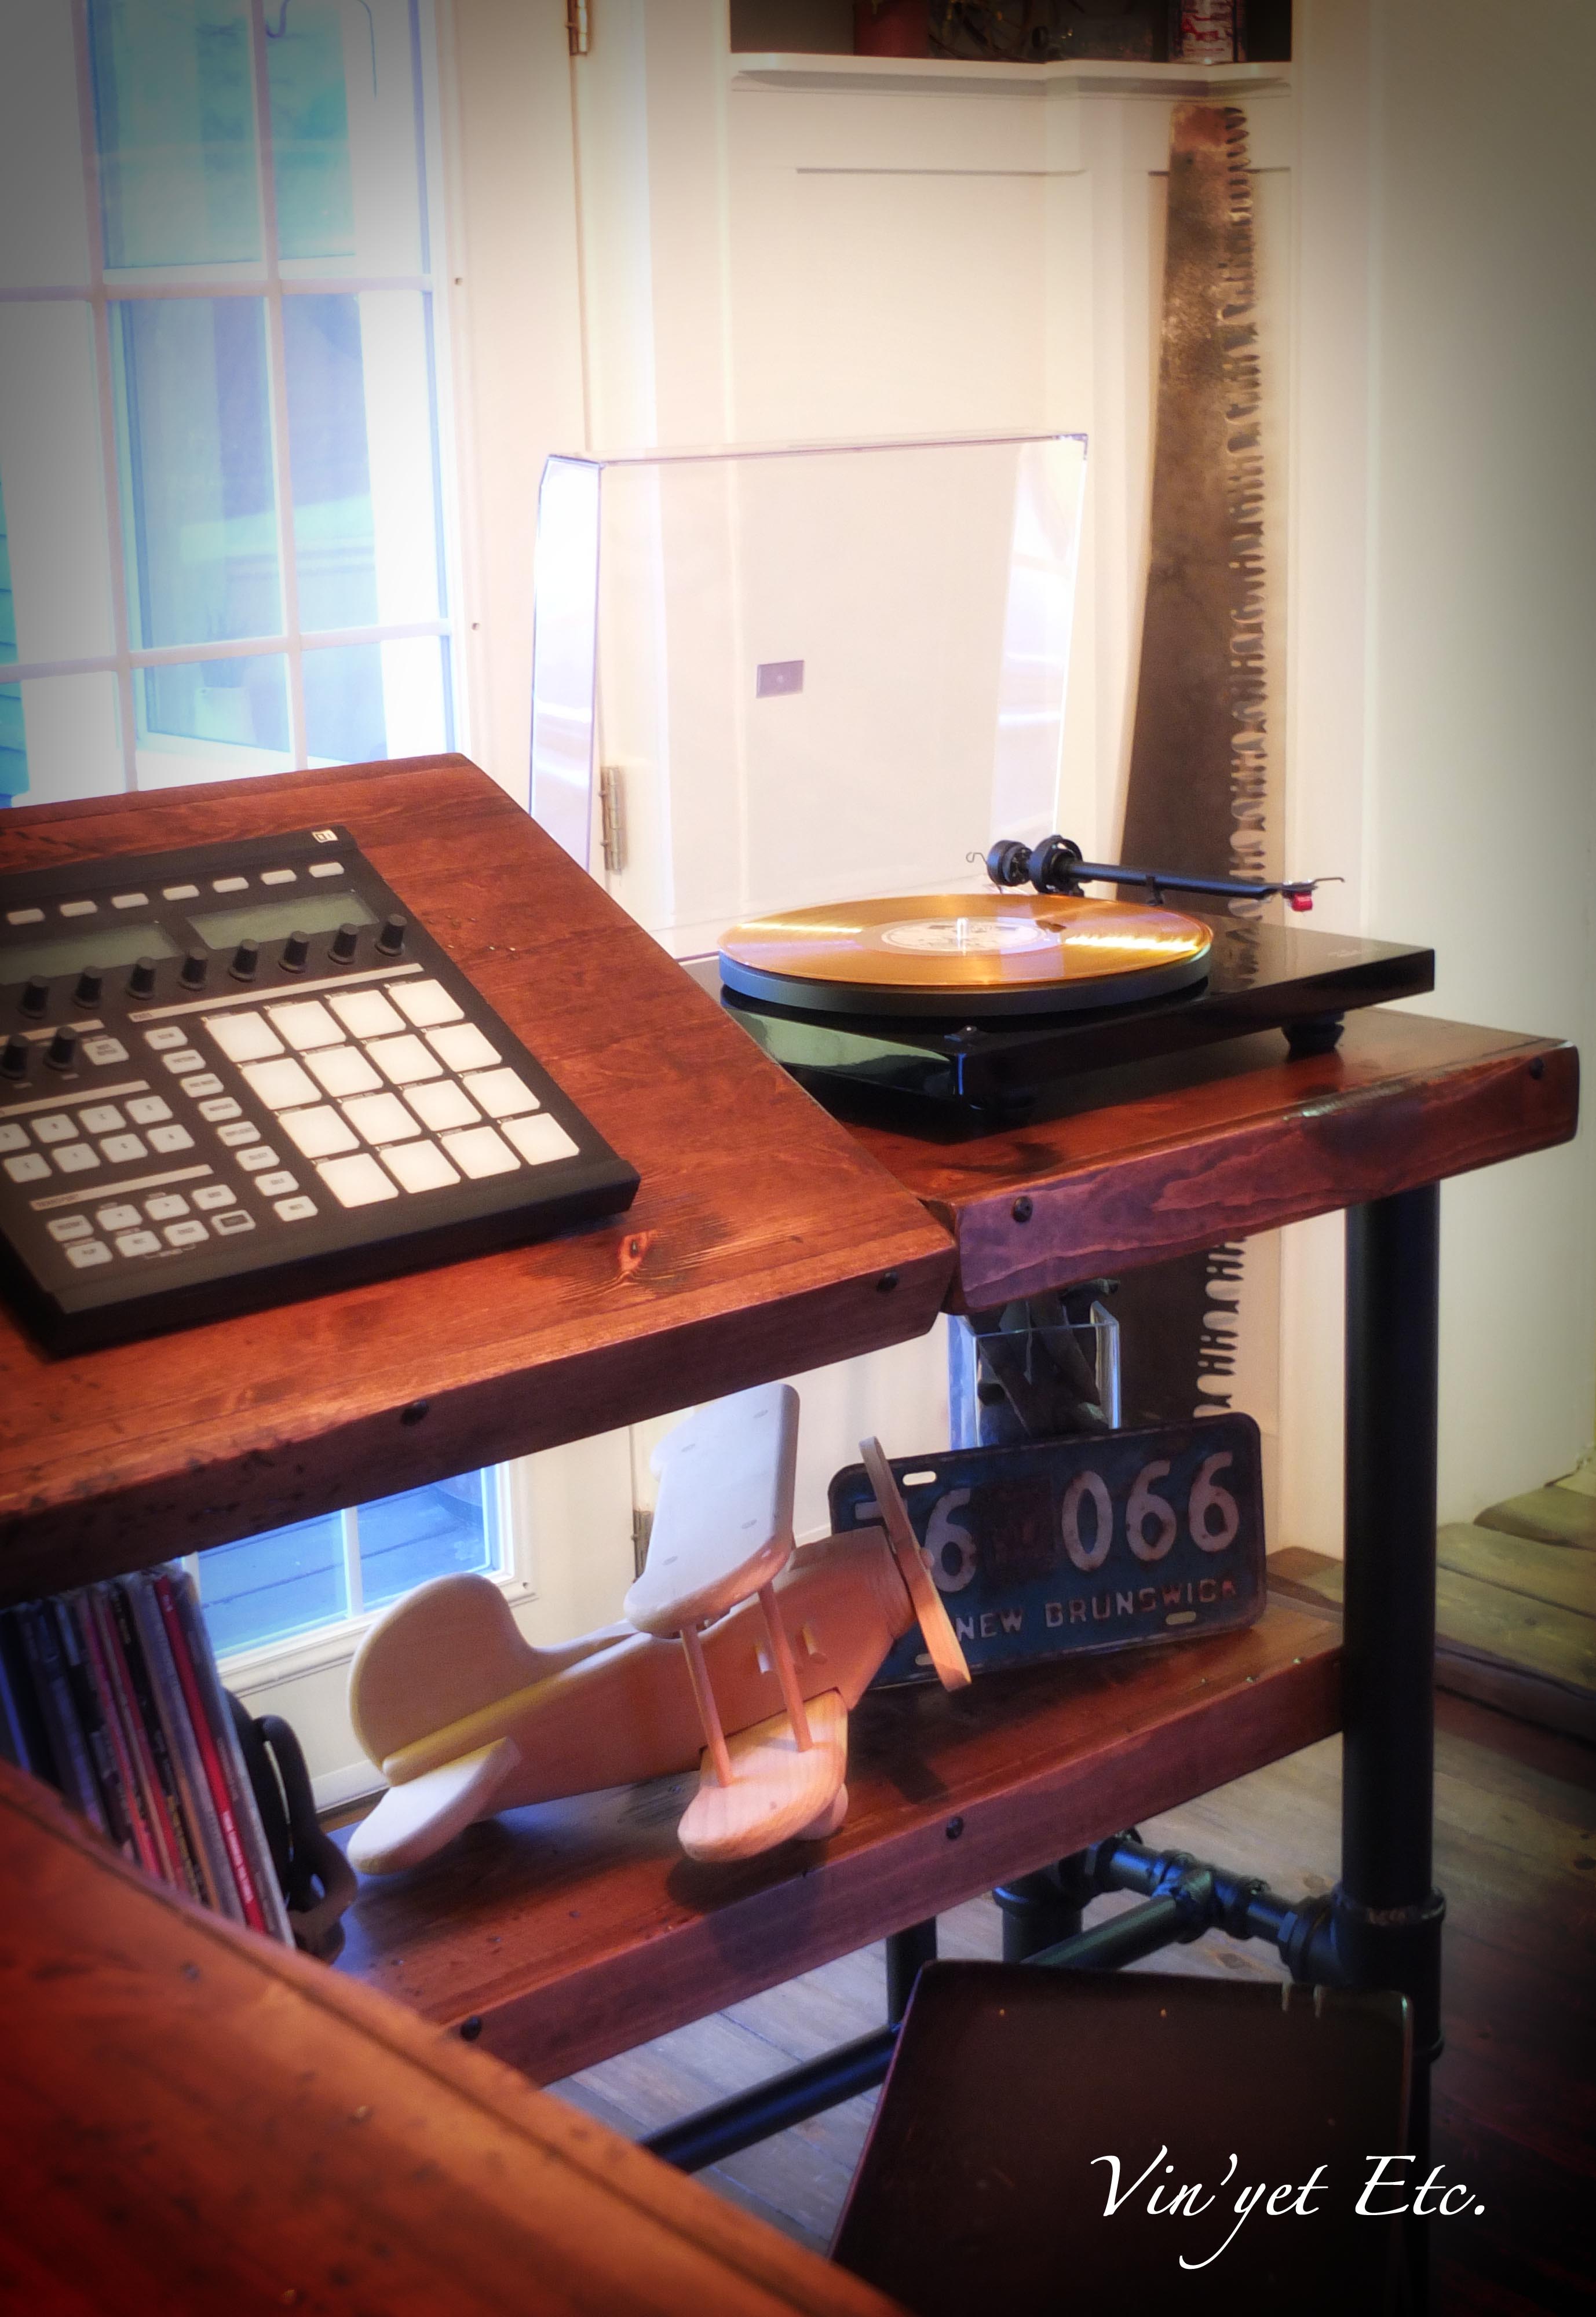
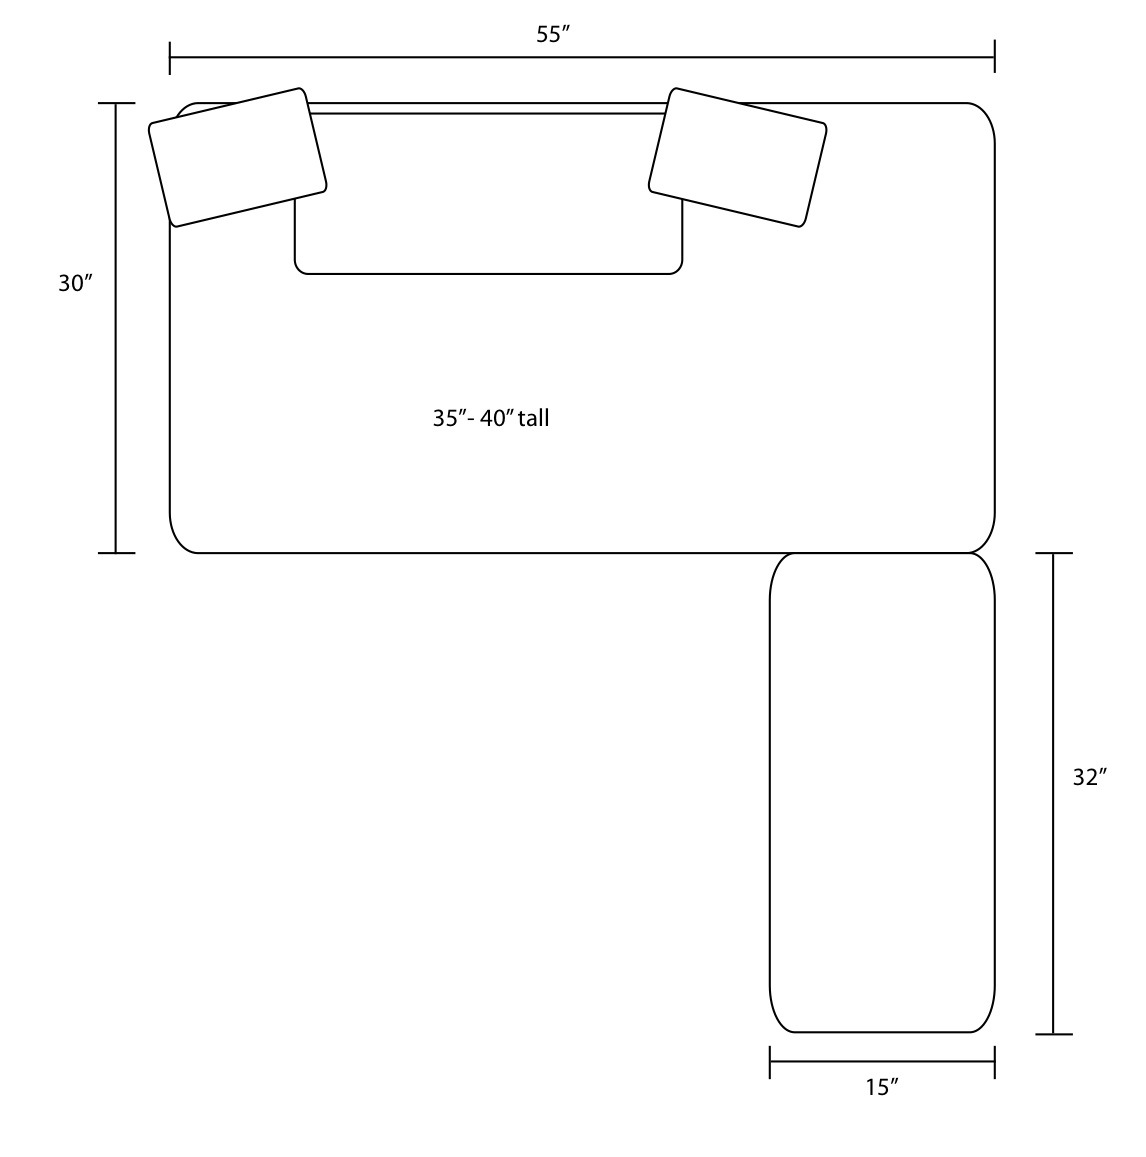 As you can see it’s a little vague, but this did give us an idea of height and size-ish, the main design criteria was, to be able to stand while he produced and he wanted some shelving for his speakers and large computer screen.
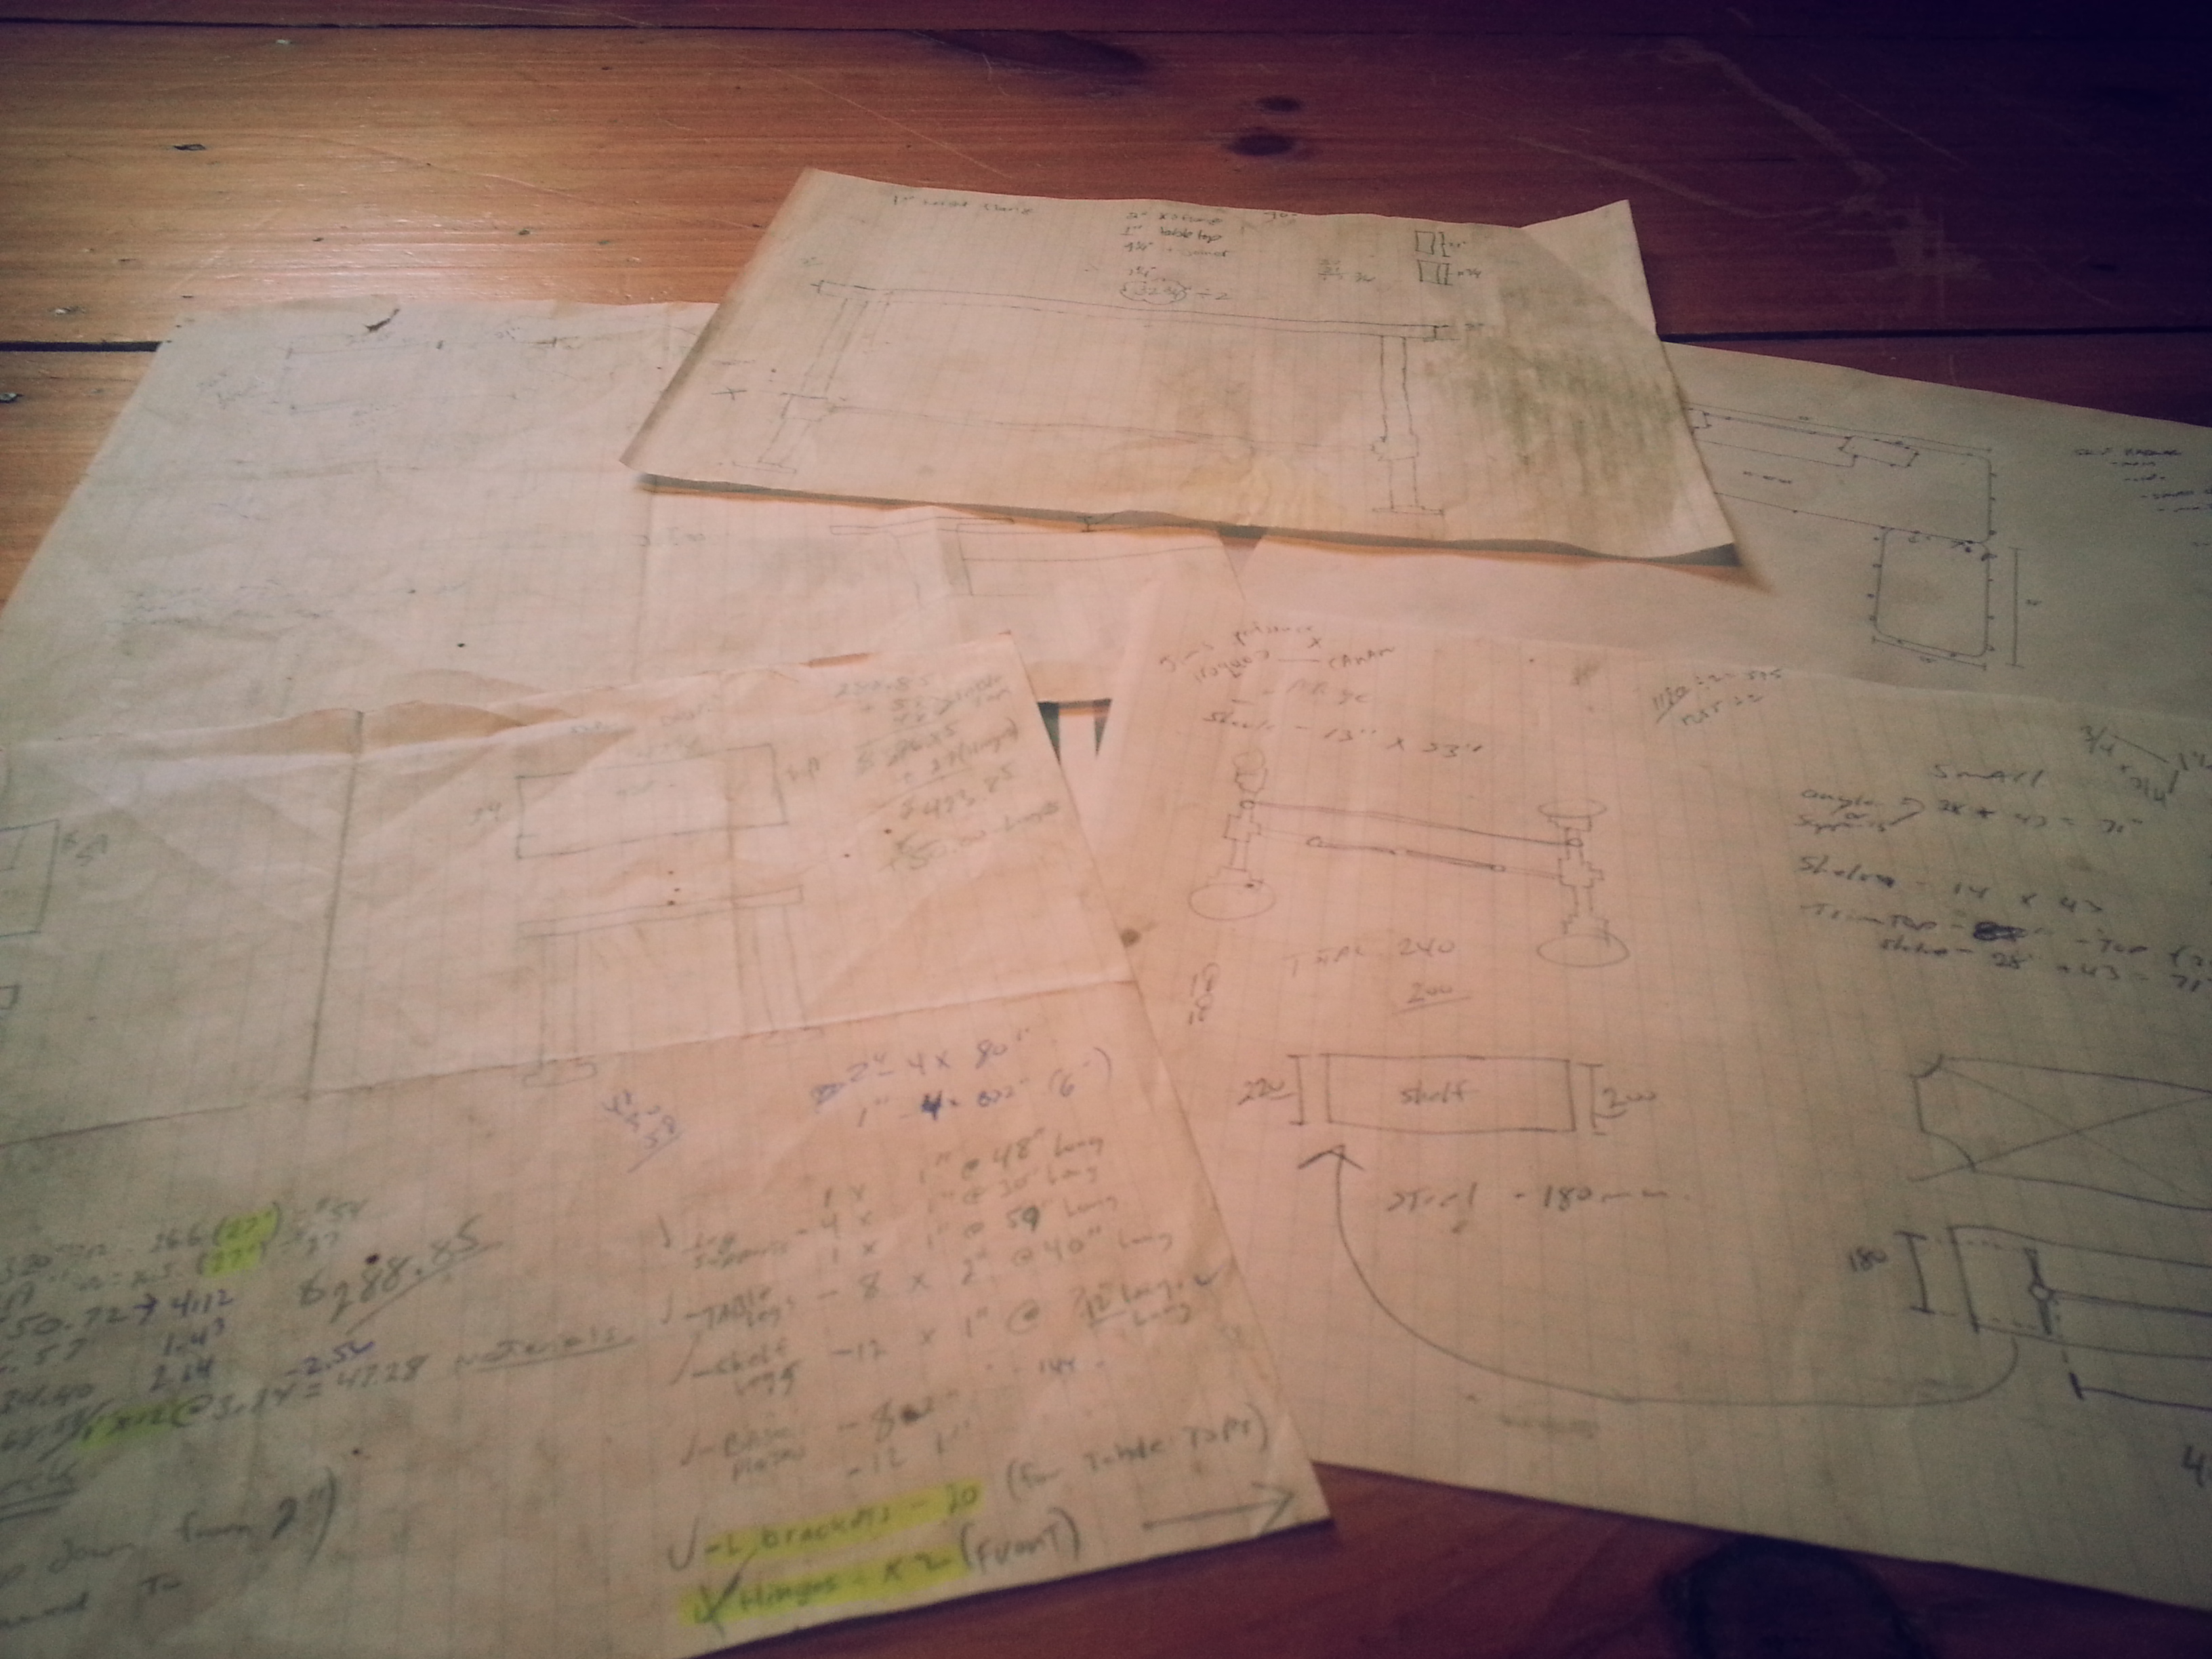 After a few sketches of our own… we came up with a plan.
Shopping List
- 1 – 59″ x 29 1/2″ VIKA FURUSKOG (Ikea) – pine table top
- 2 – 47 1/4″ x 23 5/8″ VIKA FURUSKOG (Ikea) – pine table top
- 8 – 1″ x 3″x 8′ pine (fascias)
- 2- hinges (front of small desk) 2 – hinges with height locking mechanism
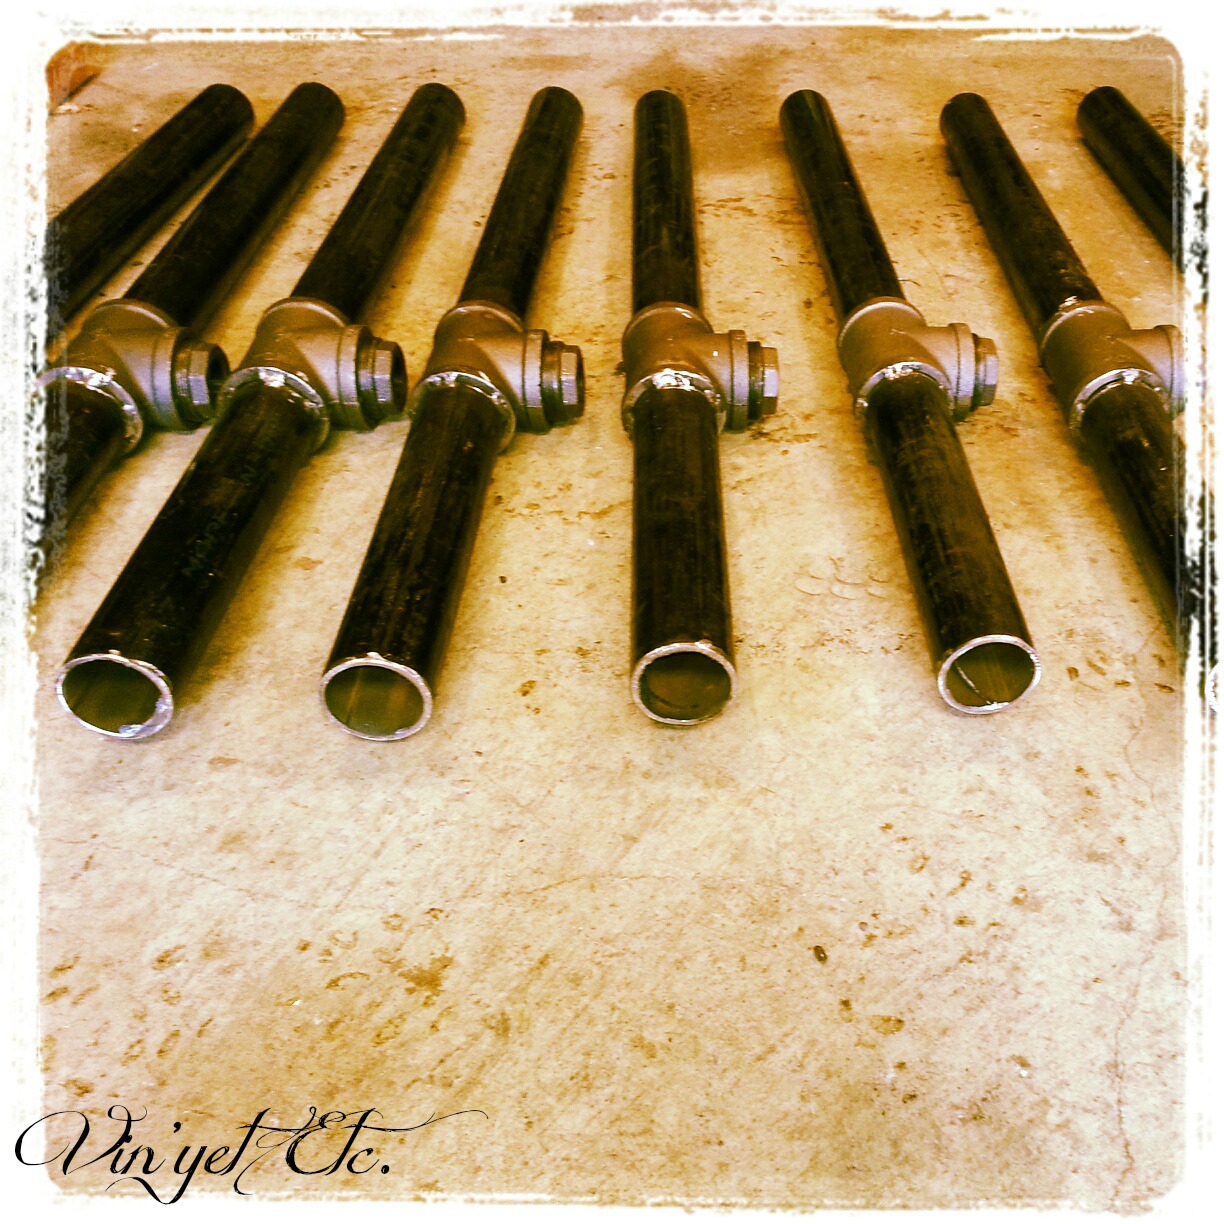
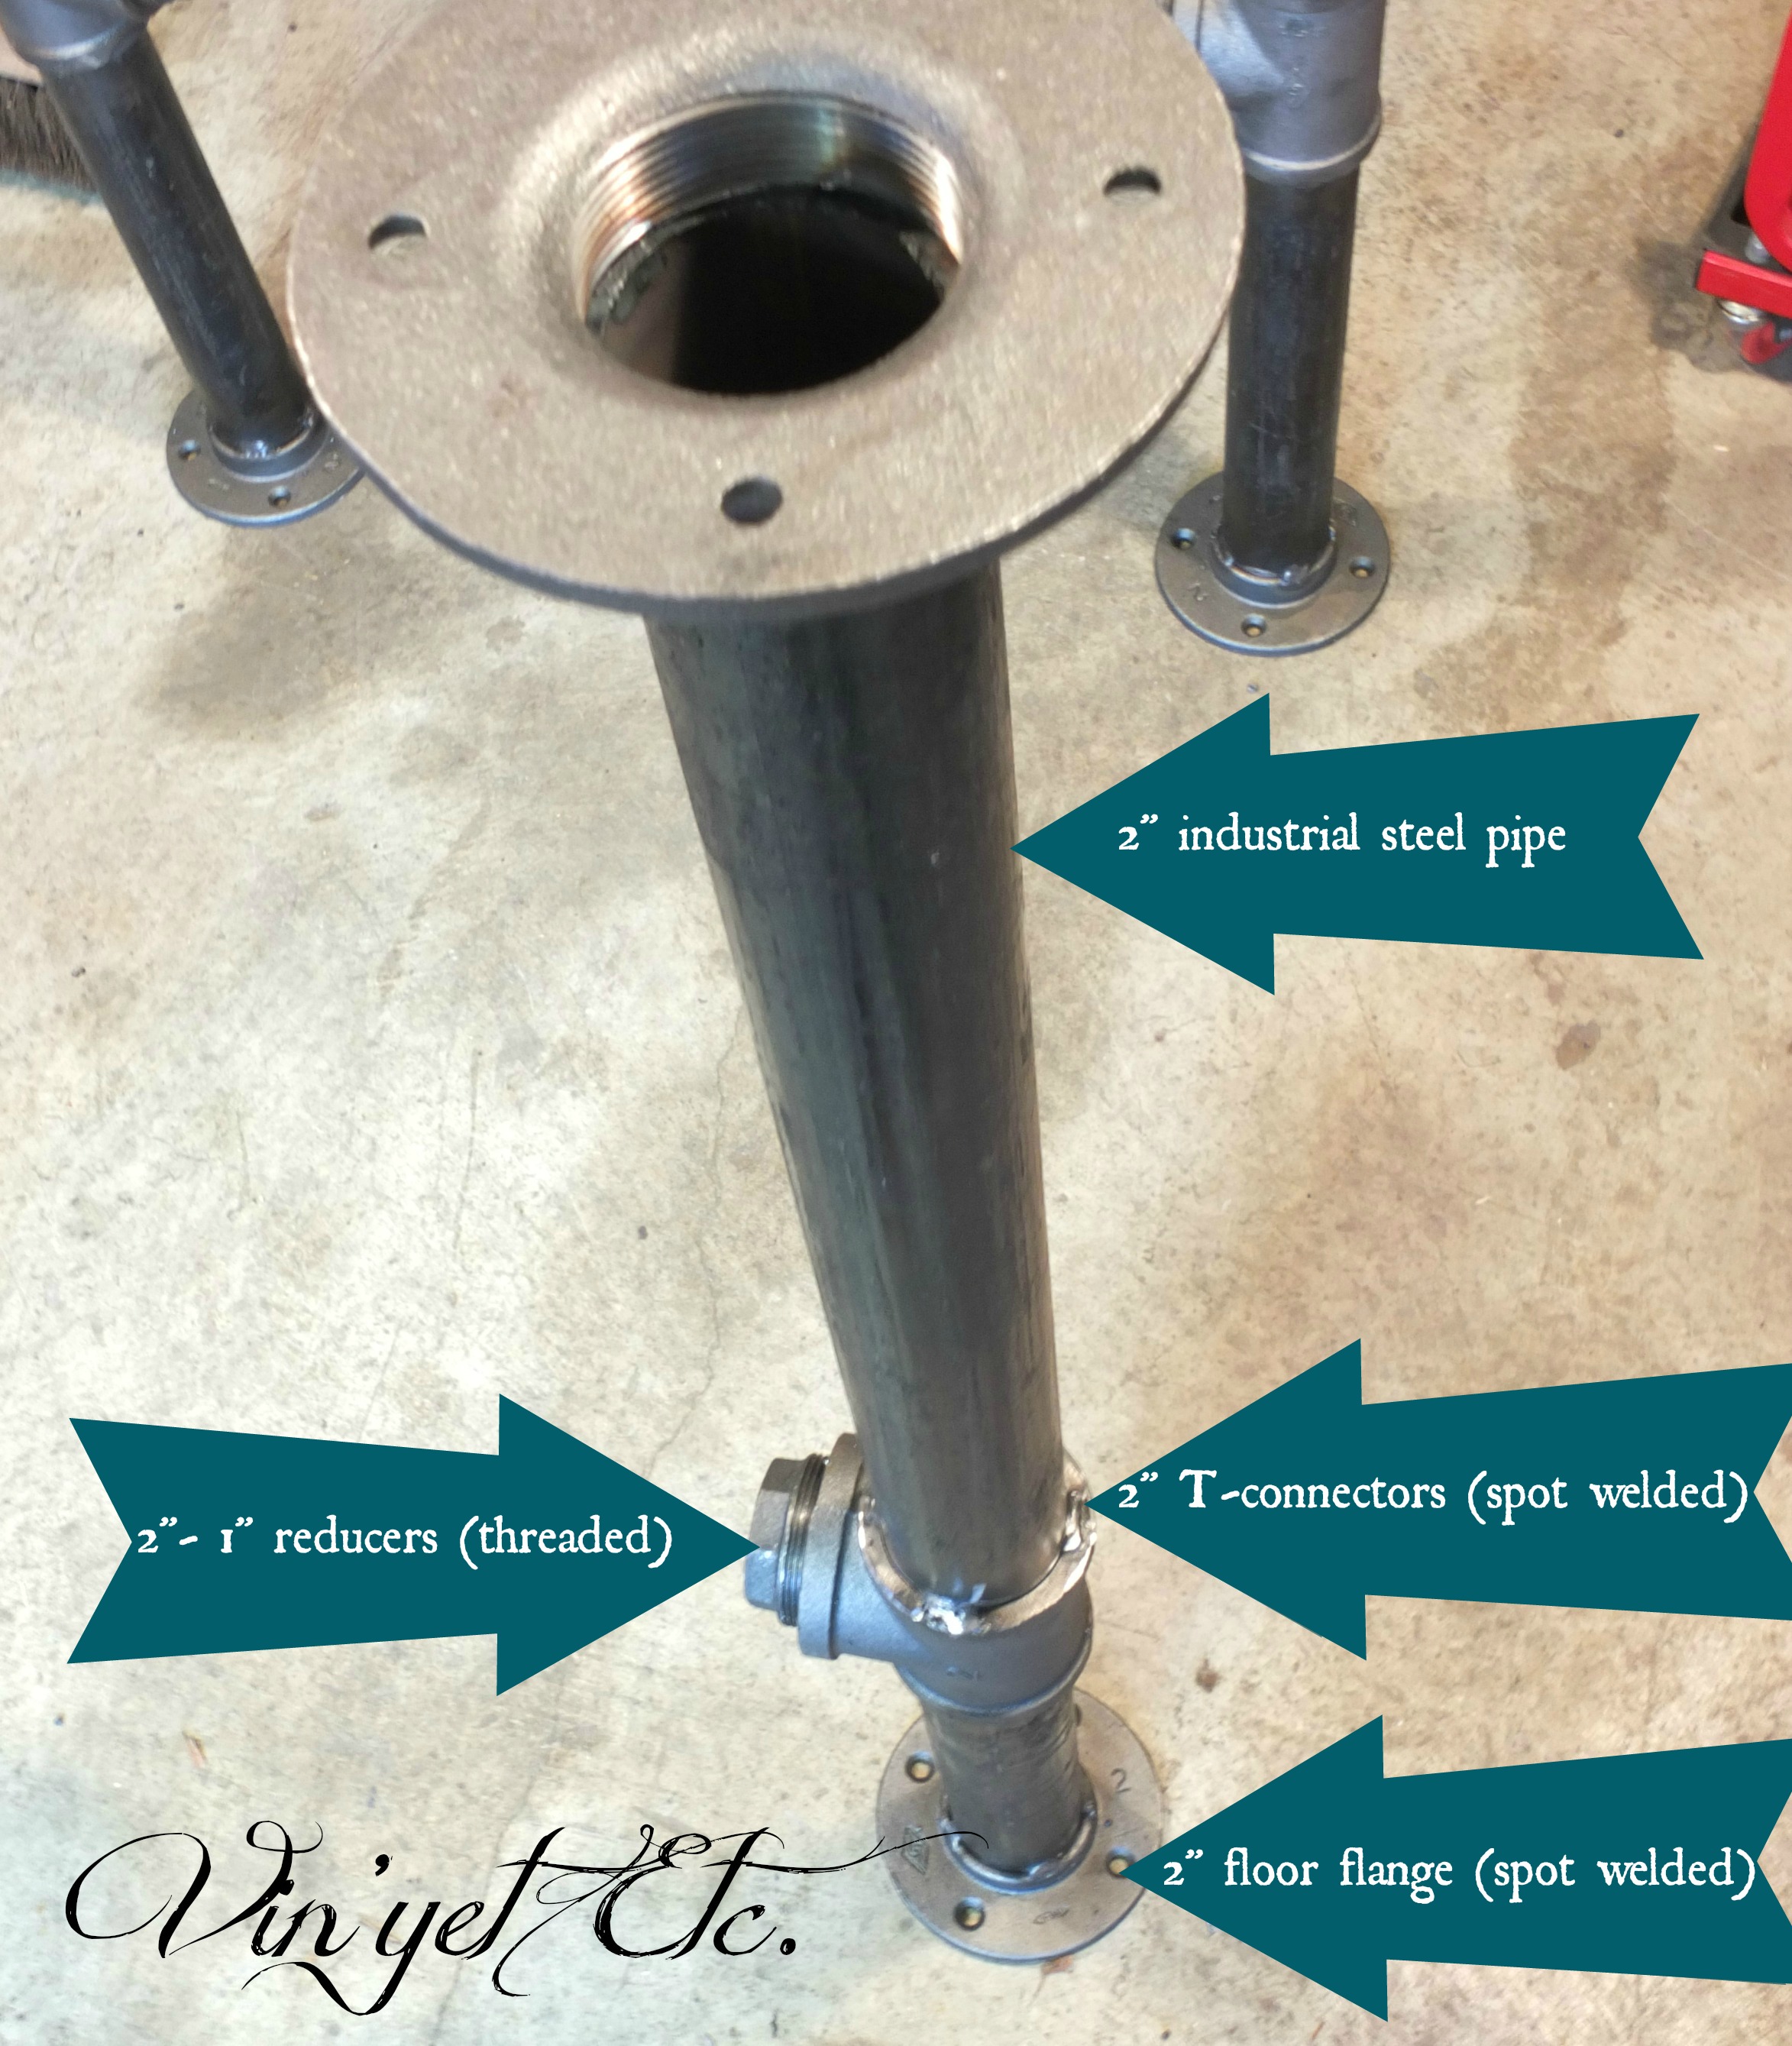
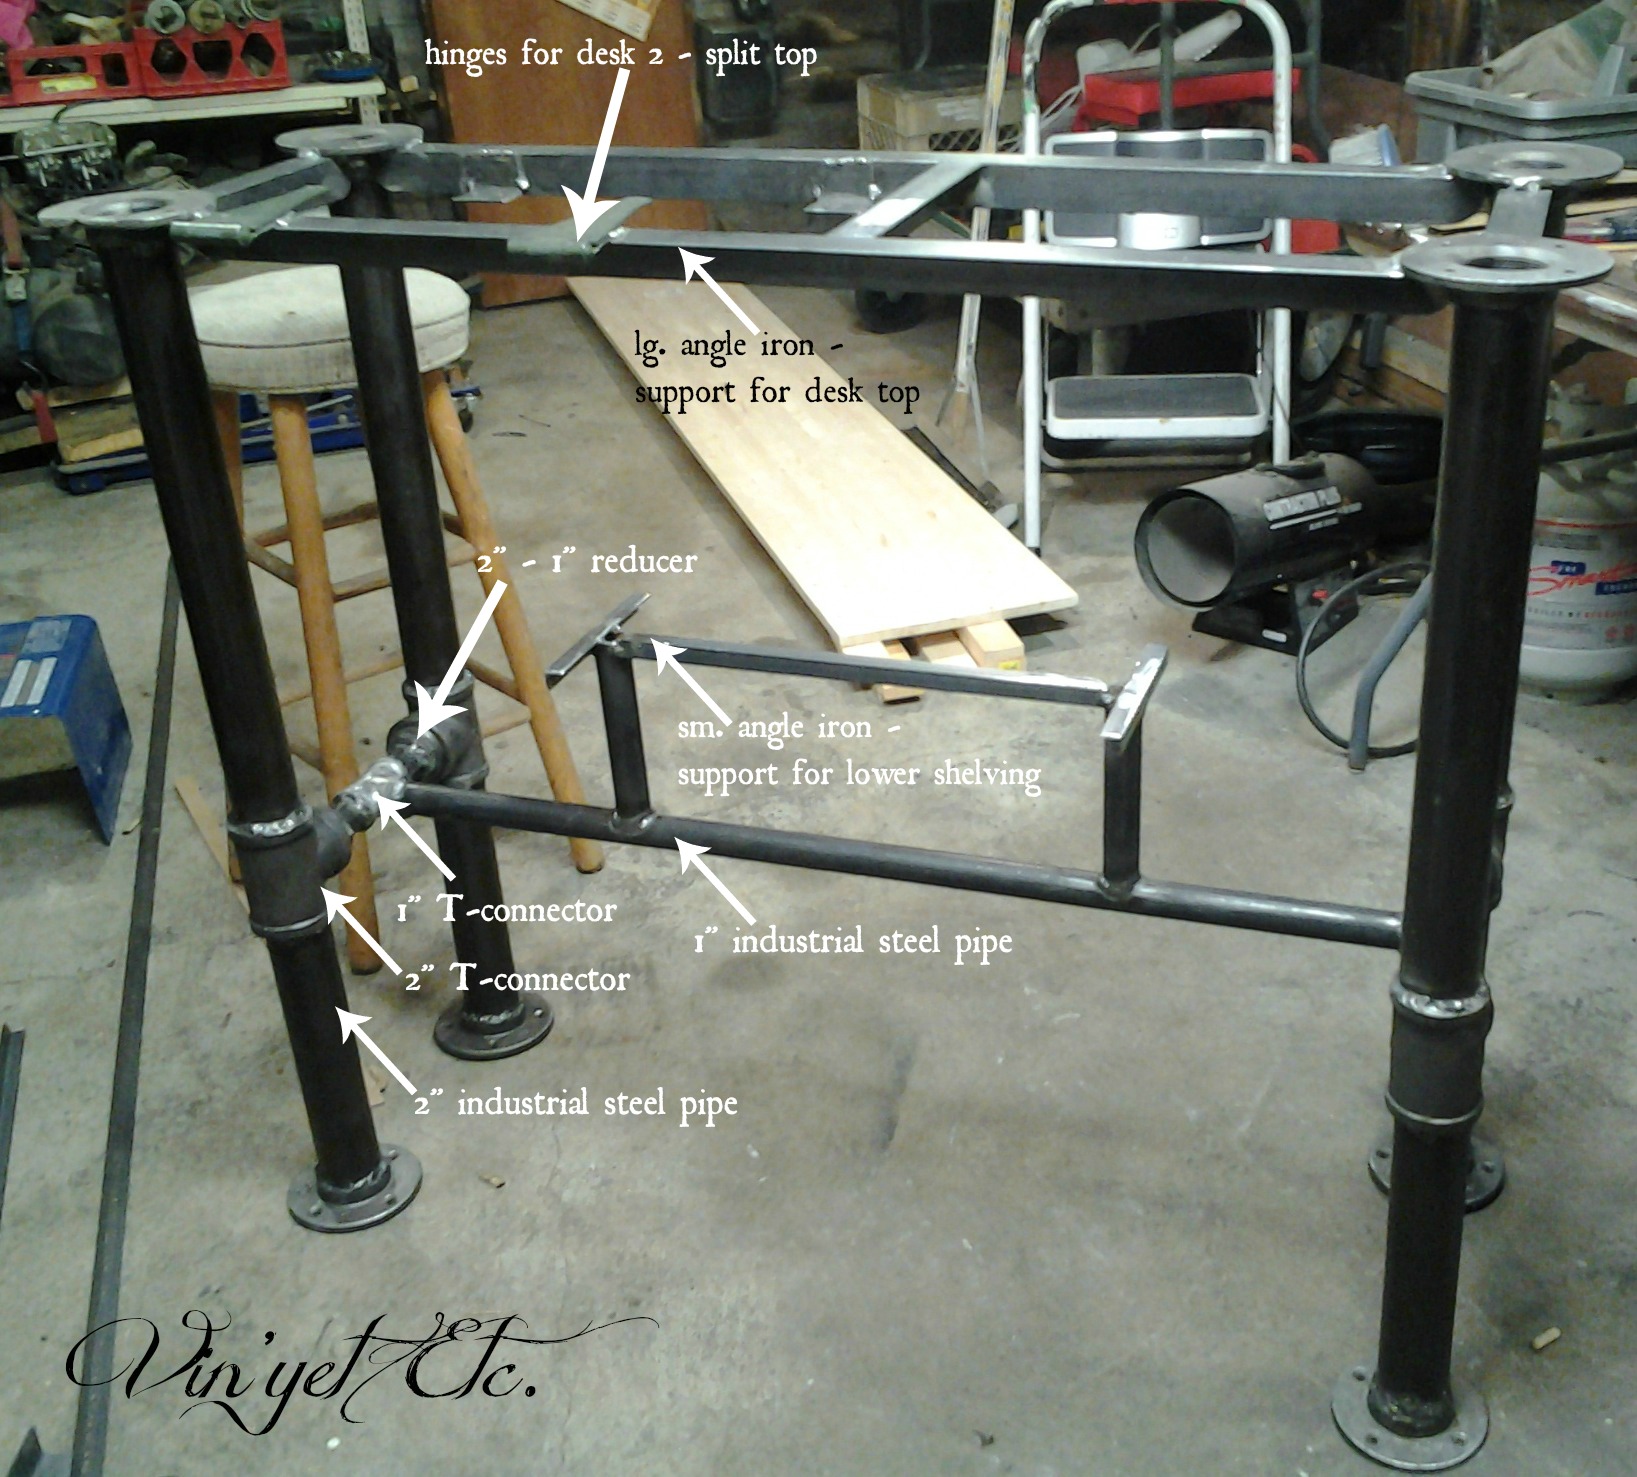
- 27 lin. ft. of 2″ industrial steel pipe
- 27 lin. ft. of 1″ industrial steel pipe
- 8 – 2″ T connectors
- 4 – 1″ T connectors
- 16 – 2″ floor flanges
- 24 – 1″ floor flanges
- 8 – 2″ to 1″ reducers
- 2 – 1″ x 14″ x 7′ pine planks (for desk lower shelving)
- 54 decorative deck screws (fascia detail)
- high heat satin black spray paint
- acetone (for cleaning the pipe before painting)
- wood glue
Tool List
- measuring tape or tapes if your like me, *scratches head, where did I put that?
- pencils
- safety glasses
- hearing protection
- cut off saw
- sander
- distressing kit (torch, rebar, chains, screws, hammer, chisel)
- welder (6018 welding rods)
- welding mask
- grinder
- steel brush (for removing slag)
- rags
- drill
- bolts
- screws
- sandpaper
- orbital sander
- foam paint brushes (for applying the stain)
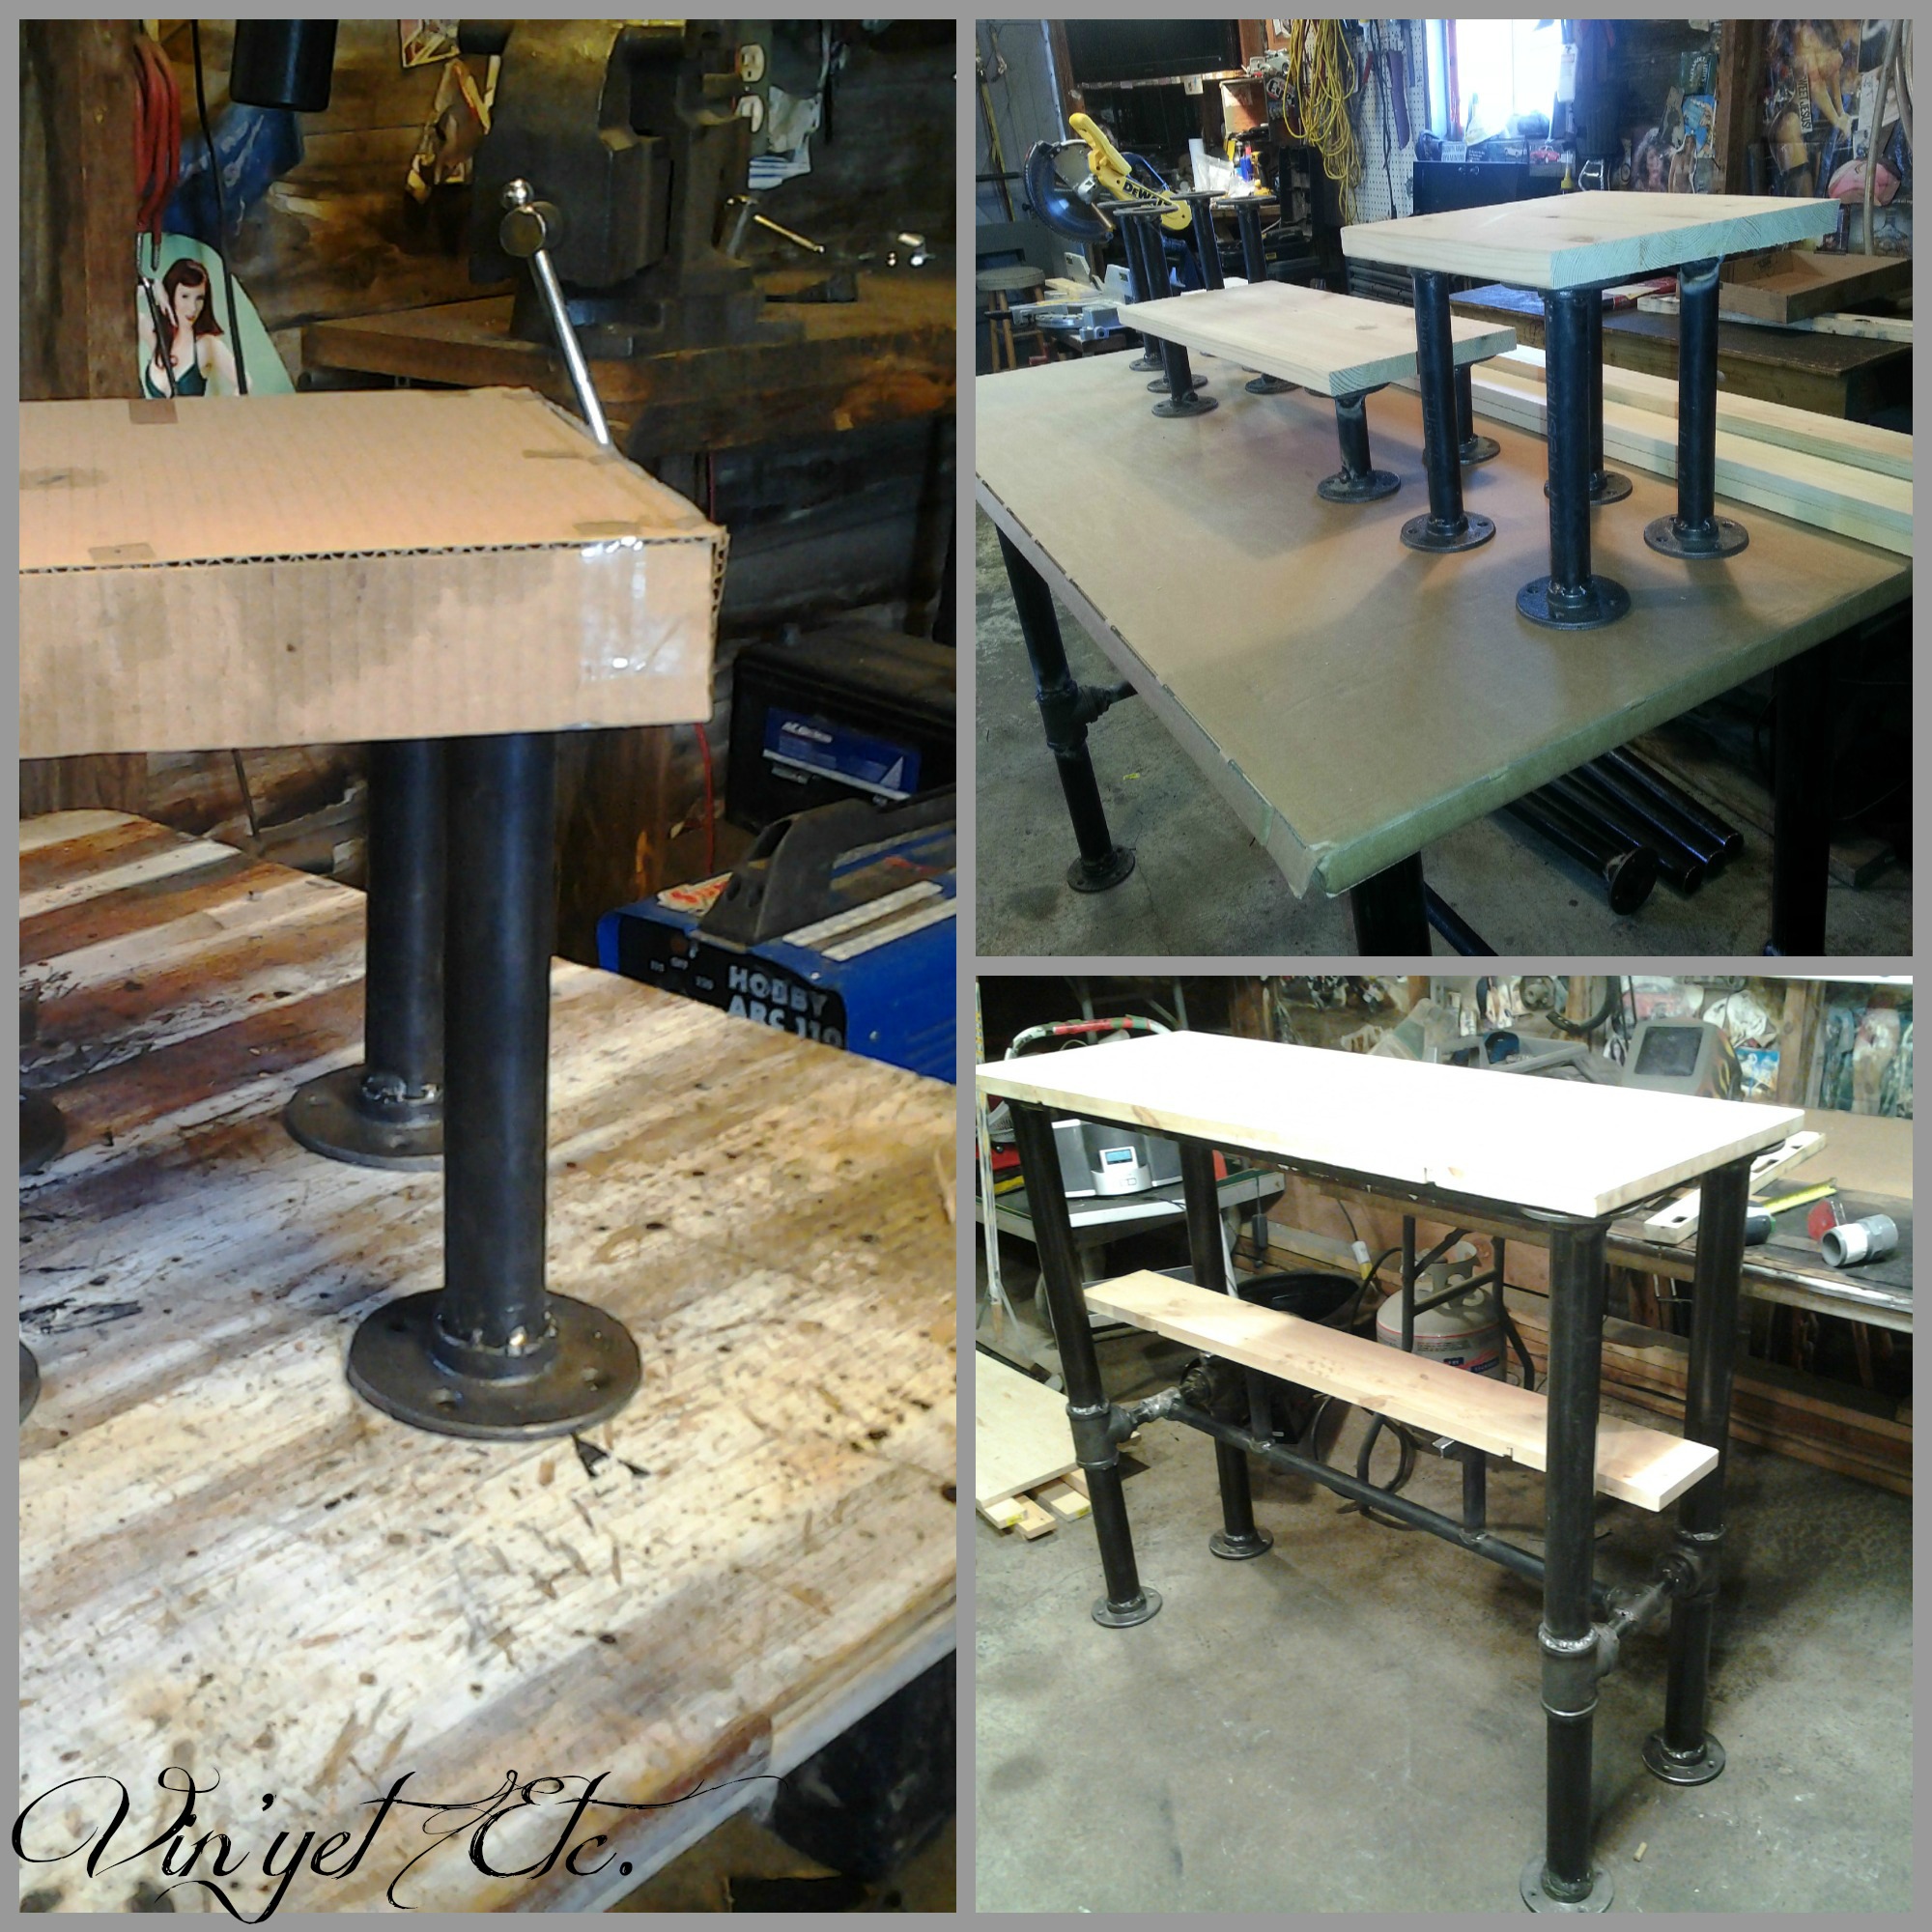
We decided to tackle the larger of the 2 desks first and work off of that scale and height. We built all of the legs first.

Quick mock-up with the top, looking good…


 You can source that hinge here.


Mr Meticulous and his military ways…
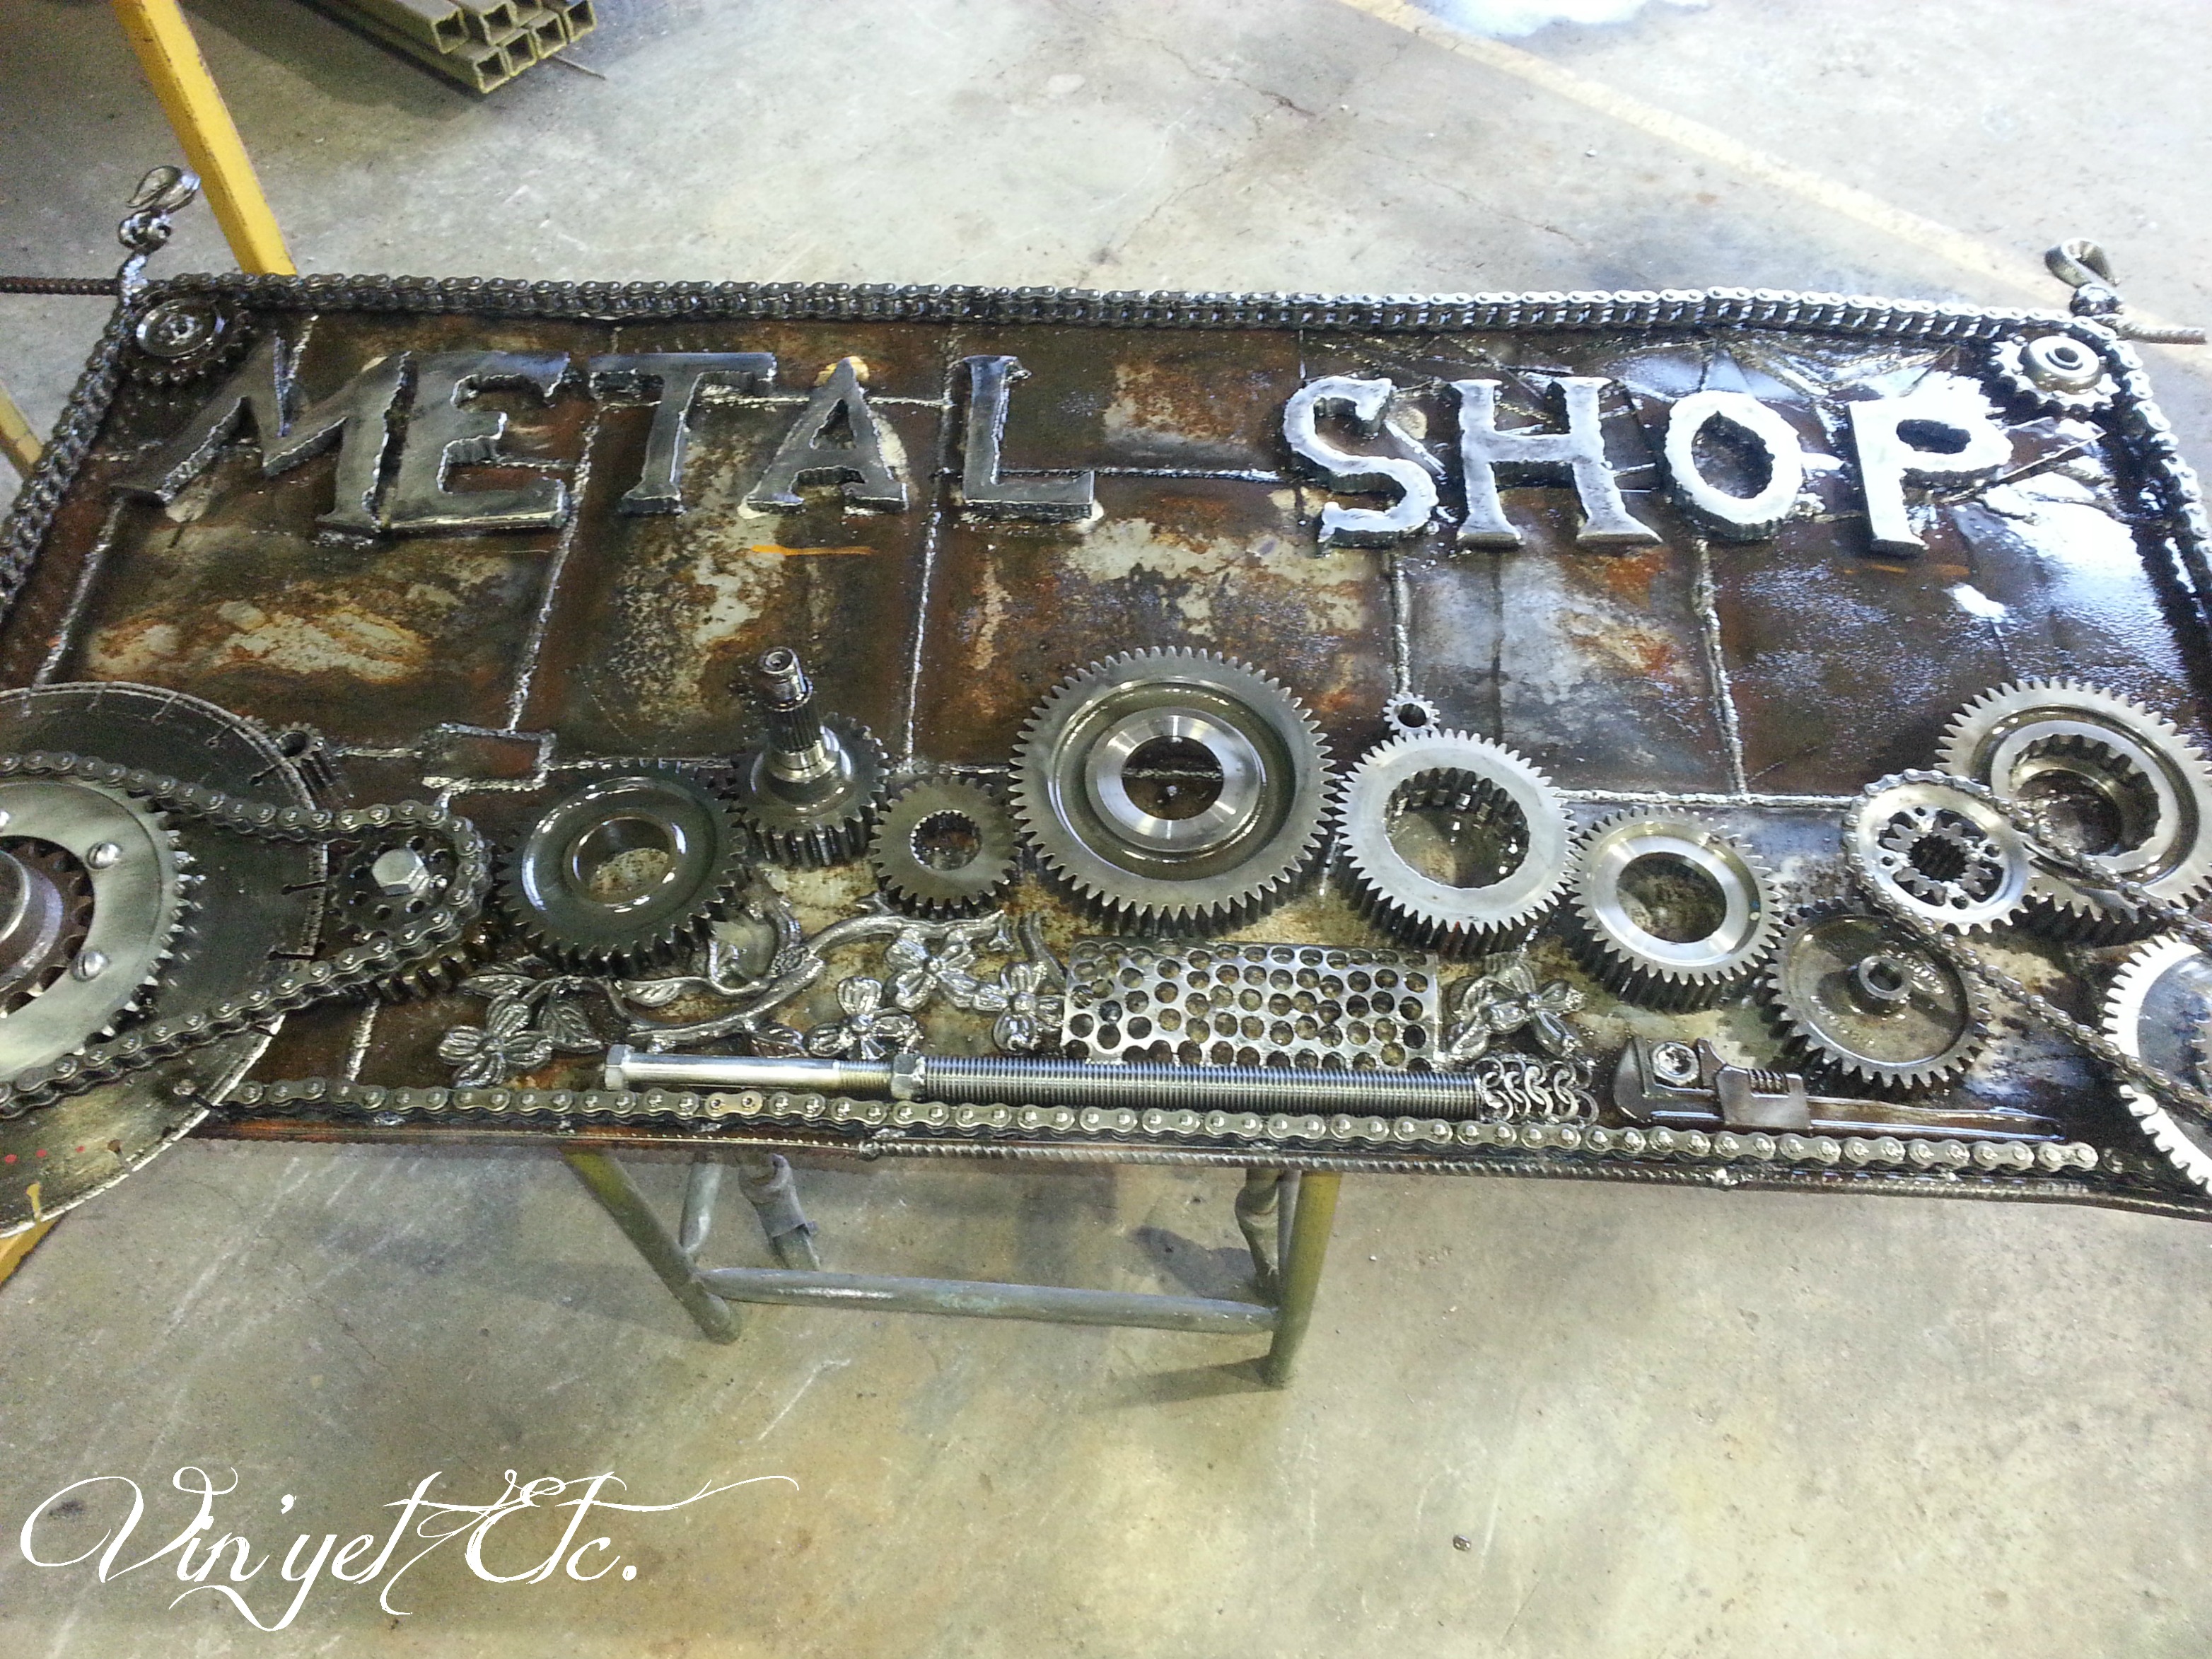
In the metal shop I spied this, isn’t it amazing? The guy that works there is making it from bits and pieces of “junk”…
Thanks for showing interest in this series, please let me know if you have any questions, I’d be happy to answer them…
~Laurie xo


24 Comments
Wow, that is a long list of tools and supplies – you are very brave! These are amazing instructions – if I ever get the crazy idea to try something like this, I’ll be coming to you first. But what really stood out for me is how groovy you look in those glasses 😉
Hahaha… I love those goggles! I’ll be here if you need me, if you ever become crazy enough to try this… 😉
A-W-E-S-O-M-E !!!!!!!!!!!!!!!!!!!!!!
Great project, great job and fabulous look! I love this!!!
Ah, thanks so much Anne! I really appreciate you saying that, I admire your projects so much, this is a huge compliment! xo
I’m in total awe of your project! I absolutely love how the desk turned out!
That’s so nice of you to say, thanks so very much!!!
Wow that’s an amazing desk! Great job. Also that’s something my son would never ask me to make him, he knows I have no skill lol.
LOL you could try something on a smaller scale? Thanks for stopping in and thanks for the compliment! xo
Wow! Very cool Laurie! Love the self portrait! Ha! Sharing on FB later today. xoxo
Thanks sweetie! Haha, if you can’t have fun, what’s the point, right?
Super cool, Laurie – pinned!!!
Hey Amy, thanks for pinning!!! 😉 xo
You are amazing! That is all… I am speechless 😉
Thanks so much Cynthia, I really appreciate you stopping by! xo
I read this the other day on my phone, so my apologies for the delayed commenting (my phone and I don’t play nice together!).
I LOVE your desk! Industrial style is my thing, and I’ve been wanting to figure out how to have a standing work station for my laptop. Your design has completely inspired me – I don’t know when, but now I know basically how! Thank you so much for sharing in such detail the steps to build this beauty!
Hi Sheila! Maybe one day we could build you one… 😉 if not though, when you get to it, just let me know if you have any questions at all! Thanks for the visit!
holy cr** that desk is amazing! fantastic idea and it looks incredibly good
totally love how it works with the color of the shelves and the floor
keep it up!
That desk came out great. You really did a fantastic job giving it the right look and feel. Where did you source all your pipe, connectors and flanges?
Hi Shawn, Thanks! We sourced all of the pipe, connectors and flanges from Wolseley Canada, they were very helpful. http://www.wolseleyinc.ca/home.htm;jsessionid=22BD47070478F33B9778B56206130646
Thanks for checking out the blog, I appreciate it!
~Laurie
Wow, your desk turned out great. I really love it! I’m sure your son is thrilled as well.
Hi, while looking for something on Pinterest I found this beauty!!! I REALLY love it! I was looking for the color you used for the wood… but couldn’t find it.
Hi Gretchen, thanks for stopping in to see our Industrial desk! 🙂 You can find a bit more detail and build info here including the finish we used, http://www.vinyetetc.ca/industrial-style-desk-reveal-33/. The finish we used was, Minwax Special Walnut. Hope that helps?
The desks look great and will help me with my own project, but one question I had was why did you folks weld the pieces together? Every other place I’ve looked at for inspiration and information has never welded the pieces together. Was there a specific reason for this that I’m not seeing? Thanks for posting everything!
Hi Jim, thanks for checking out our industrial desk. We built this desk 5 years ago and we are quite happy to say it’s still going strong, our son uses it every day. The reason we chose to weld the seams is because there were some custom on site cuts that were not threaded to screw into the flanges. Also, the threaded bits were loosening, and screwing into the flanges at different heights – making the desk uneven. We chose to do it that way so there were no variables in the leg heigh, no moving parts when the desk is moved (our son is young – so he will be living in many different locations) and the fact we did not have a pipe threader in our shop really determined that we weld the seams. 🙂 hope that answers your question, thanks again for stopping in. 🙂