Yipee, I’m back for March’s #12MonthsDIY challenge with my Canadian blogging friends… this month our challenge was to build, repurpose or make something from wood. My project is… wood slice art! I am so thrilled with how it turned out and I can now say it’s FINALLY out of my head! I’ve been wanting to make this piece of art for so long, I hope you like it as much as I do.
And a special twist to the challenge… queue the dramatic music! 😉 For this month’s challenge we are fortunate for the opportunity to be sponsored by, Fusion Mineral Paints!! Have you heard of, Fusion Mineral Paints? I must tell you this paint is beyond impressive! The high quality of their product blew my mind, seriously! Below is what they sent me, I used just a tiny bit of the paint (coal back) and a smidgen of the beeswax finish. The coal black paint and the beeswax finish really made my piece pop, it really brought out the lovely grain in all of those wood slices… so many wood slices! I’m already excited to use this gorgeous paint on my next furniture victim!
 If you’d like to learn more about this fab company you can stalk them on; Facebook, Instagram, Twitter and Pinterest
I must say that I was so excited to start working on this project, as I said above it’s been kicking around in my head for so long that it’s really been difficult to not share everything with you all on Instagram… but I did share some sneak peeks, did you guess what I was up to?
Are you on INSTAGRAM? Make sure to follow me there, see how YOU can be involved in our #12MonthsofDIY series this year! We’d love to see what you create!

So, let’s get on to the details, how did I make this piece of art for our master bedroom?
(see more details on that never ending project here)
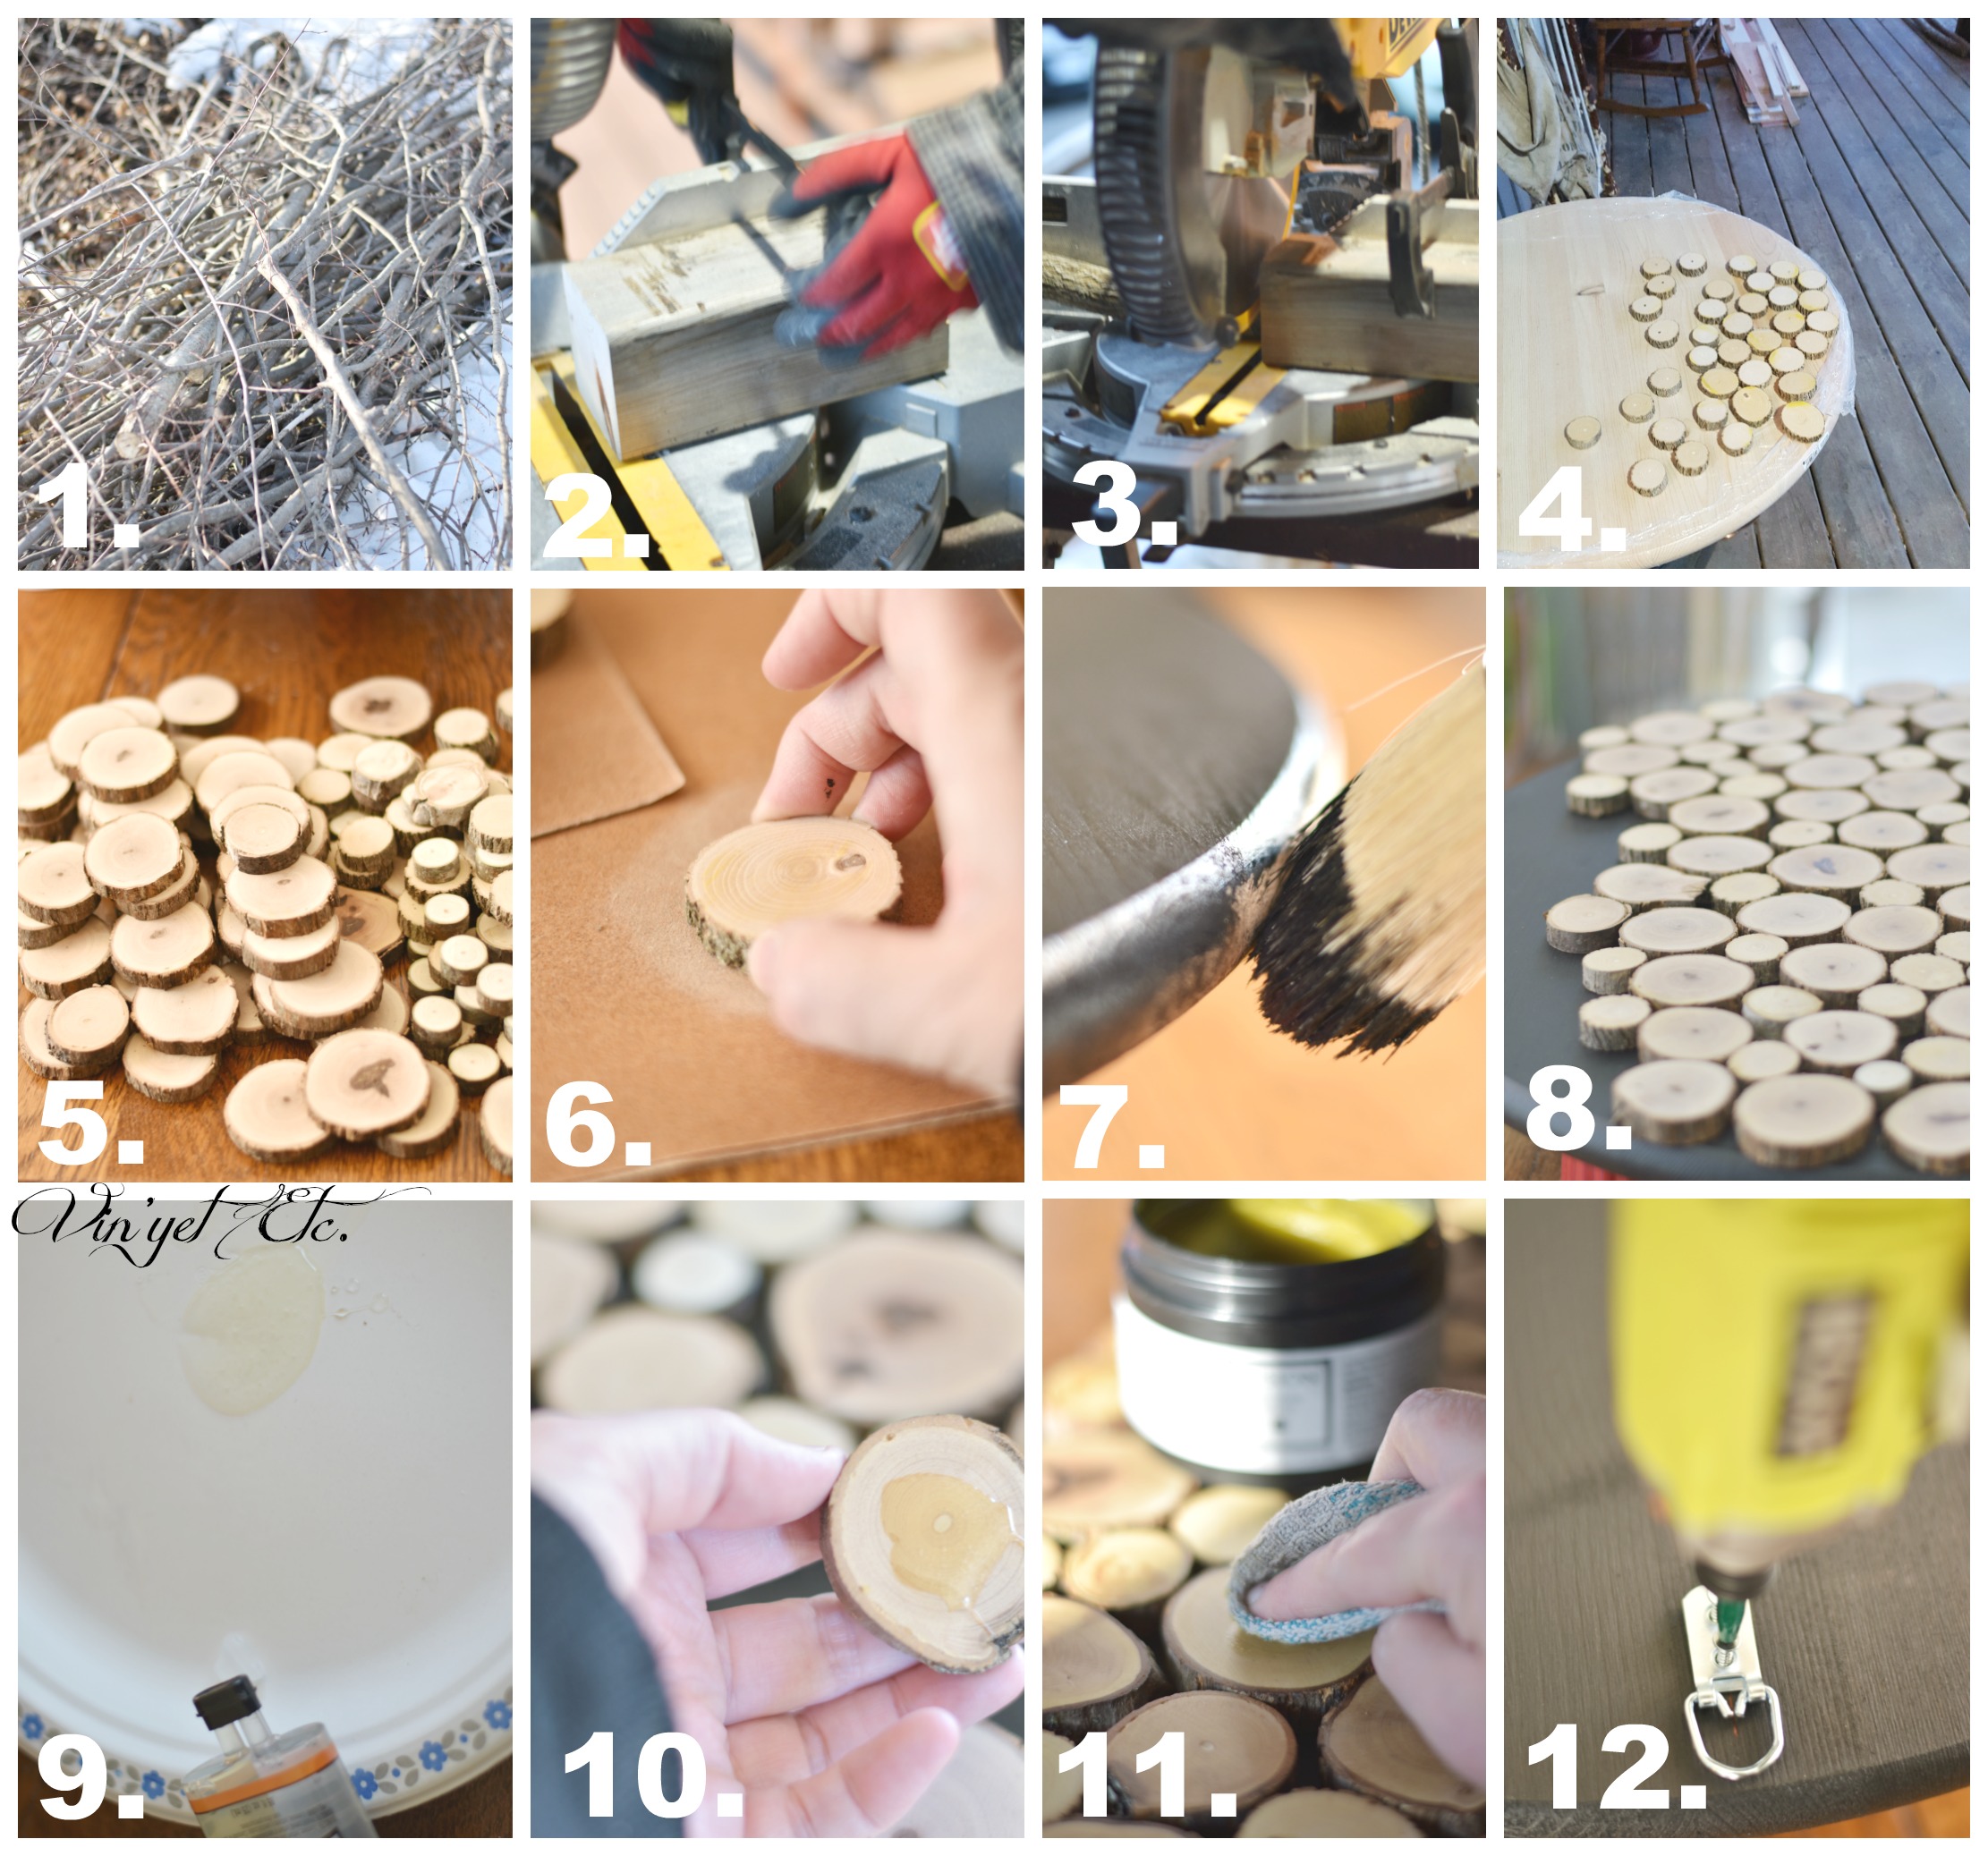
Materials you will need:
- 24-in Stain Grade Kiln-Dried Pine Round (aka – round base) – I got mine from Lowe’s – $19.99
- A saw (I used our mitre saw with a new blade – make sure your blade is sharp)
- A variety of different sized branches
- Epoxy glue (I’ve used a glue gun for wood slices in some past projects and I found that they do not stay the course and hold the slices in place for the long term – spend a little extra and make sure they don’t fall off)
- Paint (I used – Fusion Mineral Paint – coal black)
- Beeswax (Fusion)
- 2 hole D-ring hanger (for hanging your new art)
- 150 grit sand paper
Steps to make your new wood slice art:
1. Select a variety of different sized branches… these are from our fall clean up, thankfully we didn’t quite finish that chore – I guess it does pay to procrastinate 😉
2. Clamp a piece of large flat or square wood to your saw as a stopper so your wood slices stay a consistent size – we used an old 4×4 piece of fence post we had kicking around
3. Slice your branches one by one, butt the branch up against the 4×4 jig and start slicing – make sure you are wearing eye and ear protection
4. Lay each slice onto your 24 inch round base, this will help you gauge how many slices you will need in total (cut a little extra as your slices will be close together)
5. Let the wood slices dry – I have a very sunny window sill I laid them out on (to speed up the process place in the oven @ 250 for 30 min)
6. Sand each slice – I was going to skip this step but we noticed that the new saw blade left yellow marks on some of the slices, I ended up really liking the look of the sanded slices and did them all (front side only – left the backs of each slice un-sanded)
7. Paint your 24 inch round base – let it dry completely (2 coats on the front side, 1 coat on the back)
8. Arrange the sanded pieces out onto the painted round base (arrange them how you’d like them to look when glued down)
9. Once you are happy with your arrangement open the epoxy glue and mix as per the directions on the pkg
10. Lift each slice, spread epoxy on the back of each piece (use half of what is pictured in this collage) and place it back down in the same spot you took in up from – let the epoxy dry as per directions
11. Once the slices are set up, use a dry clean cloth and wax each slice as well as the sides of the painted round base with bees wax finsih, once dry buff and repeat (I did 2 coats) when done…
12. Install the 2 hole D-ring hanger on the back
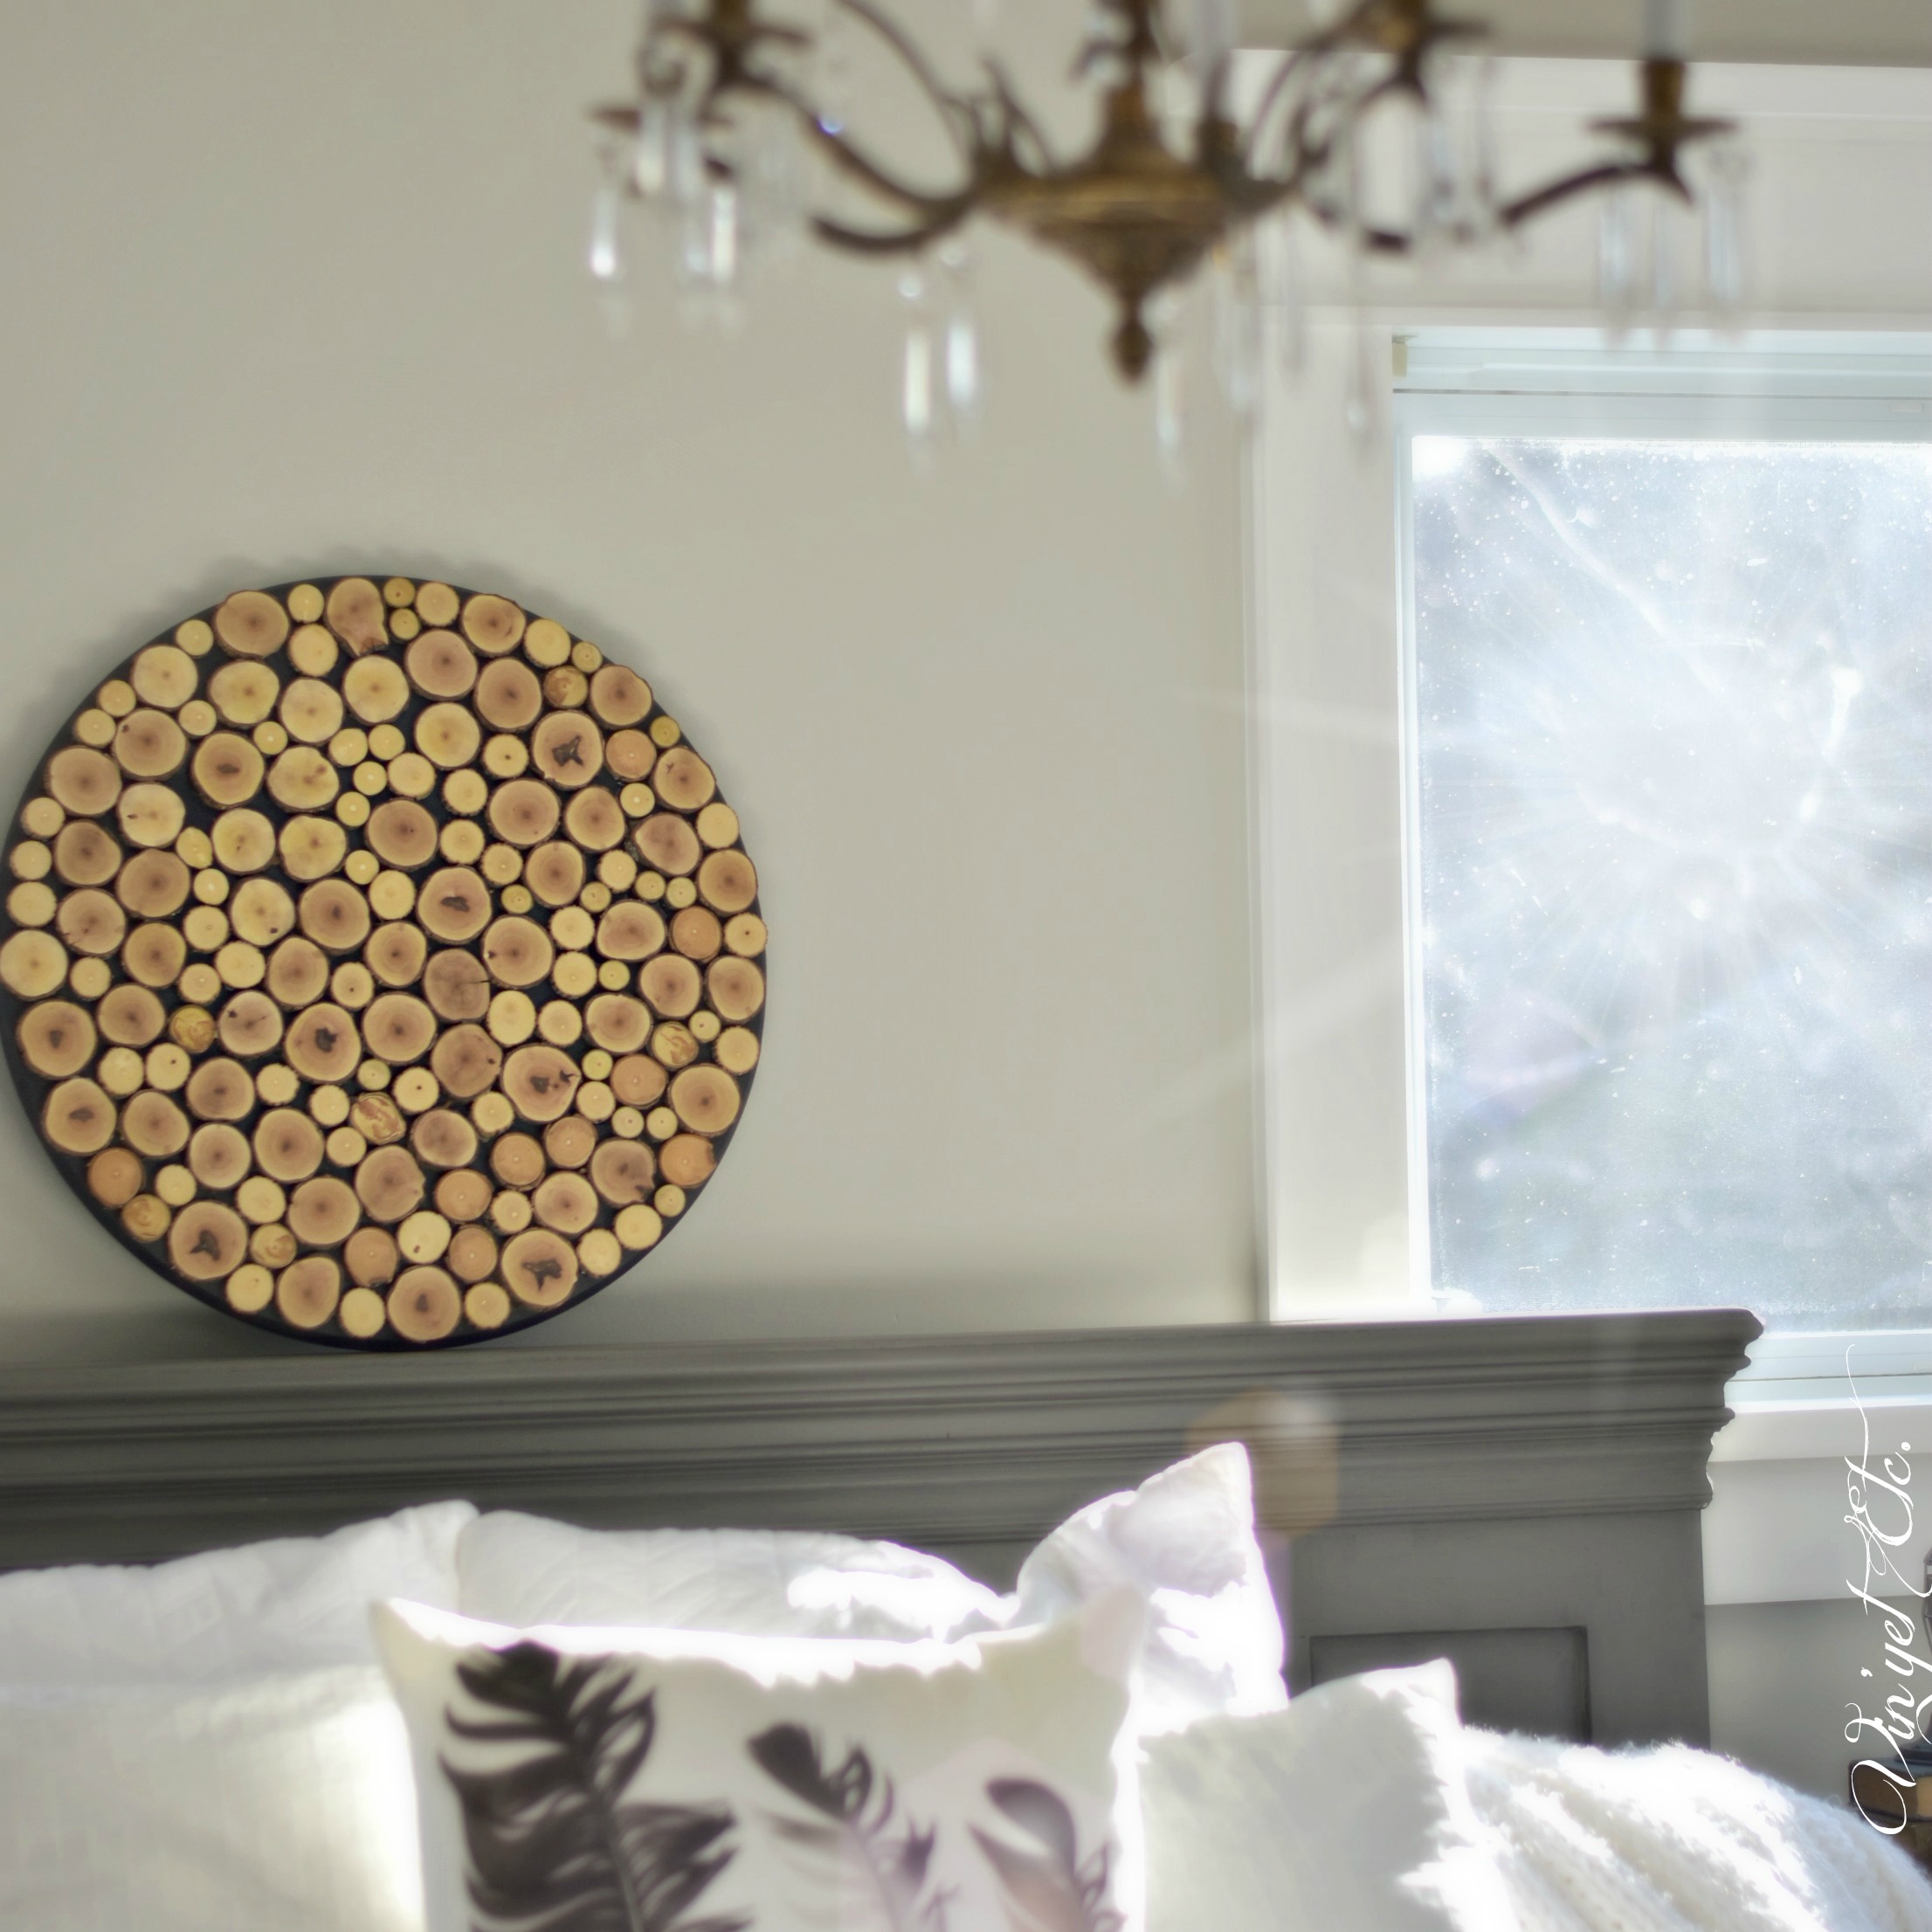
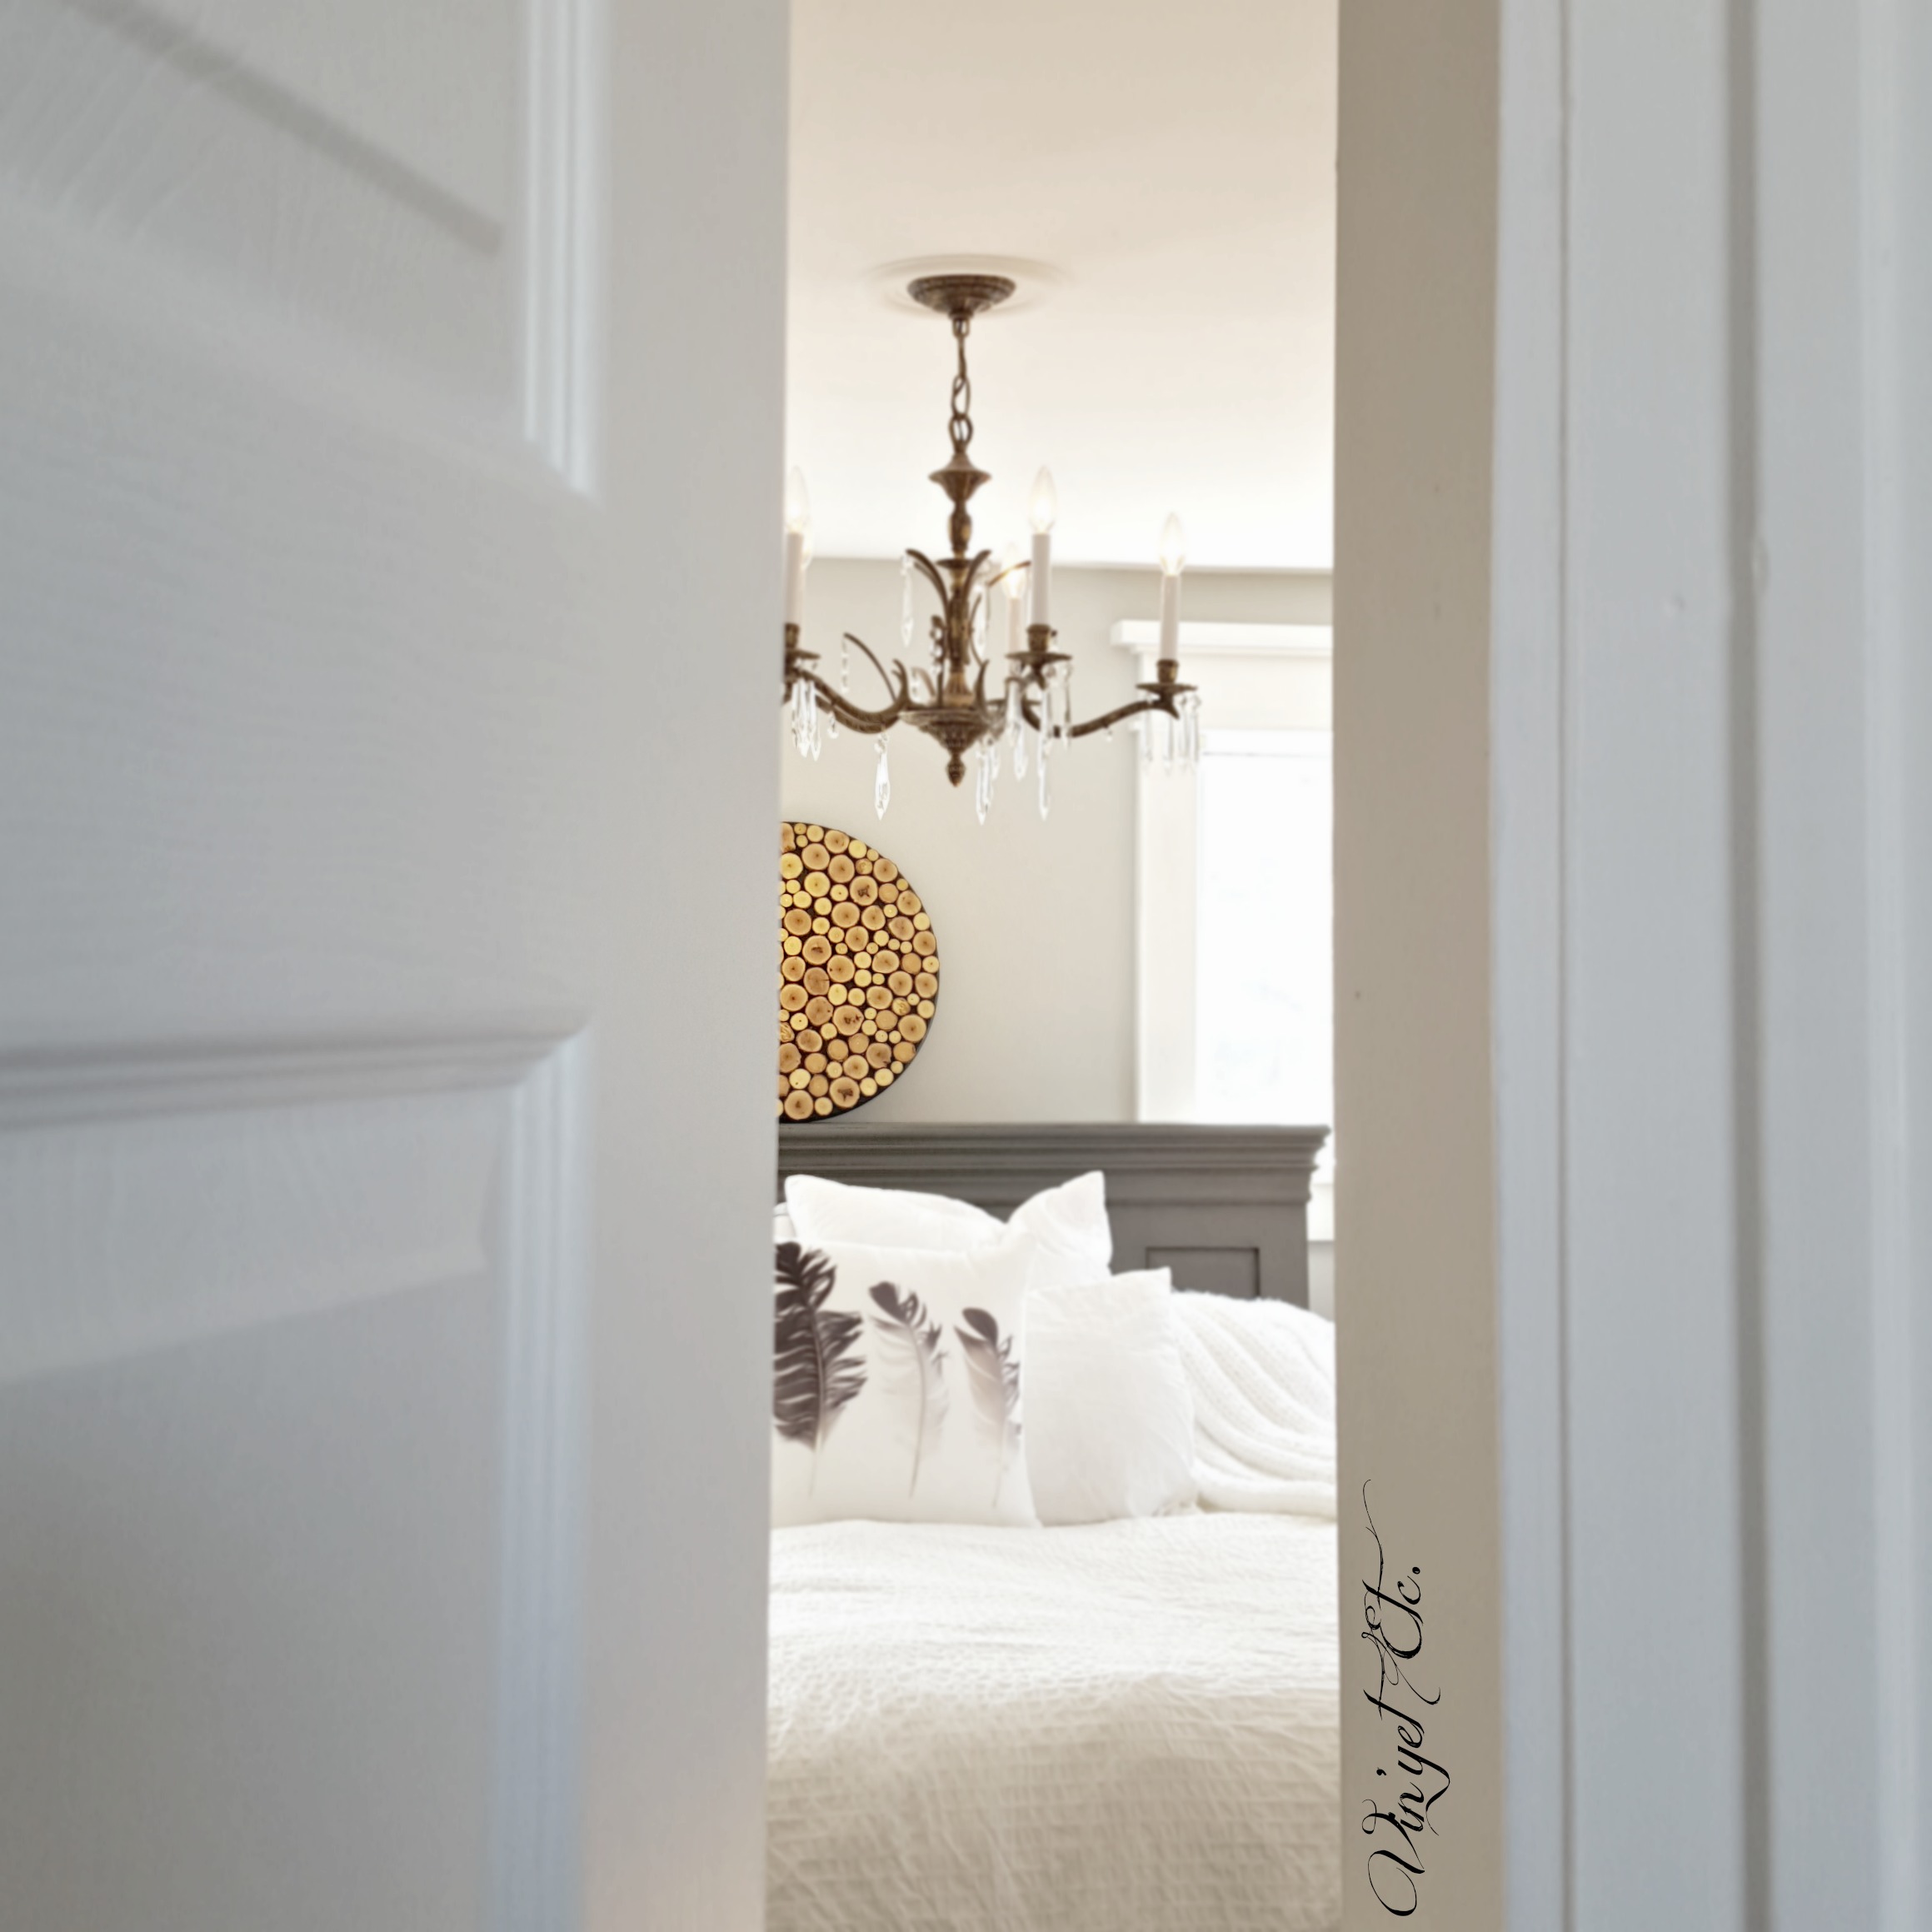
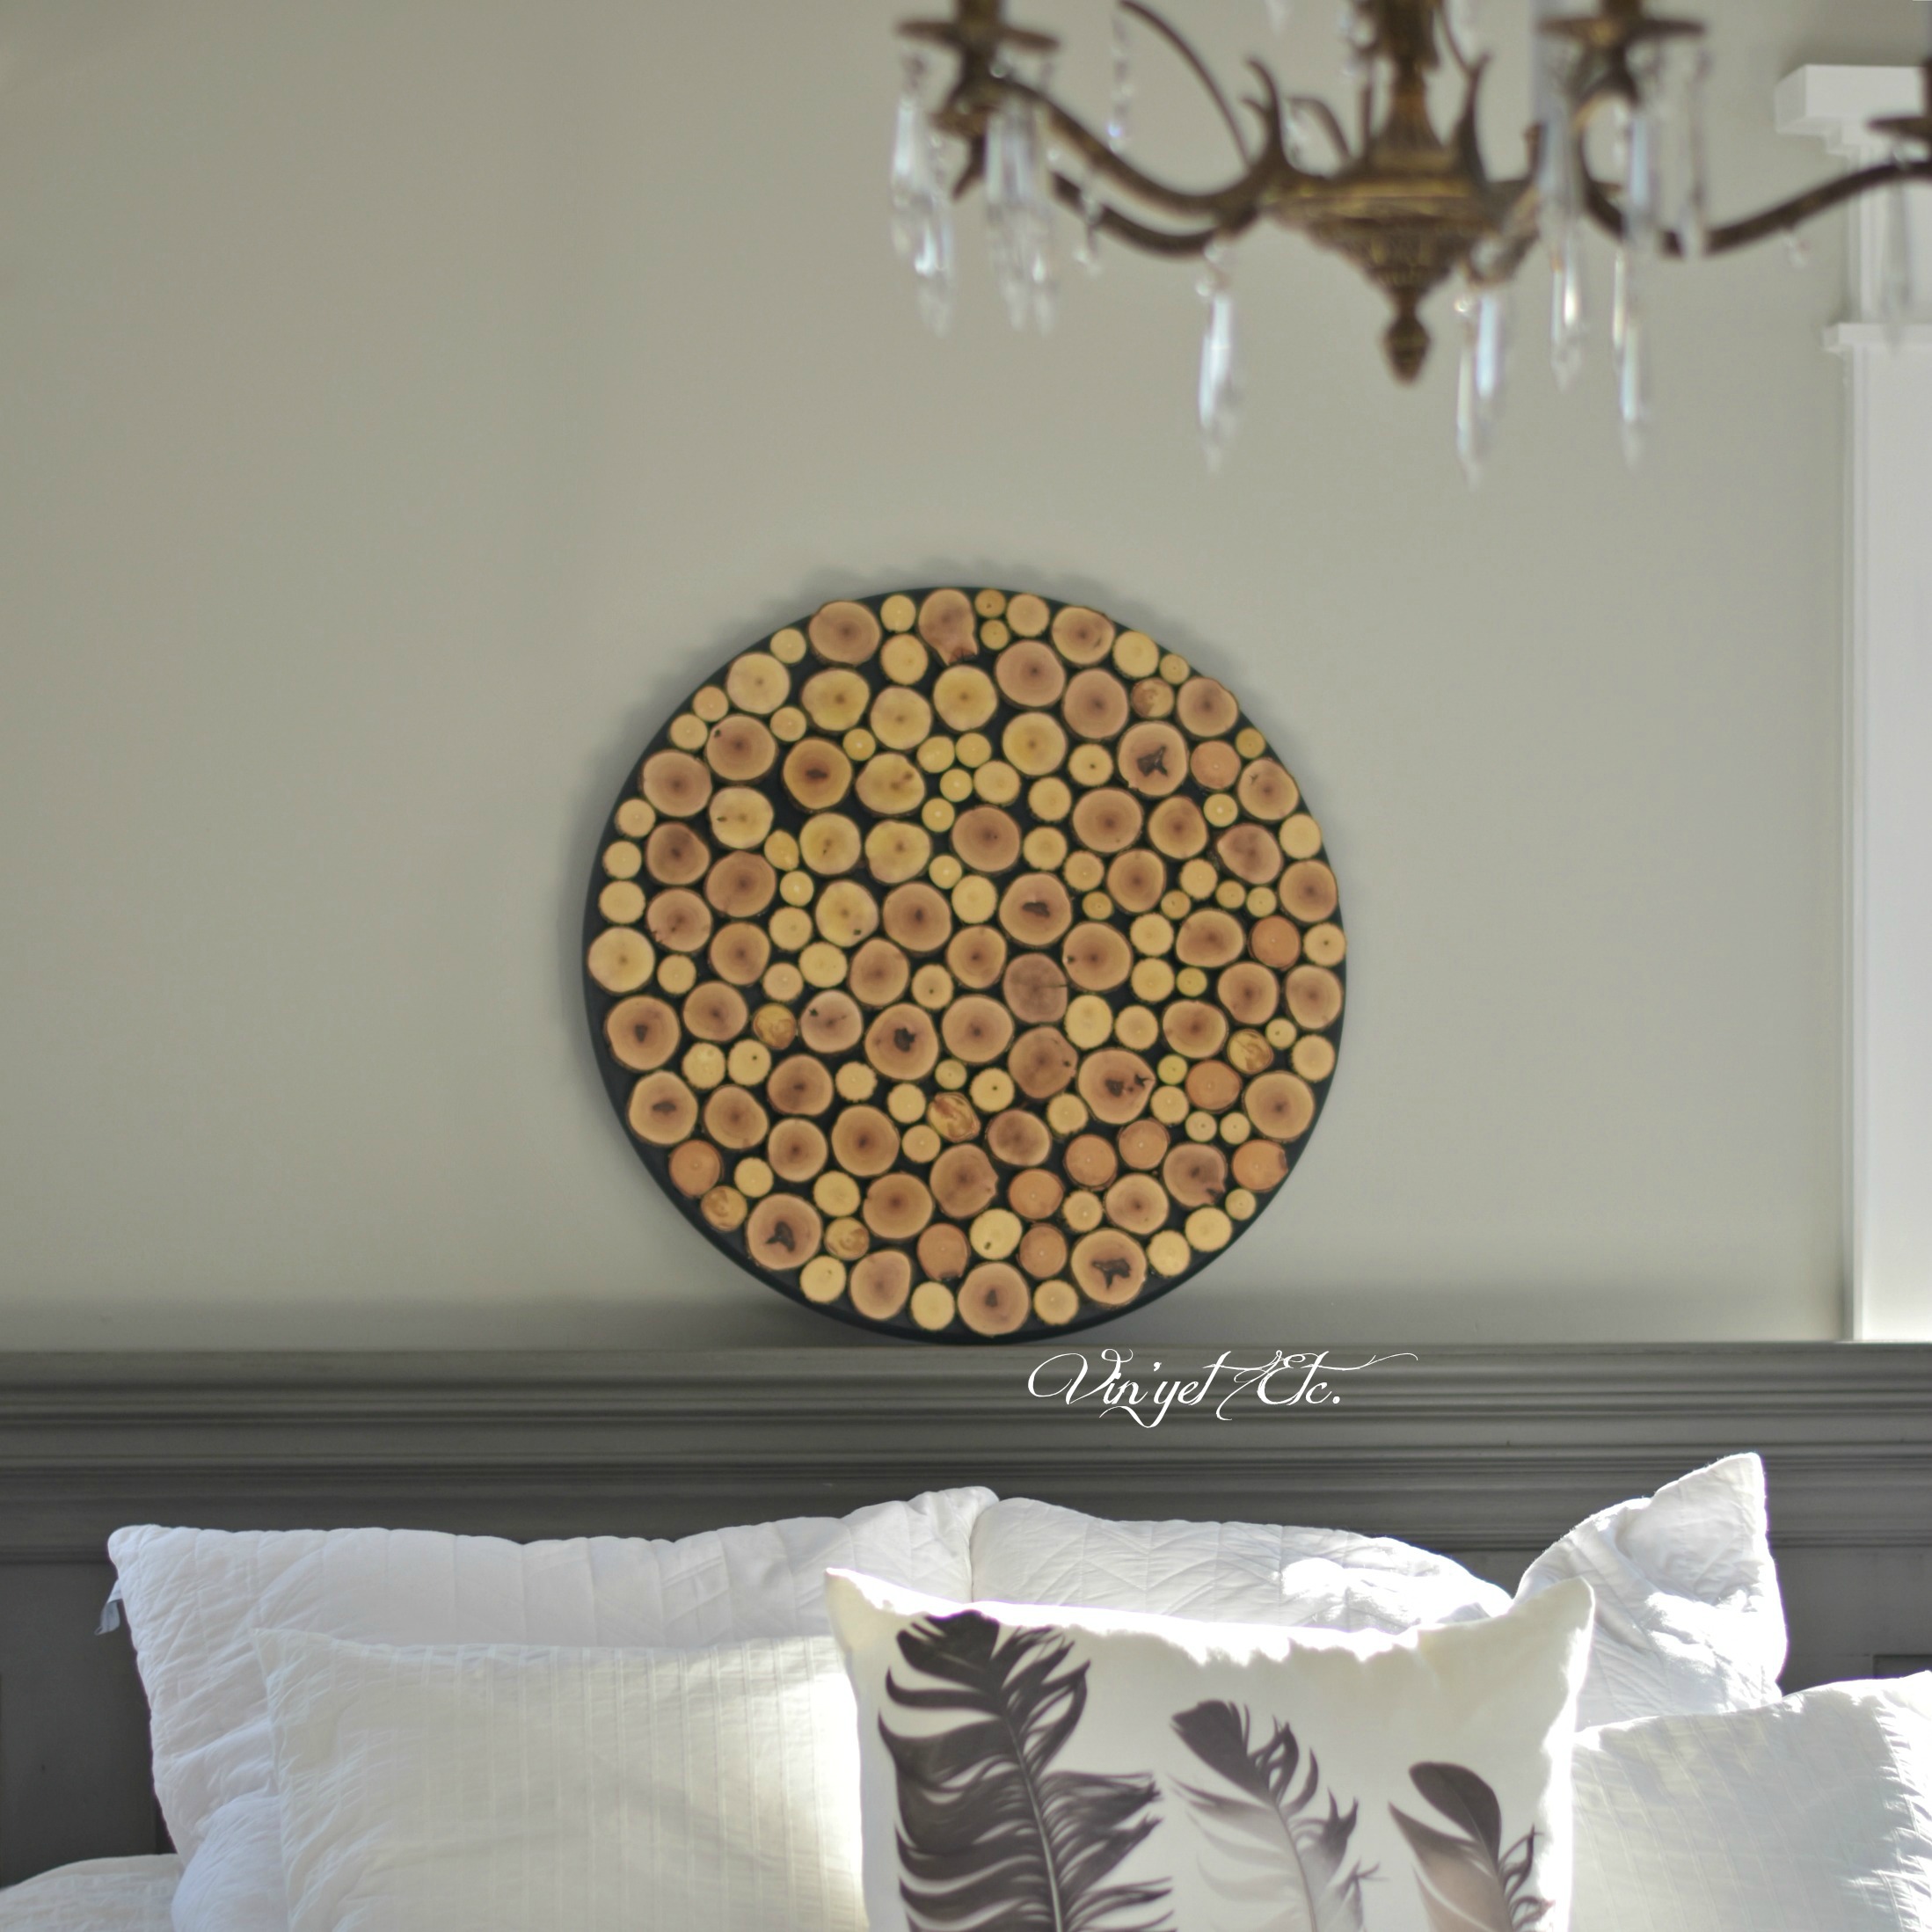
Once all of the steps are completed, hang it where you desire, we will be hanging this over our bed in the master bedroom… for now though it’s just sitting pretty on our headboard, leaning against the wall… we have a few things left to do first before we hang our new art! Here are some sneak peeks of the master bedroom, it sure has come a long way, only a little bit more until the finish line and this project brings us one step closer!
Now it’s time to see the rest of the DIY wood project ideas from my Canadian blogging friends.

From the top left, they are:
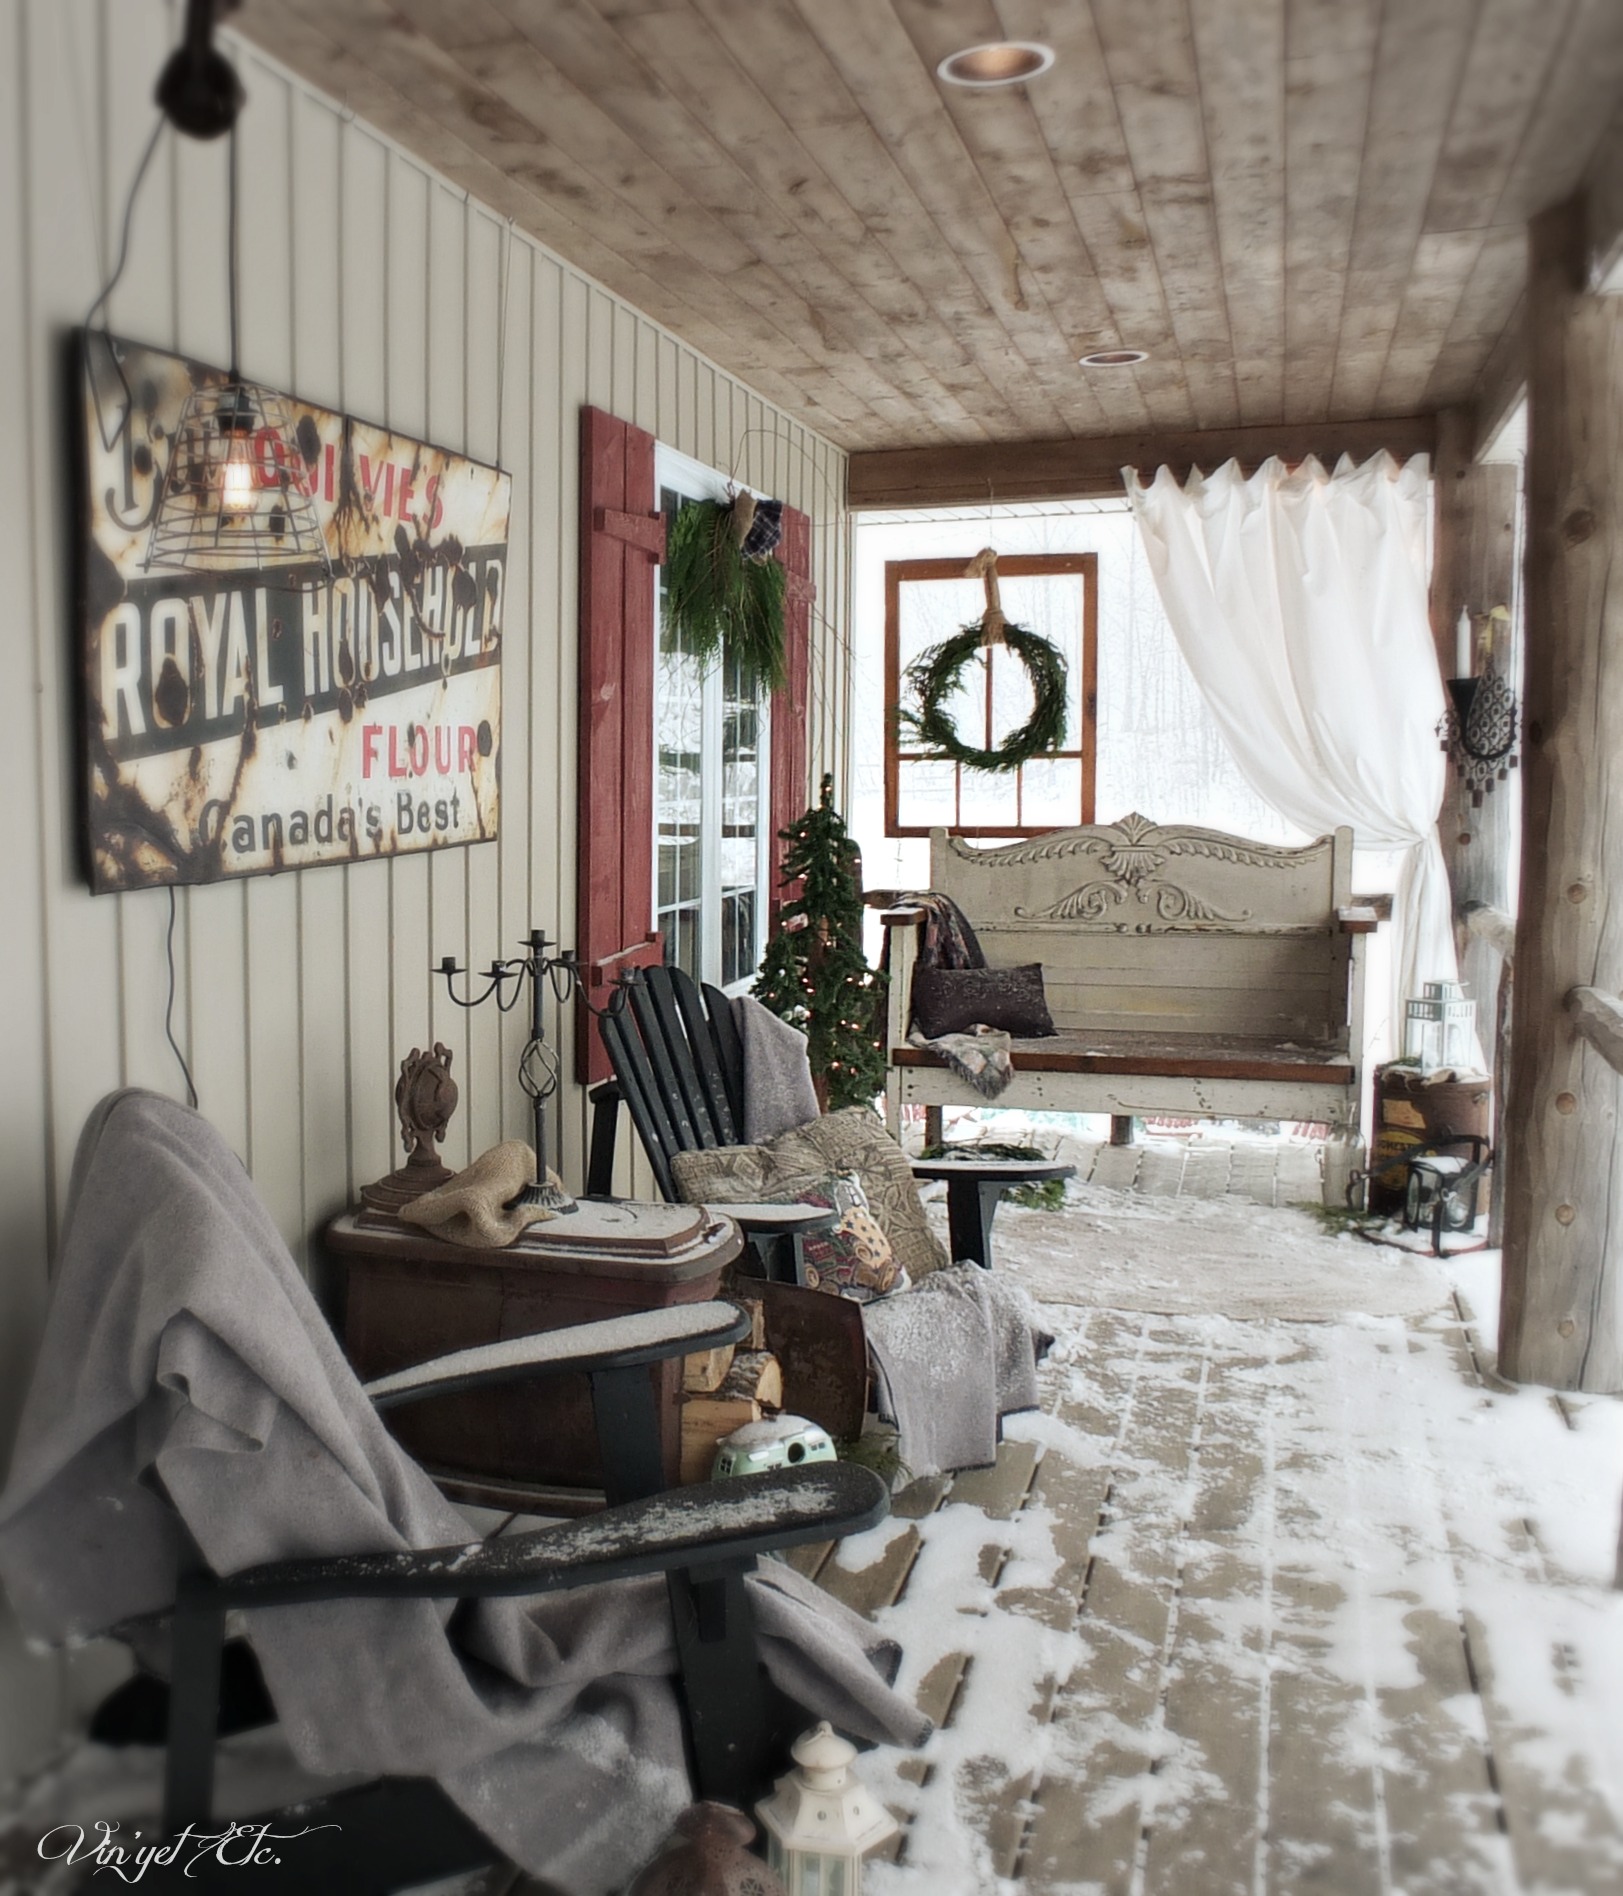
Wood Slice Art from Vin’yet Etc.
Ikea Bedside Table Revamp from PMQ for Two
Painting Wood Furniture from Fresh Crush
Easy Wooden Table Makeover from Woman in Real Life
Wooden Rocking Horse Upcycle from Mommyzoid
Metallic Painted Nightstand from New House New Home
Industrial Side Table from Love Create Celebrate
Wood Coffee Table Tray Gets New Makeover from Time with Thea
Paint Dipped Frame from Brooklyn Berry Designs
Giant Reclaimed Wooden Clock from an Electrical Reel from The DIY Mommy
Beach Inspired Farmhouse Dresser Upcycle from Sustain My Craft Habit
Twig Houses from Life is a Party
![]()
Disclaimer: This post is sponsored by, Fusion Mineral Paints. As always, all of the opinions here are my very own and I only recommend companies that I love and use myself.

17 Comments
Looks amazing!
Thanks Karen! xoxo
I’ve been wanting to make one of these too!! In fact, our Christmas tree is ready for just this treatment. I knew I kept that sucker all winter for a reason!!
Seriously though, it’s gorgeous. And I think you’re right about the black paint – it really makes the wood slices pop!
wow! I mean really, wow!
This is such a classic piece, but so modern at the same time. Well done!
Thanks so much lovely! 🙂
This looks amazing! Great job. Love the artwork 🙂
Thanks!!! 😀
Woah Laurie, that looks GREAT and the Fusion Mineral Paint really brought out the lovely wood detail!
That paint is spectacular, I almost hated to cover it… but once I added the beeswax, wowzers!
Absolutely wonderful!!
I’m so glad you like it! xo
Your piece is absolutely beautiful Laurie! Well done! And your bedroom is gorgeous. 🙂 Jo
Thanks so much Jo! Can’t wait until this room is done! 😉
Wow! This is gorgeous. So beautiful and such a showstopper over the bed. Love!
Thanks so much Alicia!
It looks fab Laurie! I’ve always wondered what it would be like to DIY something like this – at one time I had corks from wine bottles in mind… Hmmm. And thanks for the black paint tip – I definitely have to pin that for down the road!!
Thanks Sheila! I hope you share when you make your wood slice art, it makes such a statement.